August 2019 Lightroom Classic, Lightroom, and ACR Update
The August 2019 update for Lightroom Classic, Adobe Camera Raw, and the cloud-based Lightroom has been released. Check the Creative Cloud application manager or the app store on your device for the update. With this release, Adobe continues to include performance related improvements as well as new features, new camera and lens support, and bug fixes. Let’s dive into what we can find.
GPU Accelerated Editing
The most welcome feature is likely to be the improved editing performance in Lightroom Classic and Camera Raw that comes from being able to take advantage of the GPU during editing. To enable this new feature in Lightroom Classic head to Lightroom Classic > Preferences > Performance (PC: Edit > Preferences > Performance), and note the new options in the Camera Raw section. By default, Use Graphics Processor will be set to Auto (assuming your GPU is supported). Click that drop-down menu and choose Custom to access the new option.
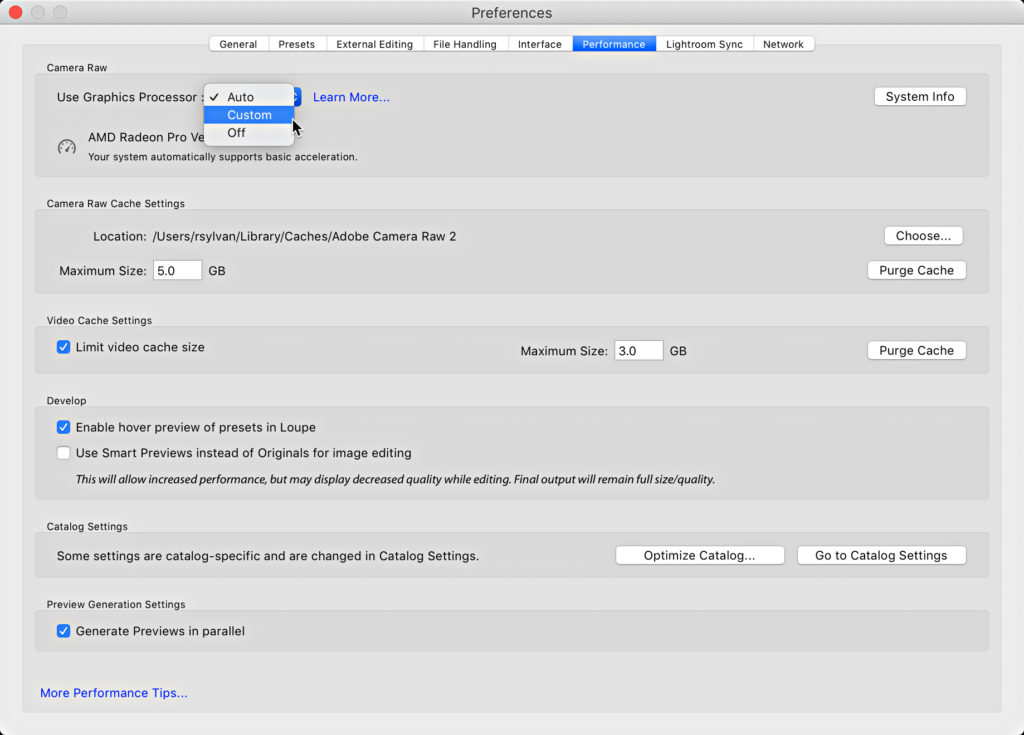
When set to Custom, you will see a checkbox for Use GPU for display. This is the same GPU utilization that exists in the prior version of Lightroom Classic and Camera Raw. Below that an additional option for Use GPU for image processing will appear. When checked, the GPU will also be used when making adjustments in the Develop module, which should result in more robust performance. Those of you with larger resolution monitors and machines with more powerful GPUs are most likely to notice the improvement. Check out Adobe’s GPU Troubleshooting and FAQ document to learn more.
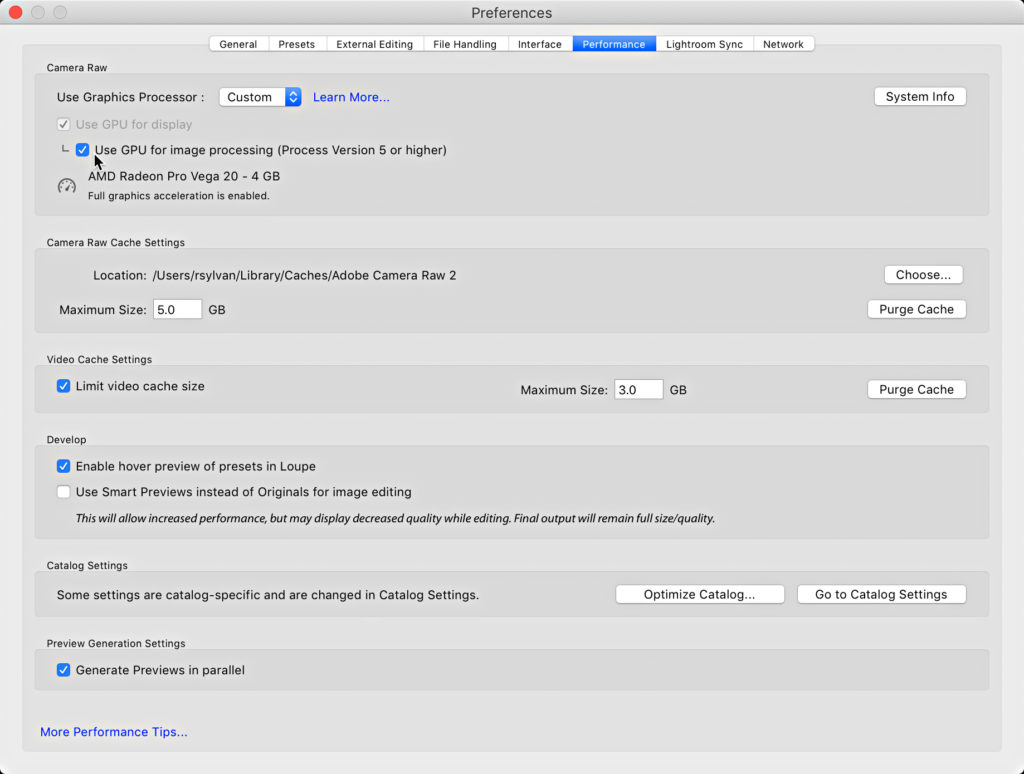
To enable in the Camera Raw plug-in, go to Photoshop > Preferences > Performance (PC: Edit > Preferences > Performance), and you will see the same options as outlined above.
PNG Export
Ever since Lightroom Classic supported the importing of PNG files people have been asking for the ability to export as PNG too. Well, that day has finally arrived. On the Export dialog, in the File Settings panel, you can now select PNG from the Image Format drop-down menu. If you start by selecting a file with transparent areas (such as a TIF, PSD, or PNG), then that transparency will be maintained in the exported PNG copy as well (transparency is always on).
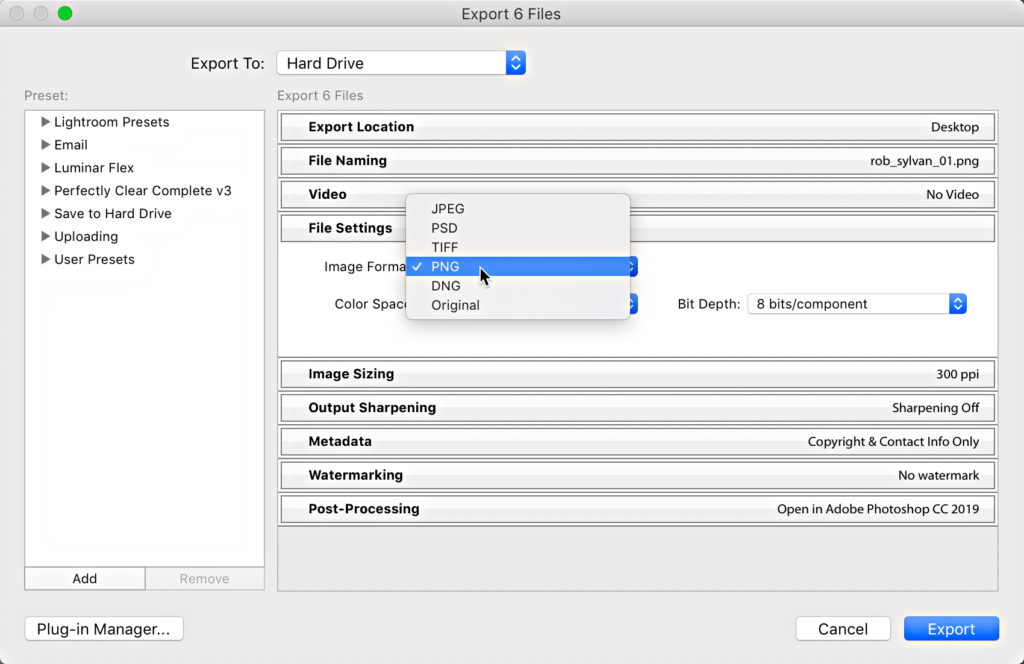
You can also save out PNG from Camera Raw via the Save Image button at the bottom of the ACR interface.
Library Module Tweaks and New Features
There are a few new things in Lightroom Classic’s Library module. For one, Browsing folders in the Folders panel should now be faster. I’ve definitely noticed a speed improvement on launch as the Folders panel displays.
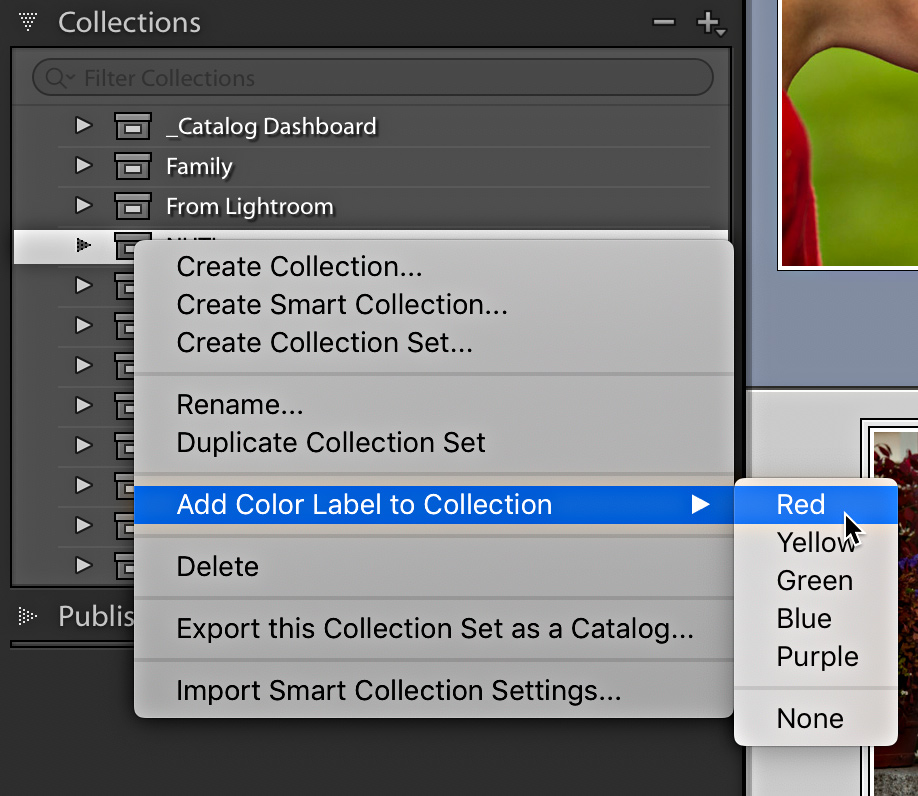
Down in the Collections panel, we now have the ability to apply a color label to collection sets, collections, and smart collections the way we do for folders in the Folders panel. Simply ctrl-click (PC: right-click) on a collection, smart collection, or collection set, and choose the color from the Add Color Label to Collection menu. Set the color to None to remove the color.
The Collection panel filter (right at the top) also has the ability to filter the contents of the panel on Labelled Collections.
You might also notice that index number now appears on thumbnails in the Filmstrip. I’ve always disabled those on thumbnails in Grid view, but if you are fan, then this one’s for you. You can disable the display of the Index number in the Filmstrip by going to Preferences > Interface, and unchecking Show Index Number in the Filmstrip section.

Batch Merge to HDR and Pano in Lightroom Classic
This time saving feature adds a super power to stacks of photos taken with the intent of merging into a pano or HDR. Start by selecting all of the photos for the merge, then group them into a stack. Proceed by creating a stack for each group of photos you intend to merge together. You can then select all of the stacks and use the Photo > Photo Merge menu to select the desired type of merge (note, all stacks must be for the same type of photo merge).
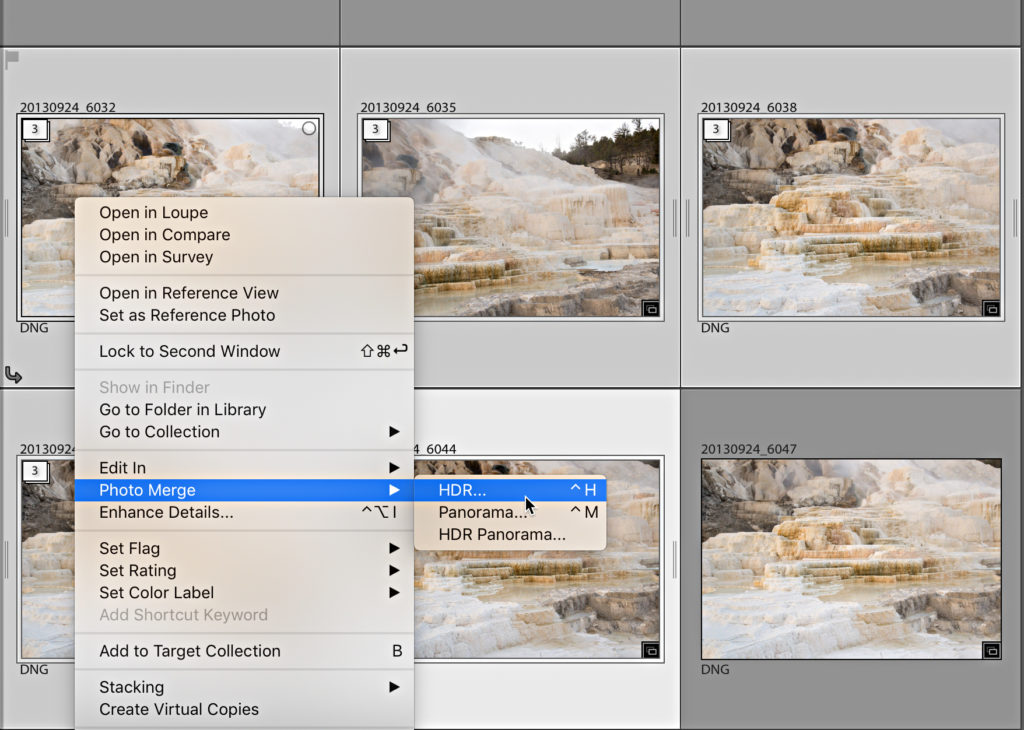
For example, let’s say you had a folder containing five stacks of bracketed shots waiting to be merged to HDR. You can now select all five of the stacks and use the Photo > Photo Merge > HDR menu to batch the process of creating a single HDR from each image stack. The settings from the previous merge operation will be used, so you may want to run a single merge first to ensure the settings are as desired.
Note, the same merge operation is performed on each stack, so don’t include HDR and pano stacks in the same batch. Non-stacked images should be ignored if stacks are included in the initial selection.
Moving on to the cloud-based Lightroom …
Recover Deleted Files
Building on the feature released to Lightroom Web back in May, the Recover Deleted Files option has been added to the Lightroom apps for Mac, Windows, iOS, Android, and ChromeOS.
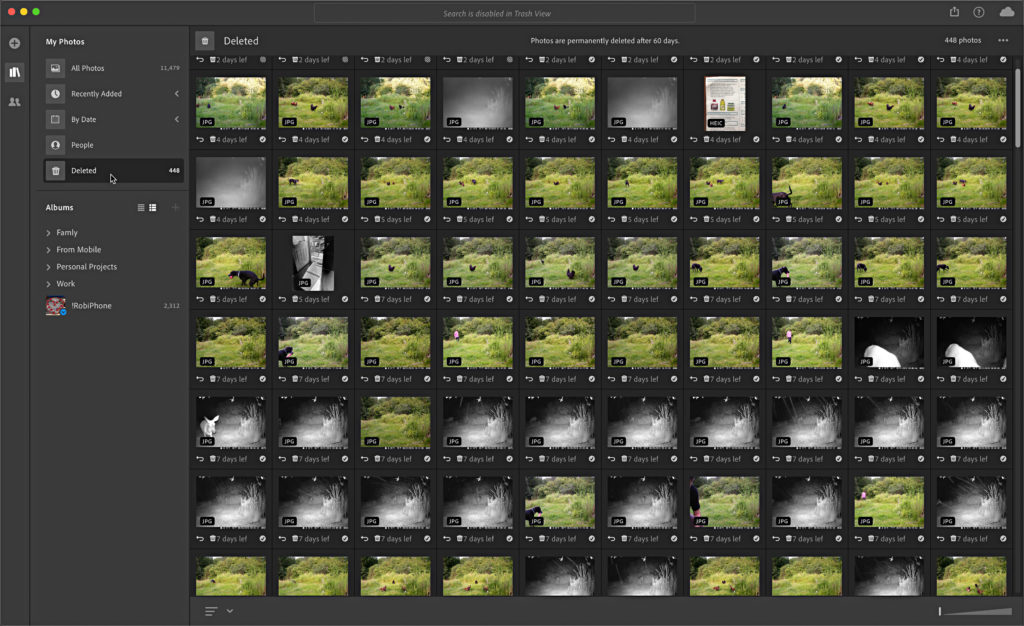
Look for the Deleted icon, where you will find all photos that have been deleted from the cloud in the last 60 days. You have that much time to recover them if needed.
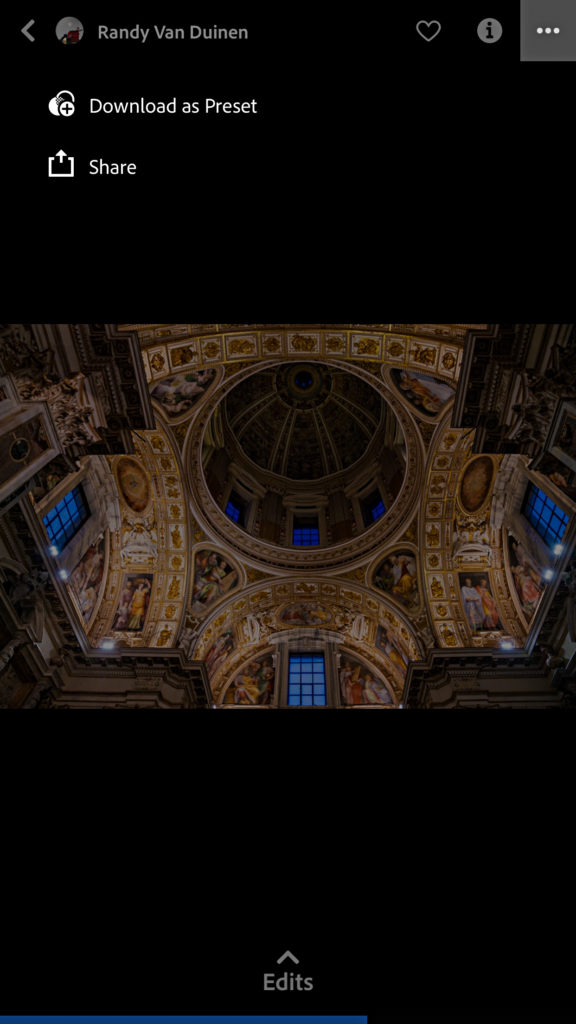
In Lightroom for iOS, Android, and ChromeOS we were introduced to Discover posts on the Home screen of the app. Discover posts allow you to see the edits that were applied to the featured photo and even watch the process happen step-by-step. In the August update you can now tap the three-dot menu and choose Download as Preset to add the settings used on that photo as a preset you can apply to your own photos (these presets are added to the User Presets folder with the name of the Discover post).
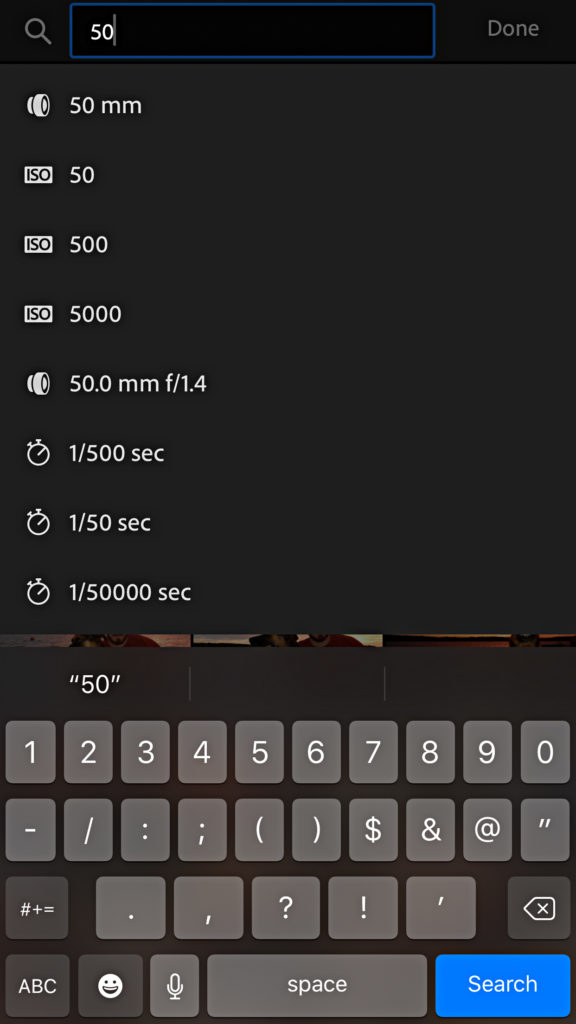
The search has also been improved in Lightroom for iOS, Android, and ChromeOS to bring it in line with the search improvements that had been added to Lightroom for Windows/Mac previously. You can now search for raw, Pano, and HDR photos, as well as photos that include a depth map, or by focal length. Just start typing and the auto complete will reveal available options that match the text you’ve entered.
Lightroom for Android and ChromeOS now have the ability to apply and edit metadata as a batch (coming soon to iOS). Just select a range of photos and you can change star rating, flag state, copyright, title, and caption to all selected photos at once.
Adobe has also published its list of support for new cameras and lenses. A summary of all new features is also available.



NB Finally the Aperture import tool works in 8.4 Classic – SLOW but it works. It seems the memory leak has been fixed.
I installed this update last night and then LR would not open properly. Spinning beach ball. Reverted back to previous version and things are hunky dory. Mac Mini with plenty of memory.
You likely had a bad install and the reversion you did cleared the issue. I would recommend attempting a clean install of 8.4.
Clean Classic Install Procedure
Close Lightroom
Restart the computer
Use the Adobe Creative Cloud App to uninstall Lightroom Classic
Restart the computer
Install Lightroom Classic via the Creative Cloud App without launching any other programs.
Restart the computer
Launch Lightroom
Wait 5 minutes
Rikk – what’s the purpose of the “Wait 5 minutes” ? The rest makes sense.
First launch requires some additional indexing time that subsequent launches do not. Application performance is slow during this time and users are sometimes too quick to pull the ‘doesn’t perform’ lever.
Thanks for the news about Lightroom Classic update. I always enjoy reading Lightroom Kilertips.
Why does my LR Classic have the “GPU For image processing” greyed out?
I am on an iMac Pro 2017, 27″ 5760X3240 main display. Graphics shows as Metal:AMD Radeon Pro Vega 64 with 16GB VRAM.
That seems like it should be powerful enough to support this GPU processing acceleration? If on Auto, I am told “basic acceleration is enabled”
I get the same thing: just a greyed out checkbox. This update doesn’t bring much.
An update that actually wipes out GPU acceleration for many video cards (including mine) isn’t an update. It is a downdate… Zooming in and out now is choppy, editing is slower than in the previous version. Bad LR… bad boy LR… 🙁
I contacted Adobe Lightroom Technical Support and after a series of back and forths, they say that my NVidia GeForce GTX 780 GPU with 3 GB of VRAM doesn’t support graphic acceleration for editing despite the fact that their web site claims it should. They said the program automatically determines if the GPU can accommodate the advanced acceleration versus basic which only permits acceleration of previews.
Spent a lot of time searching for answers before I finally contacted Adobe. They and their supporters should update the information so you don’t think you’re doing something wrong.
Adobe said it was not something I could correct. It is hard wired into the code.
Allen
Anybody else recognizes more worth performance than before? On my Macbook (2018) the spinnball comes up each time I move a brush or other local adjustments. Sigh…
windows 10, but the overall feel is noticeable faster over the previous dot release.
Still no list of local adjustments. I have to reset images many times because I can’t find them in the photo.
Someday, adding focus stacking right in LR would be highly welcomed… and work on a stack like they’ve gotten pano and hdr to work…
PNG is a nice add. Finally.
Once again, I agree. 🙂