
April Updates for Lightroom Classic, Lightroom, and Camera Raw
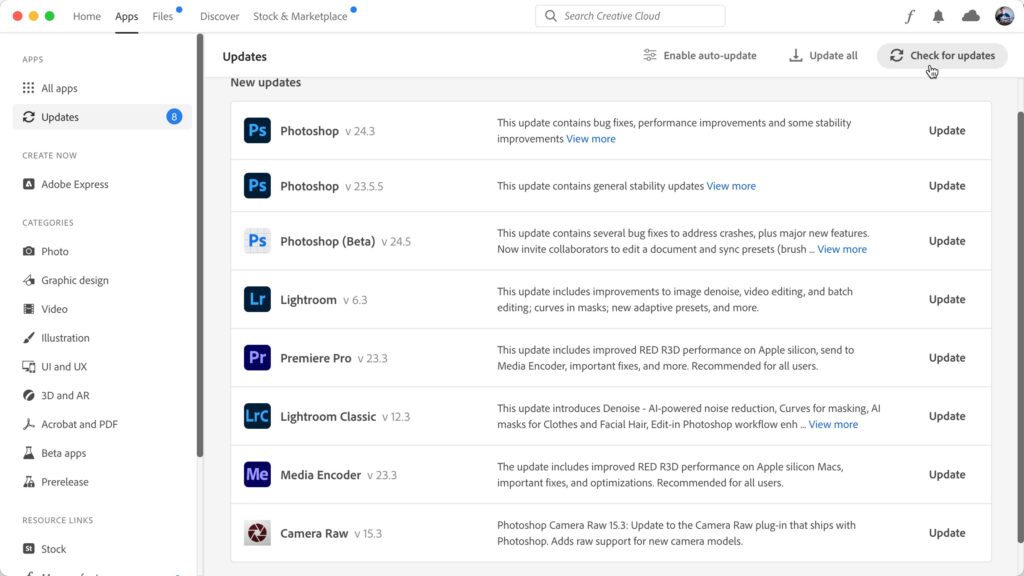
Adobe has just released an update containing new features, new camera support, new lens support, and some bug fixes. Open up your Adobe Application Manager, click on the Updates tab, and then click Check for updates if you don’t see the latest releases for Lightroom Classic 12.3, Lightroom 6.3, and Camera Raw 15.3.
AI-powered Denoise
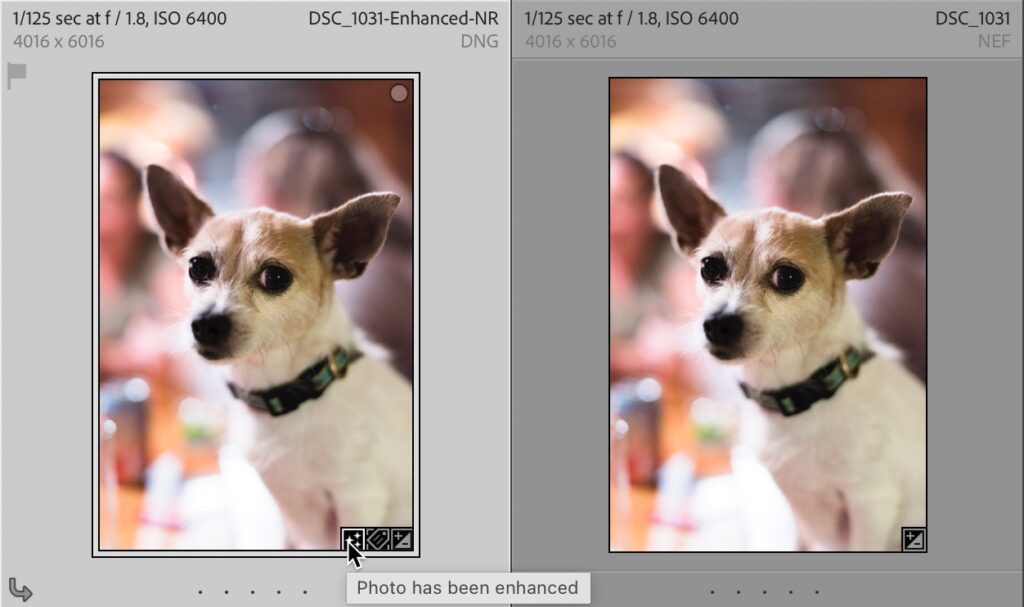
A new AI-powered tool has been added to aid us in removing noise from our photos. Built into the Enhance set of features (Super Resolution and Raw details), we now have the ability to reduce noise with a single click. You can launch Denoise from the Detail panel in Develop, or via the Photo > Enhance menu.
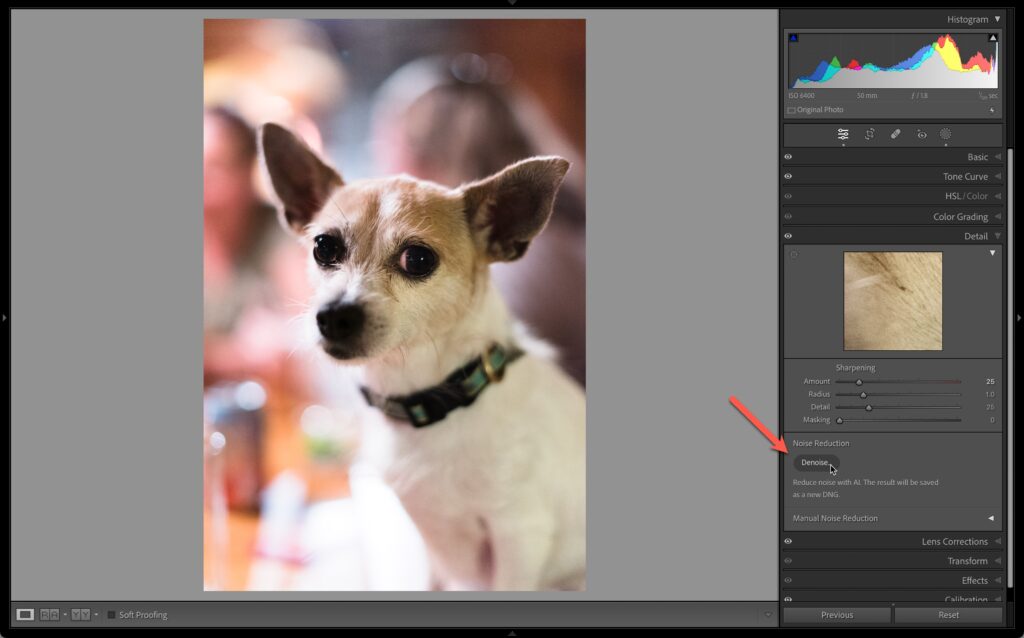
With a photo selected, click Denoise to open the Enhance Preview. Here you can adjust the Amount slider (50 is the default) to adjust the intensity of noise reduction (higher values are more aggressive in removing noise and can smooth detail more). Click and hold on the preview to see before and after views.
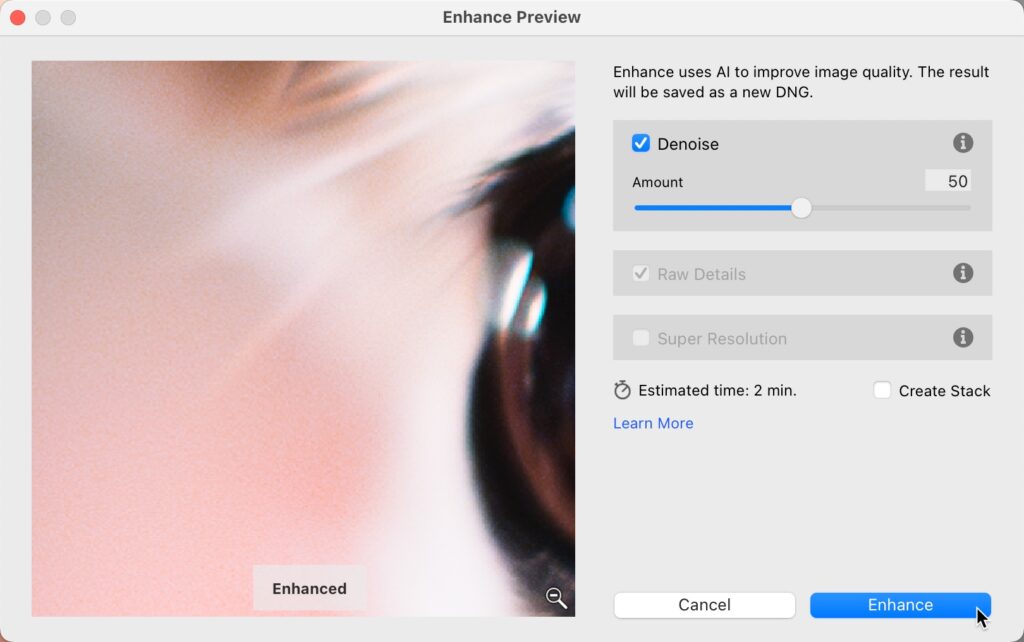
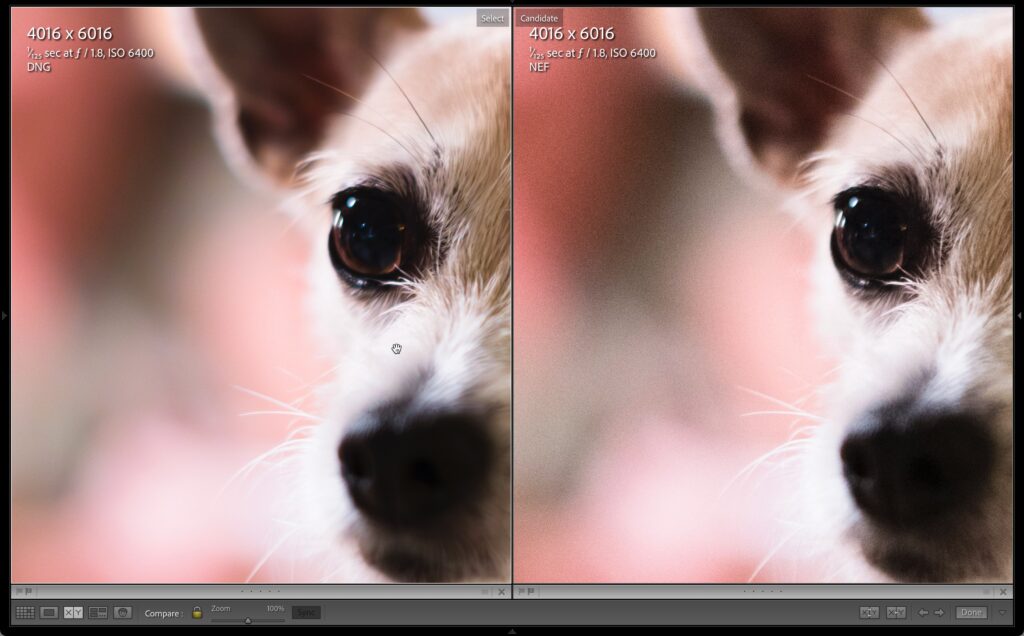
Once you’ve chosen the Amount value, click Enhance to create the new DNG copy with Denoise applied. Adobe recommends applying Denoise before other adjustments. This feature currently only works on Bayer and X-Trans RAW images. I’ve been very impressed with the results so far, and I think it works better than the existing noise removal tools found in Lightroom making this a great addition.
Enhanced photos will now have a new badge visible in Grid view and the Filmstrip. In addition, there is a new preference setting on the File Handling tab of the Preferences to automatically add a keyword to the enhanced photo indicating whichever of the features were used to create the enhanced version (Denoise, Super Resolution, or Raw Details). You’ll want to check out Eric Chan’s Denoise Demystified article to learn more from the ACR team.
Edit Indicators and Eyeballs
A simple but very useful feature is the addition of new indicators to quickly see which panels contain edits as well as a new eyeball icon that you can click and hold to temporarily disable the adjustments in a given panel. This is a feature that has existed in Lightroom since the beginning and I am so glad to see it has made its way into Lightroom Classic.
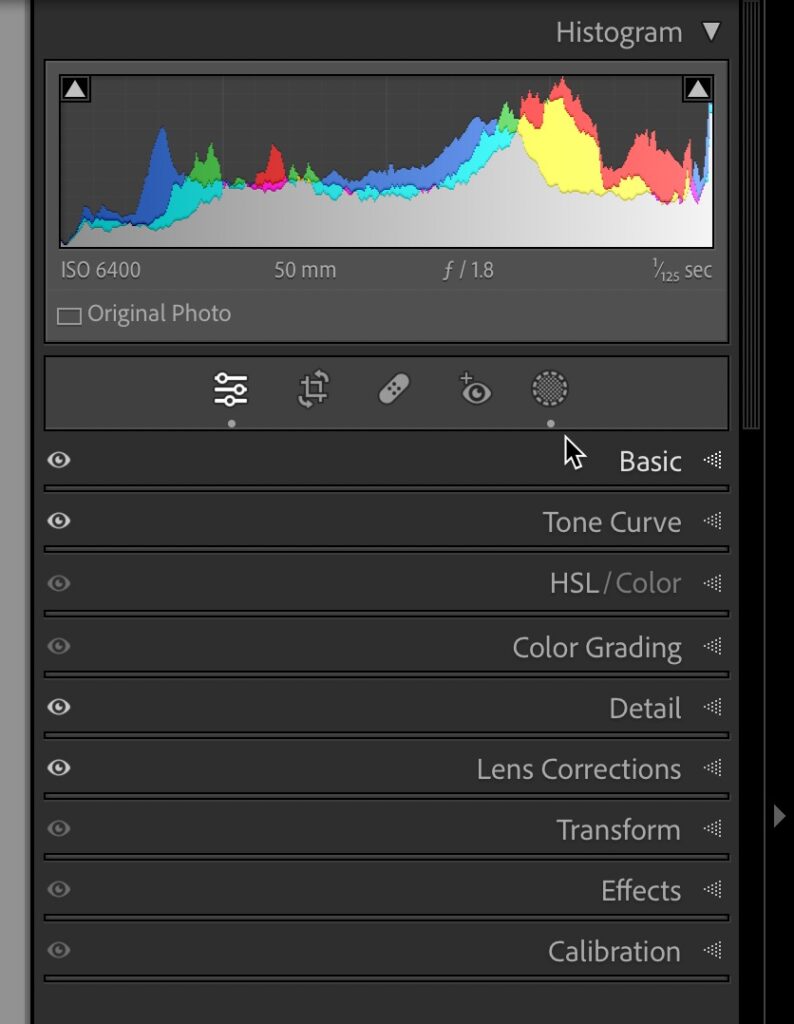
Dots will appear under tools in the Toolstrip (like Masking) to indicate if a tool has been used. On each panel, a dark eyeball indicates no settings in that panel have been applied, while a lit eyeball indicates a panel with settings. This can be so helpful determining what settings are included in a given preset, just click the preset and see which lights come on.
Masking Updates
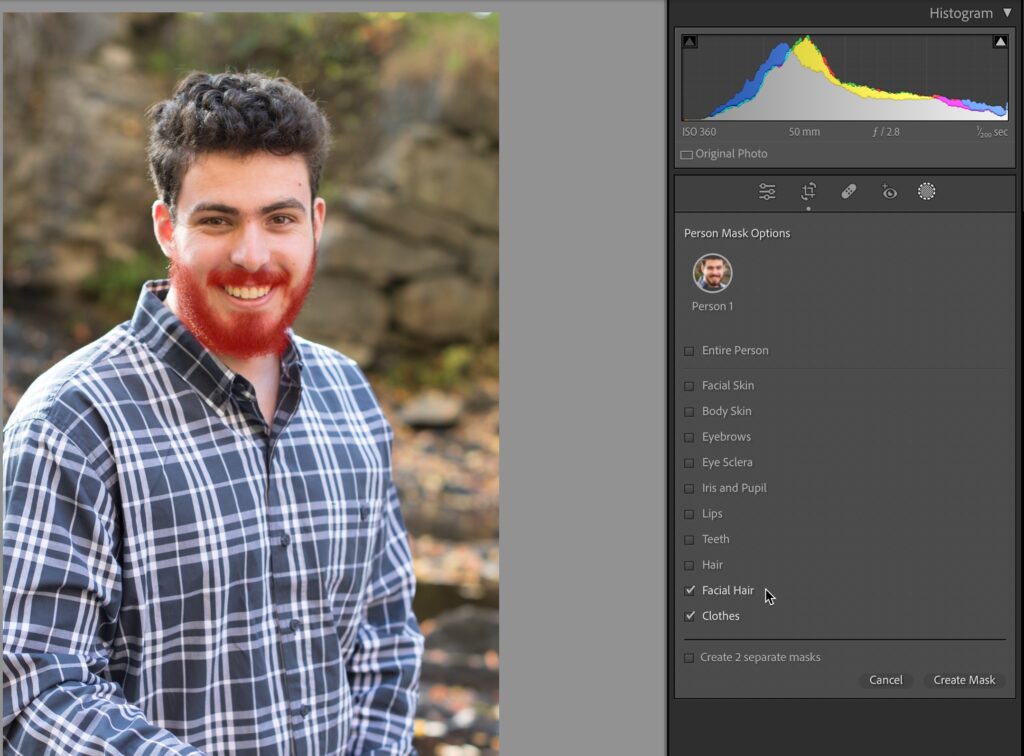
Masking tools continue to evolve and improve. Now, under People masking we have the ability to automatically generate masks for facial hair and clothes.
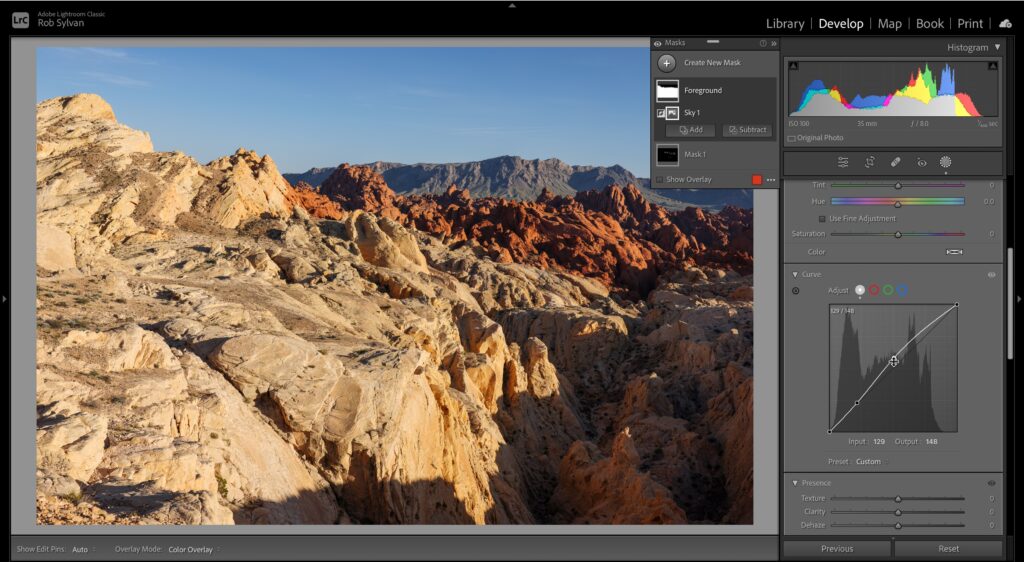
In addition, Curves adjustments have now also made their way into Lightroom Classic. We have had this in Camera Raw, and I’m glad to see this has been added to Lightroom Classic and Lightroom for desktop.
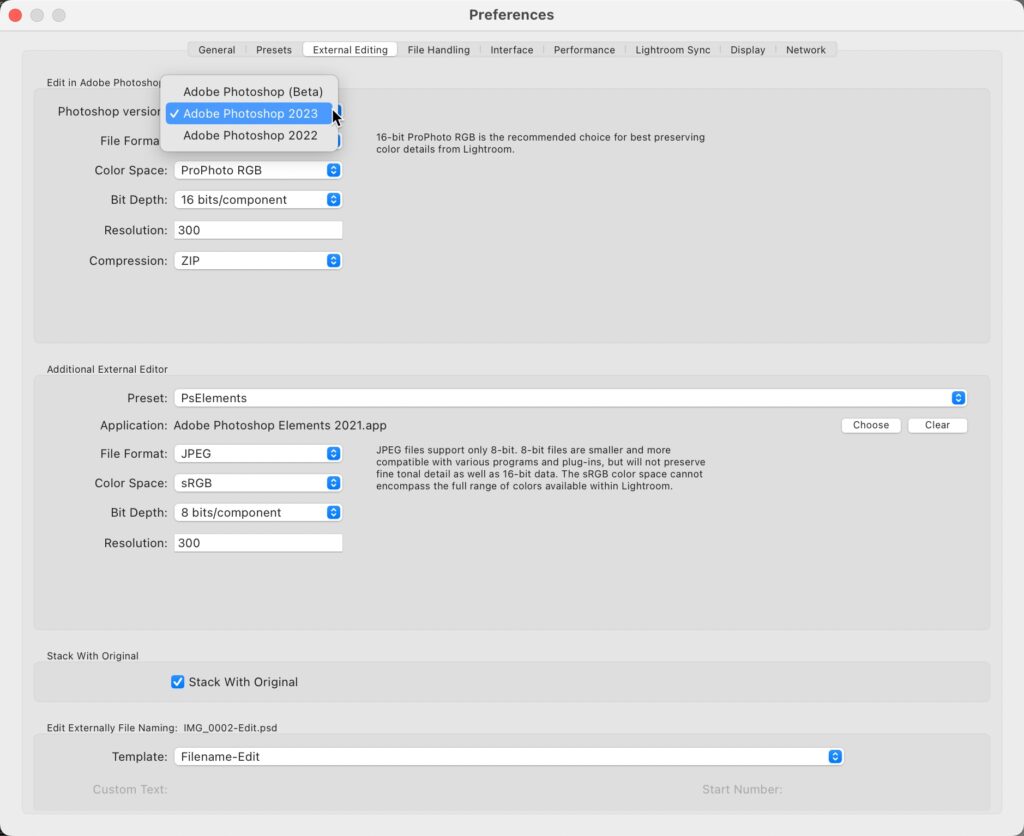
Edit in Photoshop
Sure, we’ve been able to send photos to edit in Photoshop since the dawn of time, but with this update we’ve gained a couple of cool additions. The first is that we can now choose which version of Photoshop we want to use as the primary external editor. Head over to the External Editor tab of the Preferences to see the new drop-down. This is really helpful for those of us exploring the Photoshop Beta or who just like to use more than one version of Photoshop.
Beyond that, we can now select multiple photos in LrC and use the Photo > Edit In menu to access a new option to open as Smart Object Layers in Photoshop. Very cool! There’s a lot to love and explore in this update. I’ll be curious to hear your thoughts on the new features!


Hi Rob, I am using the latest LR Classic 12.3 on a new MacBook running Ventura 13.3. My question (maybe other have this problem too) is that when I insert a memory my LR program doesn’t open automatically. I checked the box in Settings for “Import Dialog when Memory Card is Detected.”
Do you know if there is a bug or am I doing something wrong?
Thanks, Mark
Hi Mark, What type of memory card is it?
Same as Axel above.
After installing the PS Beta version, I only see “Adobe Photoshop 2023” in the dropdown list. I use Windows 11.
The nonoise is extremely slow on my machine (average rendering is est. 6 mins, sometimes higher than 12 minutes). Topaz denoise is very much quicker. I won’t use LR Denoise at this speed.
The option to select Photoshop versions for external editing doesn’t work on Windows system. I’ve installed Ps 24.4.1 and since a few days Photoshop Beta. In the list I see only “Adobe Photoshop 2023”. When I’m sendin a picture to Photoshop it opens Photoshop Beta.
Hi Axel and Phillipe, It looks like it may be a bug on the Windows side. I’m not able to test on my Windows machine at the moment, but I’m not aware that the preference change in the latest version is Mac only. Will update if I learn anything new on this.
Bonjour Rob. Pour moi la fonction “éditer dans Photoshop” (ctrl e) ne marche pas. Tout est à jour (ver 12.3) et j’ai un conflit avec la version bêta. Je n’ai le choix que de la version Photoshop 2023 dans l’external editing et c’est systématiquement la version bêta qui s’ouvre.
Rob, you failed to mention the new presets. Adobe added new Adaptive Presets for the Adaptive: Portrait group, including Polished Portrait, Darken Beard, and Enhance Clothes.
Not that I am at all certain I have a use for them, but they are new and must be useful to someone, right? 🙂
Good catch, Steven! Thanks. I’m sure someone will be glad to have their clothes enhanced. 😀
ACR 15.3 absolutely does not work.
Hey Sean, Can you say more? Be specific about what is not working, your operating system, your hardware, etc., as it works fine for me.
Am I reading other comments about this feature correctly? I can only apply ONE of the Enhance features to an image? Can I do Super esolution and then Denoise AI or can I only do one of them? The help material on the Adobe site is not very explicit on this?
Hey Chris,
Looks like you can only do one or the other.
Thanks for a helpful and informative article.
You’re welcome, Hal!
As a user of Topaz Labs DeNoise I have been wondering how long it might be before Adobe implemented similar functionality into Lightroom. I’ll be interested to compare results.