
A Look at the Latest Updates to Shooting Tethered: Part 1
The June 2021 update to Lightroom Classic brought two changes to its tethering function, so I wanted to take a closer look at how those changes can impact a tethering workflow. In addition, I’ll share how you could utilize third-party solutions for tethering if the native functionality isn’t giving you what you want.
[Editor’s note: This article originally appeared in the July issue of Photoshop User Magazine.]
One thing I’ve found to be true across all areas of photography is that every decision we make involves a calculation of all the pros and cons (support, cost, functionality, ease of use, quality, speed, robustness of performance, etc.) that matter to our own unique workflows, and then moving forward with the best choice we can make at the time. Also, knowing that this is a moving target as all those parameters change over time. This is certainly true when it comes to tethering in Lightroom Classic. This update is most welcome, and has improved the experience, but it still may not check all the boxes for some.
Live View Update for Nikon
The Live View function for supported Nikon cameras has finally moved out of Beta release and is on par with the functionality that has existed for Canon cameras since last October. That said, the list of supported Canon and Nikon cameras for live view is notably smaller than the list of all Canon and Nikon cameras supported by tethering in general, so be sure to check those links to see if your camera is supported, and yes, it is still only limited to Canon and Nikon (and this is another part of the reason why I explored third-party alternatives for other cameras).
Starting Tethered Capture
Before we get to using Live View, we’ve got get the tethered connection started, so let’s go through the steps.
Step One: Connect your camera, via USB, to your computer and turn it on.
Note, Lightroom Classic does not support tethering wirelessly, but you can utilize the Auto Import functionality in conjunction with a wireless solution by having the photos saved to a designated watched folder so that they are automatically imported as they land in that folder.
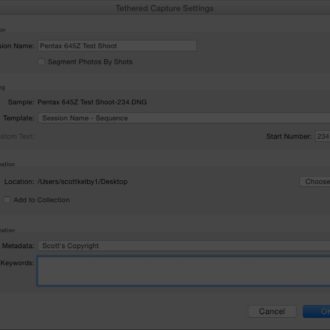
Step Two: In Lightroom Classic, go to File > Tethered Capture > Start Tethered Capture to open the Tethered Capture Settings dialog box.
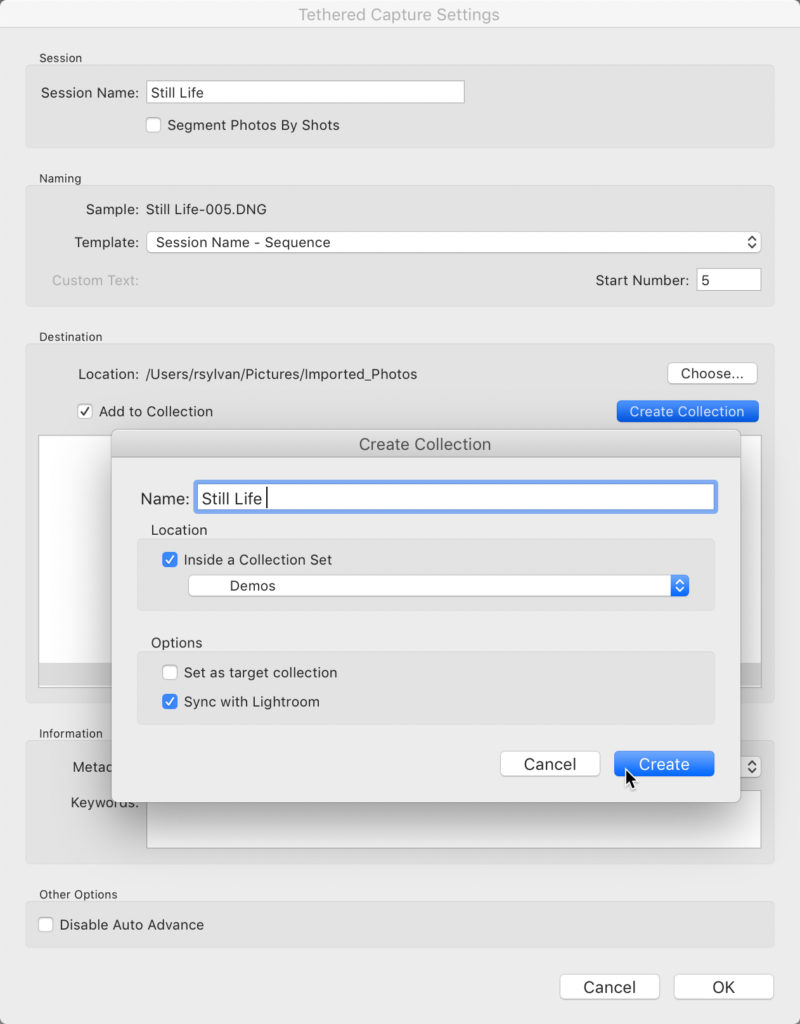
Step Three: Configure the Tethered Capture Settings dialog box. The Session Name will be used to create the folder where these photos are stored. You can also use that Session Name as part of the file name or choose a preferred file name template. Be sure to choose the desired location in the Destination section of the panel so the photos go where you want them to go, and alternatively, you can also check the Add to Collection box to have the photos added there as well. Just like a regular import, you can also apply your metadata template and any relevant keywords at this time.
By default, when shooting tethered the focus will shift to each new photo as it appears in Lightroom Classic, but you can disable that behavior by checking the Disable Auto Advance checkbox at the bottom.
Note, if you’ve enabled syncing of your catalog to the Lightroom cloud, you can add photos to a synced collection, and a smart preview of each photo will also be uploaded to the cloud as part of your session.
Step Four: Once configured, click OK to have Lightroom Classic detect your camera and open the floating tethered capture bar, which will display the name of your camera and allow you to control its operation.

If all went to plan, you’re ready to start shooting. If you encountered any problems along the way, or if your camera was not detected, please follow these troubleshooting steps.
Controlling the Camera
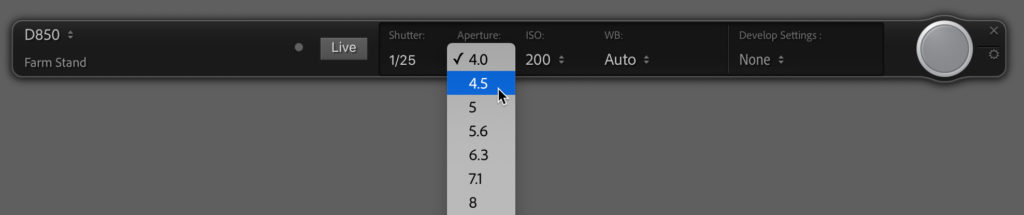
There are two ways you can control your camera while tethered, which is from the camera itself or using the floating capture bar. You’ll still need to use your camera to do anything involving its menu system, changing shooting modes, exposure compensation, and so on. However, depending on the shooting mode you are in, the capture bar can be used to adjust shutter speed, aperture, ISO, white balance, and pressing the shutter button. For example, with my camera in Aperture Priority mode I can change the aperture via the bar.
While the floating capture bar can be moved around the screen, it may also always seem to be in the way. If you hold down the Option (PC: Alt) key, the X button (used for ending the session) on the capture bar changes to a – which when clicked will reduce the capture bar down to just the shutter button (use that same shortcut to bring it back to full size). If that is still in your way, press CMD+T (PC: Ctrl+T) to completely hide it from view without ending the session, and that same shortcut will make it visible again.

On the subject of shortcuts, pressing F12 will trip the shutter with the capture bar visible or hidden. Note, depending on your keyboard and operating system, you may need to hold the fn key in conjunction with pressing the F12 key to make that work.
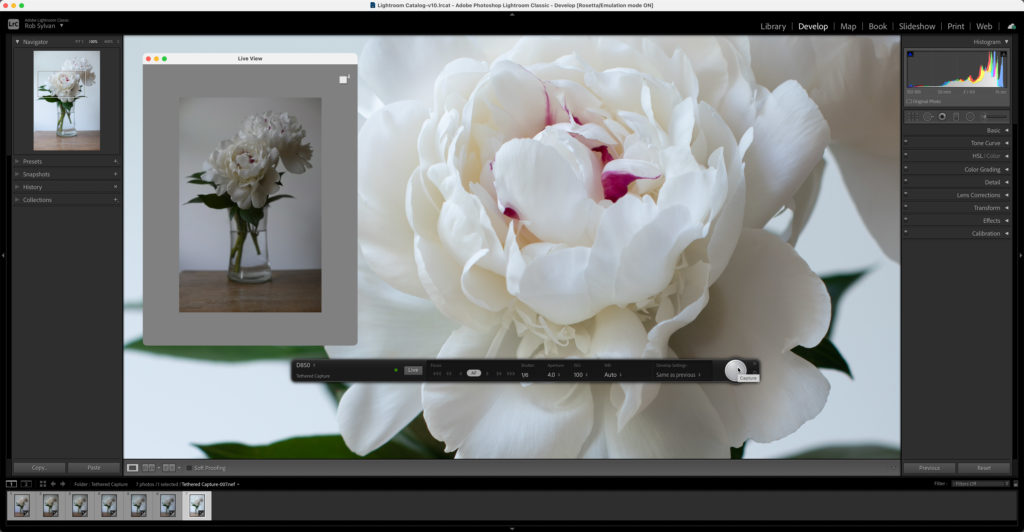
Using Live View
If your camera is supported for Live View, then you will see a button named Live on the capture bar. Click that to enable Live View shooting. Once enabled, you’ll see the Live View window appear displaying what is in front of your camera. If you are shooting in portrait orientation, click the rotation button in the upper-right of the Live View window to rotate the display until it is correctly oriented to how the camera is positioned.
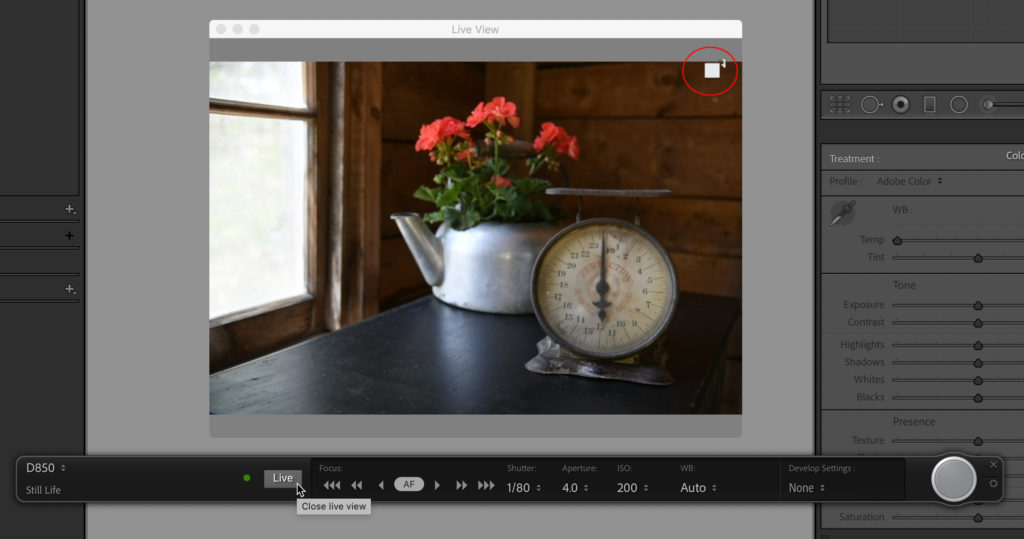
Note, on my Nikon D850, I had to press the Lv button on the camera to also be able to control the settings on the camera once Live View was engaged in Lightroom Classic.
If your camera is set to auto focus you can use the AF button on the capture bar to focus the camera. I found this to work fine on my Nikon D850, but the focus controls were disabled completely when I switched the lens to manual focus mode (supposedly focus could still be controlled by the capture bar in this mode, but that was not my experience).
So that’s the basic setup. Next week I’ll wrap up this post with Part 2 that looks at tips for shooting, how the process works on a Mac running Apple Silicon, as well as some alternative tethering solutions. See you then!

nice presentation.
Is Z6ii recognized for liveview ? I see in the list that Z6ii is mentioned for thethering since V10.3 latest version but only Z6 is mentioned for LV. Is Z6ii so different than Z6 for LV ?
Has lightroom reached now the same level for tethering and LV than Capture one 21 ?