
10 More Things I Would Tell a New Lightroom User: #10
I’m at the end of my 10 tips, and I hope people have been finding them helpful. I want to thank Scott and RC again for the opportunity to contribute here, it has been a blast! Thanks for all the questions and comments on the past posts too, I really enjoy the feedback.
#10: Don’t sell Quick Develop short
It’s easy to never take the time to expand the Quick Develop panel as the allure of the entire Develop module is just too strong, and that’s fine. After all, we want to be able to play with all the toys in the toy box. That said, when you think about Lightroom as a workflow tool I wouldn’t be so quick to rule out the power of the Quick Develop panel.
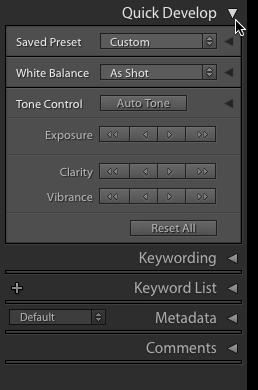
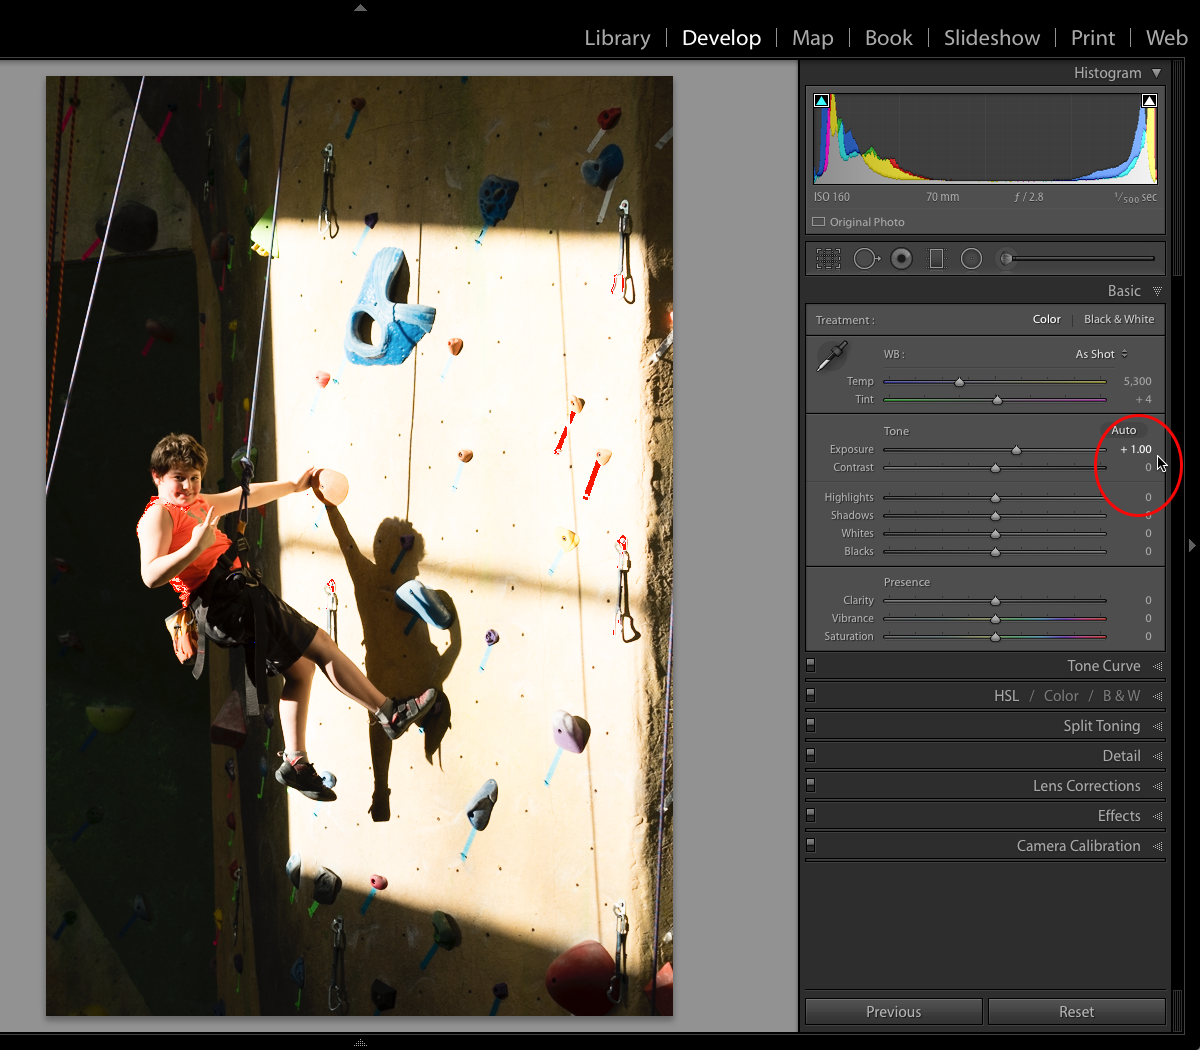
The first mistake a lot of people make is that they don’t realize all of those (low contrast) triangle icons are buttons that when clicked expand additional tools for you to use. So let’s open all of those up to see the full suite of tools at our disposal in this one panel.
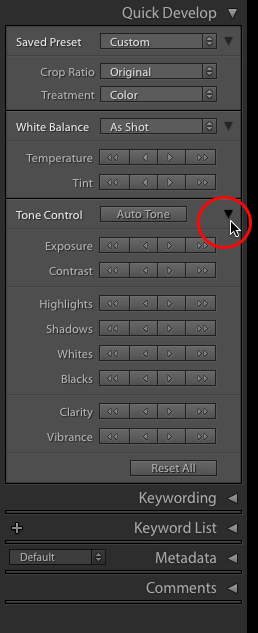
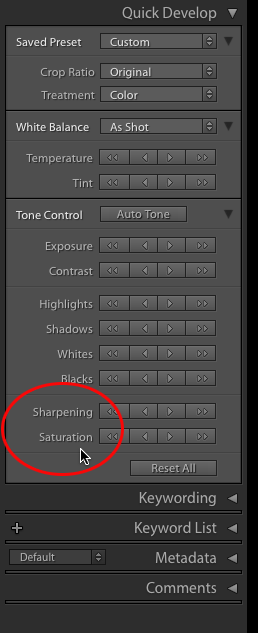
As a bonus, hold down the (Mac) Option / (Win) Alt key to see that Clarity changes to Sharpening and Vibrance changes to Saturation. If you hover your cursor over each button you’ll see a tooltip that shows what it applies when clicked. The double arrows make larger moves than the inner single arrow buttons. New in Lightroom CC/6, if you hold the Shift key the inner buttons shrink a little to indicate they provide an even finer level of adjustment.
What is important to keep in mind about the controls in the Quick Develop panel is that the adjustments you make with them are relative to any existing adjustments your photos may have. This is one of the real super powers of the Quick Develop panel. Let me explain. Over in the Develop module, when you move the Exposure slider to + 1 stop it is an absolute setting, and the selected photo gets its Exposure amount set to +1 stop no matter what it was set at before. Imagine a photo that starts out with a – 1 Exposure setting and you move the Exposure slider to +1. That action actually added 2 stops of positive exposure to the starting point, but the photo ends up with a setting of +1 Exposure.
Starts a -1 stop Exposure setting.
Ends at +1 stop Exposure setting.
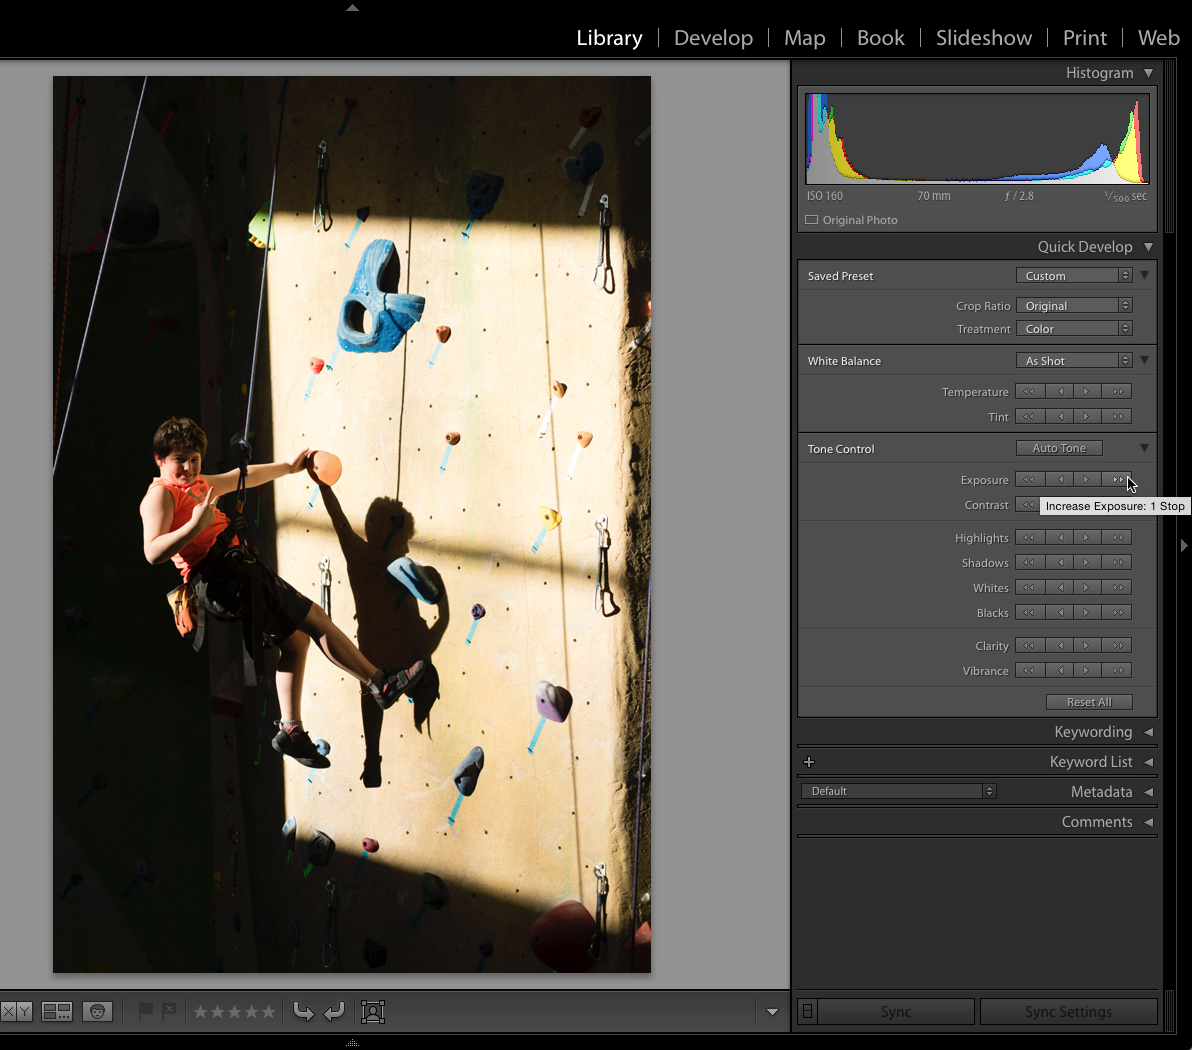
Now take that same photo with -1 Exposure back to Library and click the +1 stop Exposure button in the Quick Develop panel, and the photo’s Exposure setting just goes to 0, because it just added 1 stop of Exposure to the current setting. The adjustment is relative to whatever the photo’s setting was before.
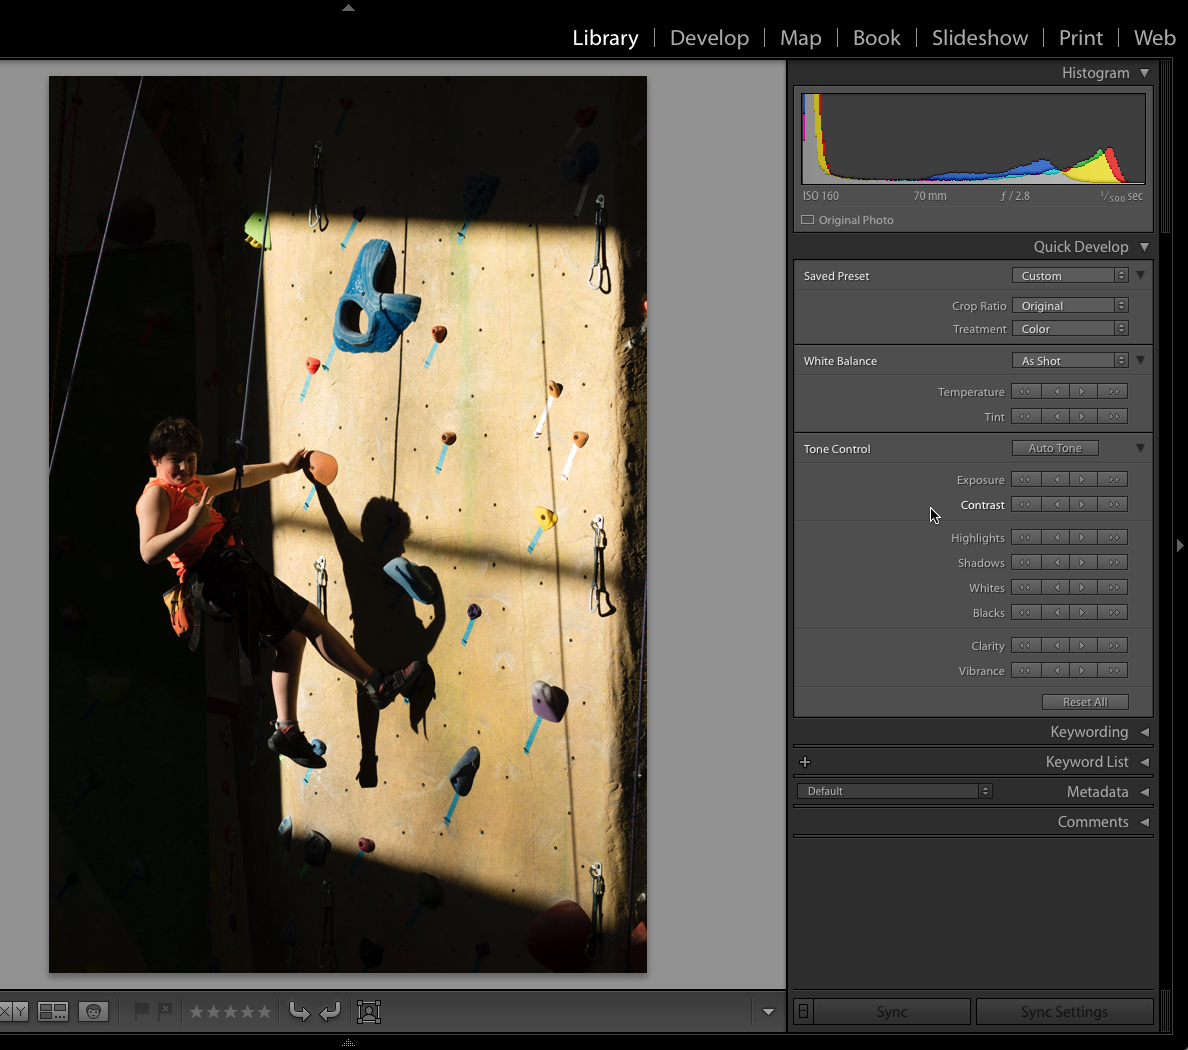
Starting at -1 stop Exposure setting.
Ends at 0 Exposure setting.
Why is that so powerful? OK, imagine you just processed several hundred photos, you are feeling good, but a little voice in the back of your mind says, “Hmm … I wish they all were just a tiny little bit brighter.” Then you remember Quick Develop and think no problem, and proceed to select them all in Grid view, expand the Quick Develop panel, hold down the Shift key and click the small positive Exposure button to add a 1/6 Exposure bump to all photos in one smooth motion. Every photo gets a +1/6 exposure bump relative to what ever Exposure setting it already had. You couldn’t do that in Develop without having to nudge the Exposure slider for each photo one at a time, because Develop settings are absolute. Give it a test and you’ll see what I mean.
Another real handy way I use Quick Develop is if I need to crop a large number of photos to a given aspect ratio. Just select all photos in Grid view, and choose the desired aspect from the Crop Ratio drop-down menu in Quick Develop. Done. From there press the R key to jump to the Crop tool and tweak each photo for composition only as the aspect ratio is already set. There’s a lot more to explore in the Quick Develop panel, but I hope I’ve got you thinking about ways it can help you in your workflow. See you on the Help Desk!
great article
Thanks Rob for sharing, nice article
I have just started using quick develop and survey mode a lot more after discovering a few quick tricks that save so much time…..thanks for the tip about the shift feature!!! 🙂 woo hoo!!!
Welcome to the new world of photography
Thank you for your post. I have encountered one other preblom which seems to have started after downloading LR 3.4, but could be unrelated. After flagging photos for rejection (x) and then attempting to delete the rejected ones, the dialog box to either delete from disc or remove from the catalog no longer appears. This means I cannot mass delete my rejects. Maybe it is something else that has changed, but I cannot see to get it to work.
Just used your tip to change the crop ratio on 45 photos at once– what a time saver! I am going to have to play with Quick Develop more 🙂
I’ve been using LR since LR3 came out yet I never noticed that Clarity became Sharpening with the ALT key. That alone is enough of a tip, Thanks Rob.
You’re welcome Paul!
What about using Sync in the Develop module?
Mike: that what he’s saying, if you select a bunch of photos and use Sync to apply a small change to say exposure from the Develop module, it’ll simply set them all to that exposure setting, rather than applying a uniform change relative to each photo’s existing setting. If you do it in Quick develop it applies the relative change instead.
Thanks Owen! That’s exactly right. It is a easier concept to see for yourself than to explain. 🙂
If you want to set all photos to a +1 Exposure setting then you can use Sync to synchronize all photos to that same exact absolute setting (regardless of any exposure setting they may have had already).
If you want to nudge all photos +1 Exposure relative to whatever exposure setting they may already have then you can use Quick Develop.
Give it a try Mike and I think it will make more sense.