
Happy Monday everybody — It’s going to be a great week! (I’ll be up in Minneapolis on Friday with my full-day Lightroom Seminar — hope I’ll get you to meet you there).
If you want to Organize your images using the Map module, but you don’t have the GPS coordinates embedded, a couple of weeks ago I showed you a technique that can help, but you have to do part of it while you’re at that location. In the method, I’m sharing today (the manual way), you can do all of this after the without, with any GPS info at all, and it’s as easy as searching within Lightroom’s built-in version of Goggle maps. Here’s how it’s done:
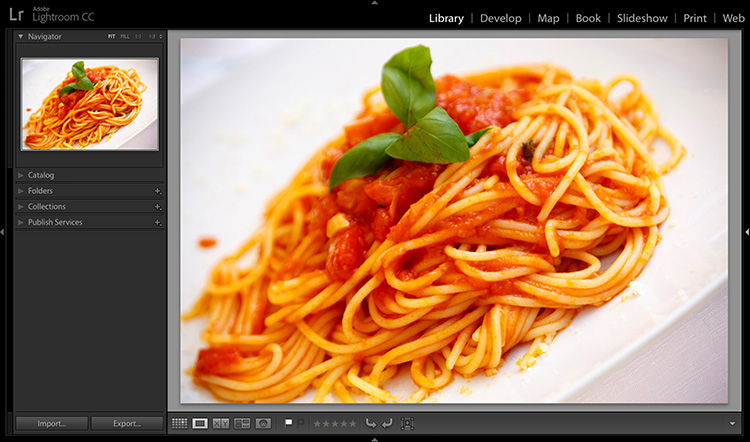
STEP ONE: Click on the image you want to add to the Map in the exact place where you took the shot. I recognize that shot — it was a very memorable pasta lunch I had a couple of years ago in beautiful Portofino, Italy. Mmmmm.
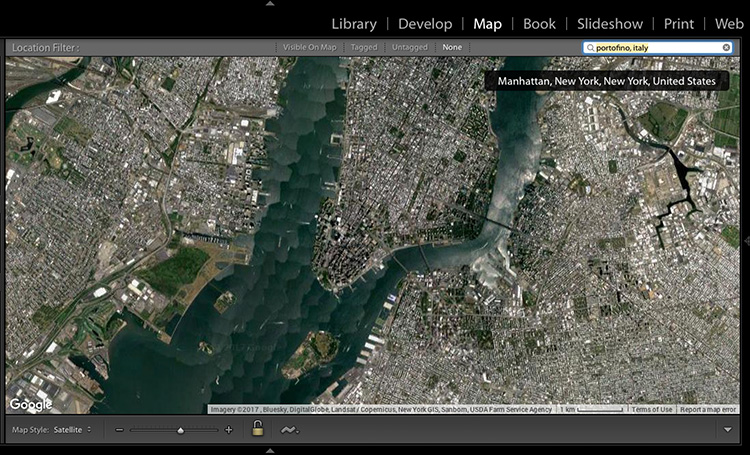
STEP TWO: Click on the Map module, and up in the top right corner you’ll see a search field, Type in the location where you took the shot (not GPS location — just regular ol’ Google search location), so I typed in Portofino, Italy.
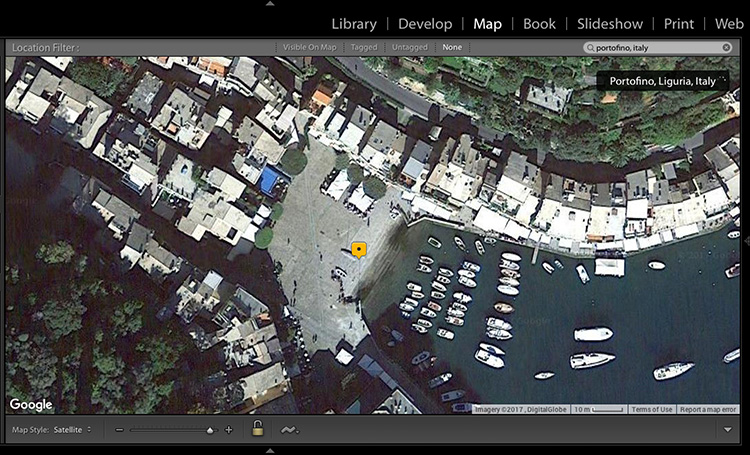
STEP THREE: Hit the Return key (PC: Enter key), and it takes you that spot on the map (as seen here). If you just wanted to tag this shot with “Portofino, Italy” you can drag and drop it from the filmstrip at the bottom right onto that yellow marker and you’re done. My problem is — I want it to appear exactly where I took the shot, not just some generic location in Portofino (even though Portofino is incredibly small). I remember when the restaurant was located (right along that harbor on the far side of the water, but before that little white dock).
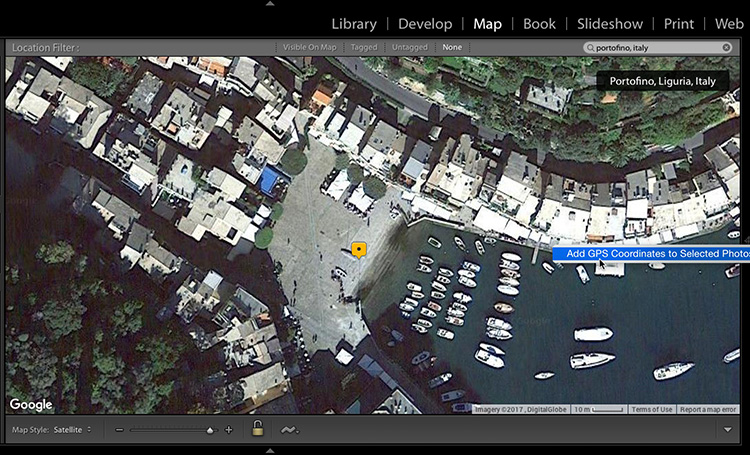
STEP FOUR: If you know the exact location (from looking at the map, like I am here), right-click directly on that area, and a pop-up menu will appear with “Add GPS Coordinates to Selected Photo” (as seen above). Choose that and it embeds that exact GPS data into the image.
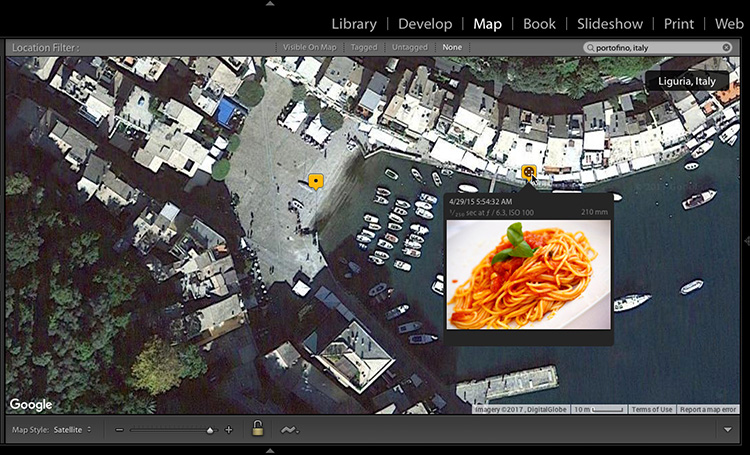
STEP FIVE: When you do that, it adds a yellow tag to the map, and if you click on it, you’ll see your image has been added to the map (as seen above).
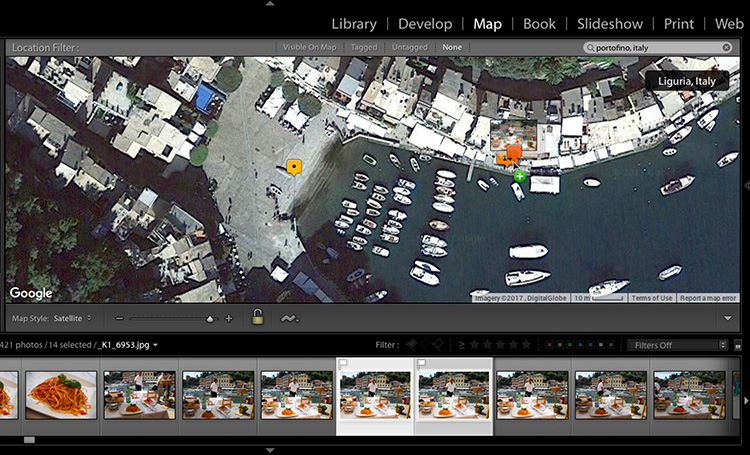
STEP SIX: If you have more images that were taken at that restaurant that you want to be added to that location, just select them down in the Filmstrip and drag and drop them to that same yellow pin on the map, and it adds them. Note: the pin turns orange when you’re right over it, and you’ll see the little green “Add” plus-sign appear at the bottom right corner of your cursor.
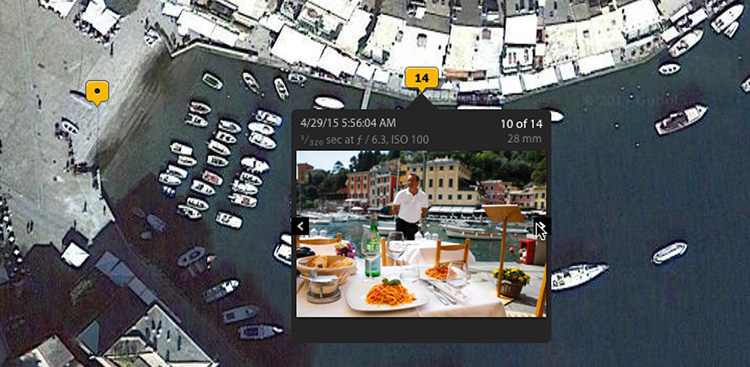
STEP SEVEN: Now when you click on that pin, it brings up a preview with all your images tagged with that exact location (here I dragged another 13 images to that tag). You can scroll through previews of them all by clicking the arrow buttons on either side of that pop-up preview.
So there you have it. Hope you found that helpful.
Remember, this is going to be an awesome week – let’s make the most of it! 🙂
Best,
-Scott
If you have a group of pictures from the same location, i.e. the restaurant, you can select all of them before going to Maps and then add all at with one drag. Awesome tip Scott.
Great! If I CTRL+S will it now save this GPS location into my DNG file?