
Here’s the quick answer to that question:
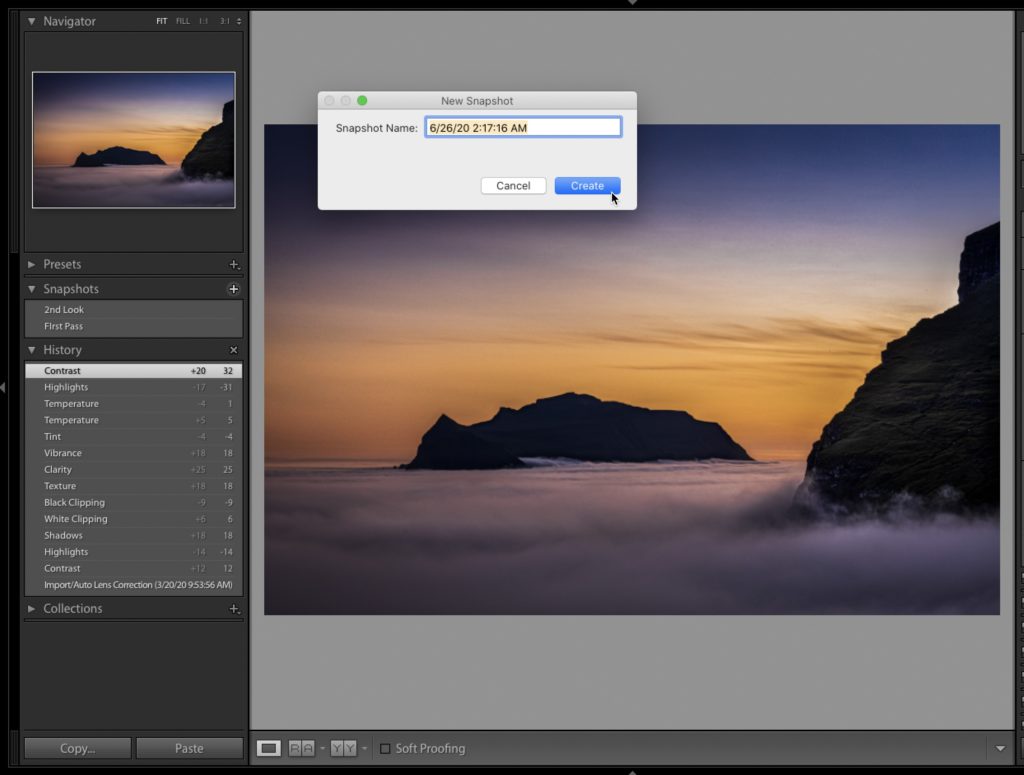
I use Snapshots when I’m working on an image and I kinda like where it looks at this point, but I want to keep tinkering and experimenting a bit with it, but if I don’t like how things are going I want an easy way to get back to the point where I did like how it looked. So, when I get to that first point where I liked it, I make a snapshot by going to the Snapshot panel (in the Develop Module) and clicking the + sign at the top right of that panel. Then I tinker. If I get to another point where I like how things are looking, I can make an additional snapshot, and keep tinkering. This way, I can jump back to two different versions I know I liked and I can compare to see which I like better. You can add as many snapshots as you like along the way, and this all happens on one single image.
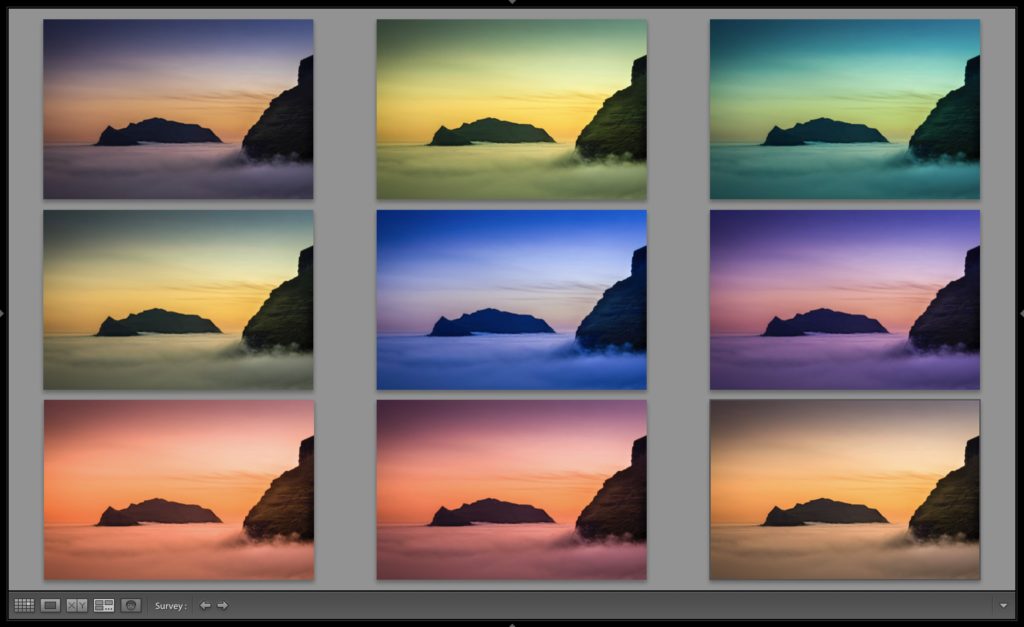
I use virtual copies when I want to see a number of different versions of the same image simultaneously on screen, or I want to export them out as JPEGs. I use this sometimes when I’m trying out different white balance settings for artistic purposes. I get my initial white balance, and then I make a virtual copy and completely change its white balance. Then I make another virtual copy and tweak its White Balance, and so on. It’s not unusual for me to make 6 or 9 virtual copies. Then I select them all and press the letter “n’ on my keyboard to see them all on screen at once (as seen above). When I see one I don’t like; I hover my cursor over it; an “x’ appears in the bottom left corner, and I click it to remove it from my screen. It doesn’t delete it. It doesn’t remove it from my collection. It just takes it off screen. I’ll also use Virtual Copies to export actual JPEGs of these different white balances to either send to a client, or to send to a fellow photographer to get a 2nd opinion.
Just a couple of week from our Photoshop Conference
The sign-ups are on fire with photographers all over signing up. It’s two full days, all live online with with two simultaneous training tracks, and an incredible team of instructors. Best of all, it’s all online, so everybody, everywhere can attend, and it’s so affordable anybody can be a part of it. Check out the video below to see if it’s right for you:
Get your ticket at https://kelbyonelive.com/photoshop-conference – sign up right now to get the best pricing.
Have a great weekend, everybody. Stay safe and sane and we’ll catch you next week. 🙂
-Scott


I’ve been using Lightroom for about eight years I think, and … never knew this. Yes, I’ve seen the snapshot feature but never looked at it, never realised what is could do for me! Now I know. It’ll be something I’m obviously going to use from now on. And do you have an article titled something like, “Lightroom features you never knew existed, but should”?
Hi Scott,
Is there a way to freeze/apply/flatten a virtual copy before applying a new preset… ?
for instance before/after doesn’t show original but the modified raw.
Nik3 allows a non destructive workflow but works only on a single plugin. if we use a second one it works only on last one. using Virctual Copy doesn’t work.
Snapshots are shared between virtual copies. Select the original master, create a snapshot of the unedited state you want to see as the before in the virtual copy. Then, select the virtual copy, right-click the snapshot you just created and set that state as the before state. Now you will see the original for the before in the VC.
thank you Rob
And what about flattening a preset in a VC and applying a second preset to it.
For instance a HDR preset boosting colors and a deep BW preset applied on colorful image…
If NIK3 could integrate viveza upoint and sylver efex pro 2 inside color efex pro (the latest module with stack of filters,…) to make a unique “NIK studio”, it would become fully non destructive plugin for lightroom ! today we must select one plugin only.
I don’t understand what you mean by flattening a preset. A virtual copy is simply a second set of instructions that is applied to the same source photo. A preset is simply a text file of Develop settings. You can apply as many presets as you want to a photo, but the last preset applied will change any settings that were included in a previously applied preset. So, if you have one preset that contains +10 Vibrance and another that contains + 15 Vibrance, then whatever preset you apply last will determine what setting Vibrance is on (either +10 or +15). If you like the look of a photo after applying a preset, then the only thing you can do to “flatten” that look is to export a copy, which will “bake” in those settings in the resulting copy. Add the copy to the catalog and apply any other preset you want to it.
thanks Rob,
this is what i do with a huge tif while it would be so easy to add a “apply” button which says to the catalog to add a new section where you can apply a +10 vibrance over a +15 one to reach +25 value.
This is simply a stack of filters as we can find in topaz, ON1 or luminar instead of playing all the time with a unique slider. writing that, it means that basic panel should be perhaps a local settings instead of a global one so, like luminar, we can create a new adjustment layer where we apply a new “lighting” filter… 🙂
This is a very helpful explanation–makes perfect sense. Thank you for sharing! Have a great weekend.
Thank you, Lori 🙂
Great tips Scott, always enjoy your ideas. One other idea around virtual copies is to use them for different corp sizes. I use this feature if I do different print sizes, i.e.; 11×14, 5×7, 8×10 etc. It’s nice to have the different versions saved in case I need to go back make another print.
Keep up the good work!
Randy – I like that – great example!!! 🙂
Have you considered getting a proof reader? No offense intended but there are several errors in this piece.
Thanks for the heads up. One wouldn’t be awake at the time I wind up writing these posts, but I did go back and at least fix the ones I could find. 🙂