If you start to realize you’re using the same settings fairly often when importing images, you can save a ton of time by creating an “Import Preset” with your settings already in place. That way, you don’t have to answer all the questions, and check all the boxes, and type in all the extra info in the Import window every time. Plus, you can create as many of these presets as you need, so for example, if you’re shoot architecture you could create one for importing your exterior shoot (that goes into an exteriors folder on your external hard drive), and a separate presets for interiors, and maybe another for residential, and another for commercial — all with your favorite settings and all going to just the right place on your hard drive, and all just one-click away. Here how to set your up:
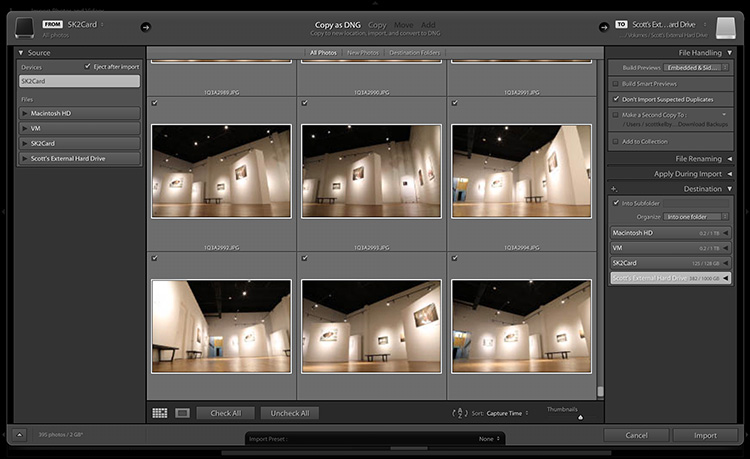
STEP ONE: In this case, you’re importing images from a memory card, and you’re going to copy them onto your external hard drive, into your Lightroom Photos main folder, then into your Architectural folder, and into your Interiors folder inside that. You want to be able to name the folder that’s createdYou want your copyright info added as they’re imported, and we’ll choose Embedded and Sidecar so the thumbnails show up fast (of course, you’ll be putting in the settings you use).
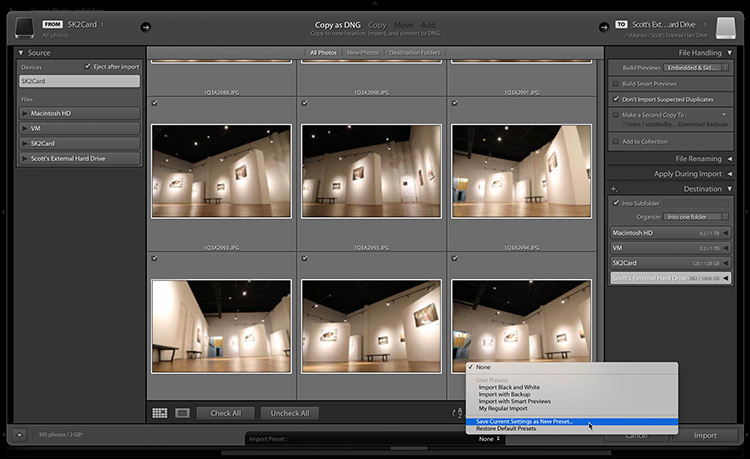
STEP TWO: Once your settings are all in place, go to the very bottom center of the Import window, and click and hold where it says “None .“ From the pop-up menu that appears, choose ‘Save Current Settings as New Preset’ (as shown here).
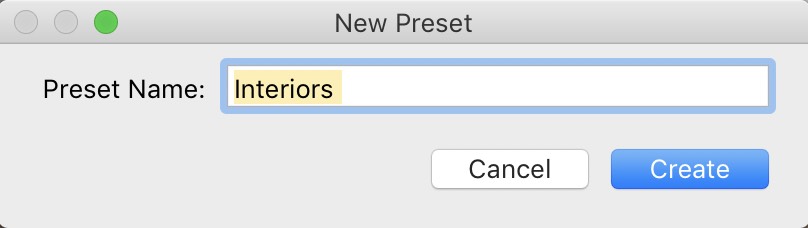
STEP THREE: This brings up a window where you can name your new preset. Give it a descriptive name. This preset is going to remember all your settings, your saving location — the whole nine yards.

STEP FOUR: Now you have your preset created, we don’t need to see the whole Import Window — you can use the mini-import window from here out if you like. Click on the up-facing arrow in the bottom left corner of the Import Window (shown circled here in red). That’s called the ‘Show Fewer Options’ button.
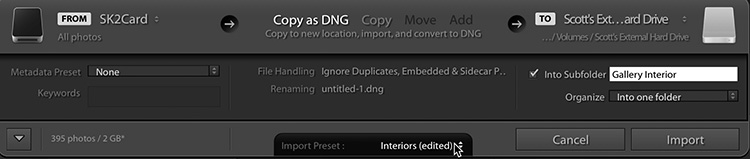
STEP FIVE: When you click on that “Show Fewer Options” button it switches to the compact view (seen here). So, from now on all you have to do is choose your preset from the pop-up menu at the bottom (as shown here, where I’m choosing my ‘Interiors’ preset), and then enter just the few bits of info that do change (like the name of the subfolder you want to create within your Interiors folder on your external hard drive). So, how much time does this save you? Well, now you only have to type in your subfolder’s name, and click the Import button. That’s fast and easy! By the way — you can return to the full-size Import window anytime by clicking the Show More Options button (that same down-facing arrow) in the bottom-left corner of the mini-import window.
Hope you found that helpful.
In two days, I’m in Charlotte. Come on out
I’m down in Ft. Lauderdale today teaching my full day Lightroom seminar to 200+ photographers, and I’ll be in Charlotte on Wednesday for my last seminar of 2017. If you’re up that way, why dontcha come on out and spend the day with me. 🙂
Have a great Monday everybody! It’s almost Christmas time (whoo hoo!).
Best,
-Scott
P.S. I’ve got some images from Saturday’s gallery opening for KelbyOne member Stephen Wallace — such a great photographer, and such a great guy. He shared some really fascinating stories during this chat with Larry Becker – you can watch that too over on my daily blog today.