
One Click Chromatic Aberration Removal in Lightroom
Hi, gang – if you see those nasty pink/purple or green lines around the edges of your image, especially visible sometimes after you apply some serious post-processing, you may be able to get rid of it with just one click (especially if it’s still in its RAW image state). Here’s how:
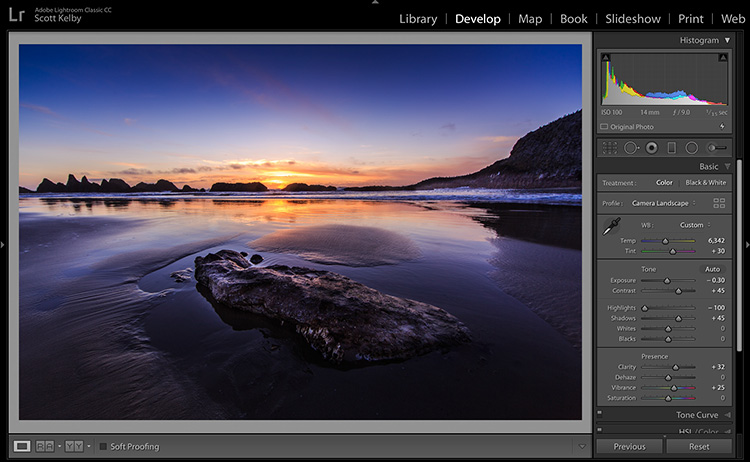
Above: Here’s the original image, and if you look at the mountain in the top right you can see a bit of a glow (which we’ll cover on another day — I’ve got a very reliable way to remove them), but if you zoom in close, you’ll see there’s another problem.
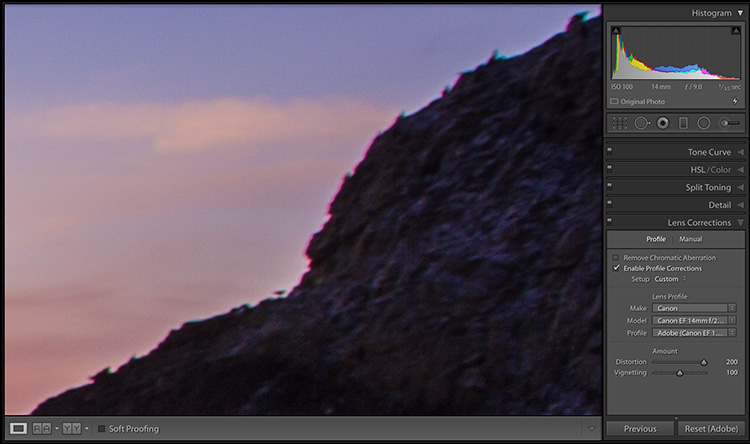
Above: When you zoom into 300%, you can see the Chromatic Aberration problem this image has — the magenta/purple and green lines around the edges of the image.
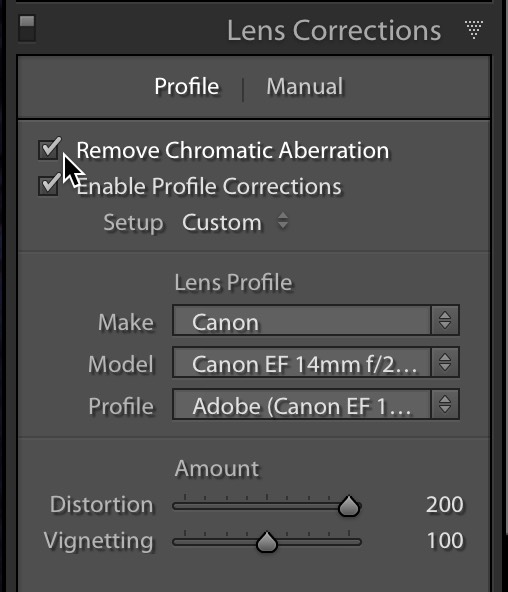
STEP ONE: In many cases, all it will take is to go to Lightroom’s Lens Correction panel and turn on the “Remove Chromatic Aberration” checkbox (as shown above).
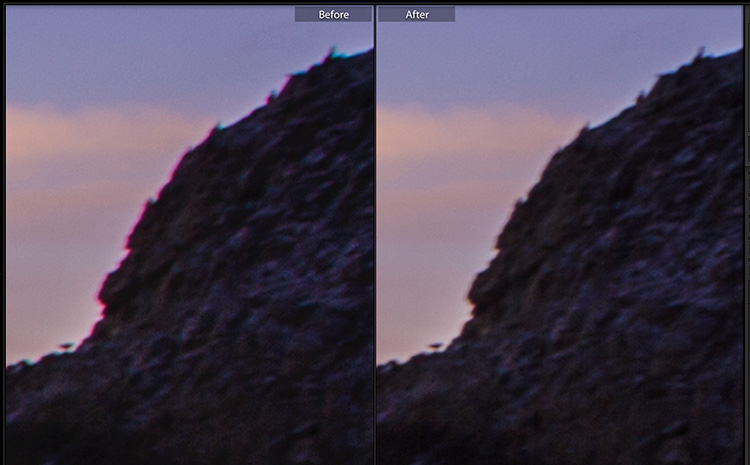
Above: Here’s a close-up before/after from that same image with nothing more being done than turning on that one checkbox. Again, this will often do the trick all by itself, but there will times where this alone won’t do the trick, and that will require its own tutorial, but I have one coming, too. But for now, it’s too easy not to be turning this feature on if you see a problem, especially since you won’t generally see any change to any of the other colors in your image.
A Limited Number of my Prints are Now Available
I just announced it today, and I’m pretty excited about it — they’re in 75+ fine art photographic galleries around the world, and they’re also available for purchase online. Check out my blog today for the scoop and a link to check out the available prints.
Hope that helps.
Best,
-Scott
P.S. On Wednesday I’m in Raleigh with my Lightroom full-day seminar and Friday in Lansing. Hope I’ll run into there.