
New Functionality to Export Develop Presets
One of the smaller updates to Lightroom Classic last week was the ability to easily export individual presets and even entire preset groups. While small, I think it is very welcome and very useful.
Create a new Preset Group
To start, you’ll need to create a preset group (if you haven’t already). Guess what? That part got easier too! Here’s how:
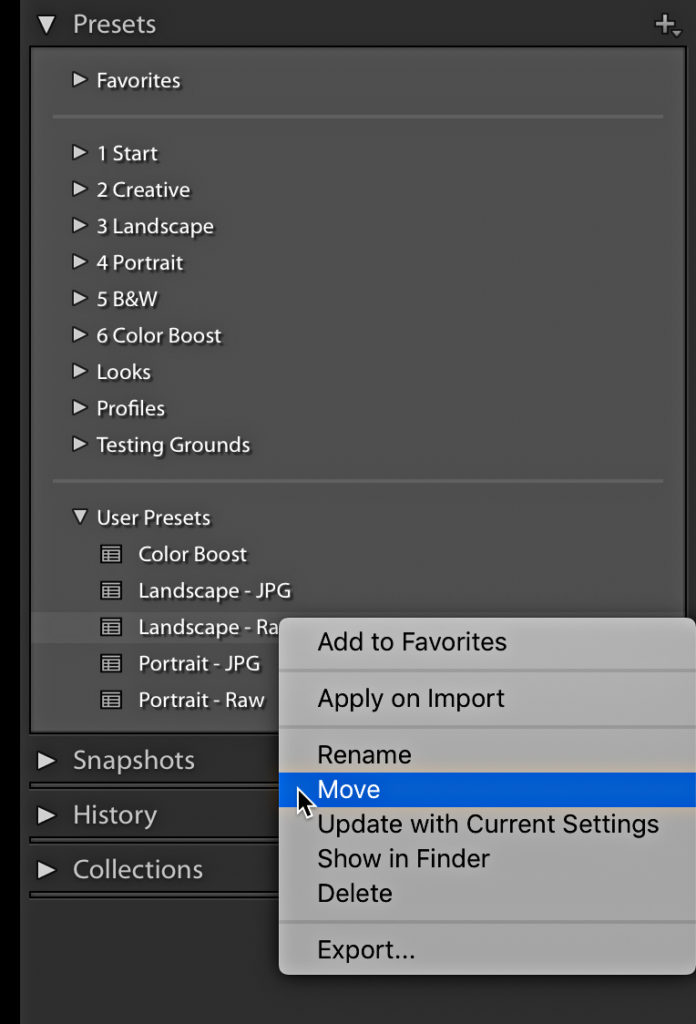
Step 1: If you’ve created custom presets, but never created a preset group, then all of your custom presets will be in the User Presets group. Expand user Presets, and right-click the preset you want to move into a new group, then choose Move from the contextual menu.
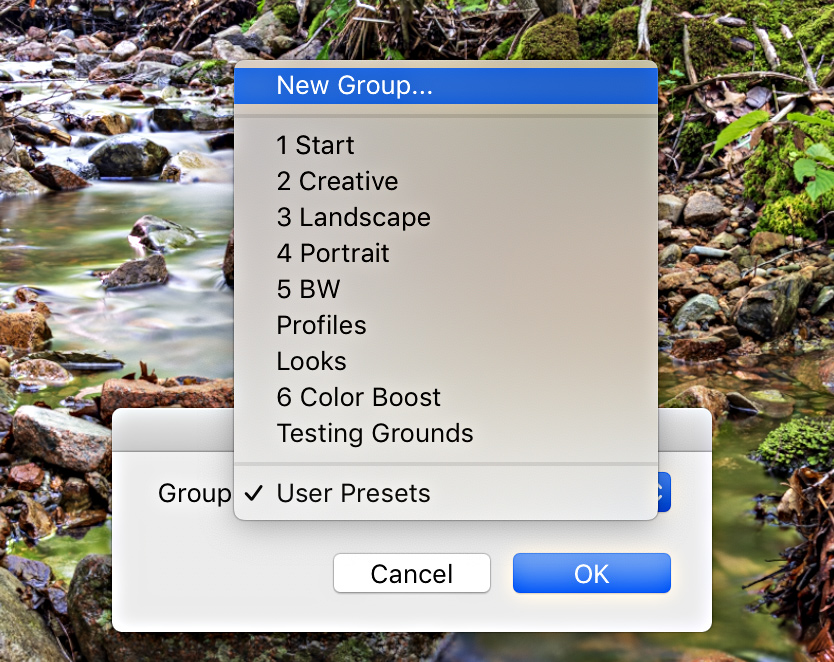
Step 2: In the Move Preset dialog that appears, click the drop-down menu and choose New Group. Then enter a meaningful name for the new group name and click Ok.
Your new preset group is created and the preset you right-clicked on is moved into it. Easy-peasy. Move any other presets you intend to add to that group by right-clicking each preset in turn, and choosing your new group from the menu. Create any other new preset groups as desired.
Export a Preset Group
Now that you have a custom preset group you can easily export that entire group in one move, and even have it compressed into a zip file as part of the process. Here’s how:
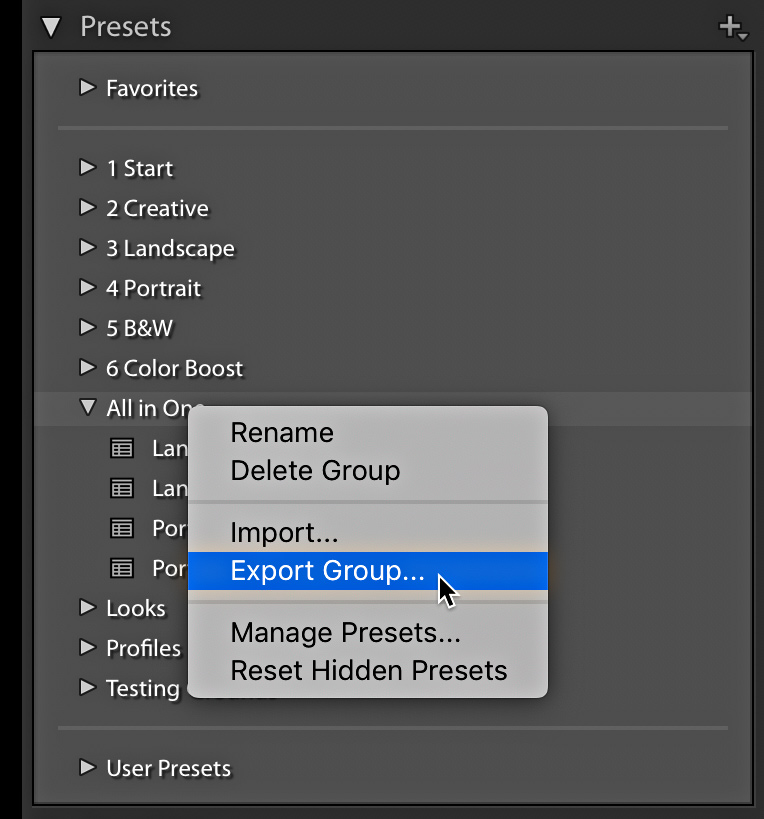
Step 1: Right-click the preset group you want to export and choose Export Group from the contextual menu.
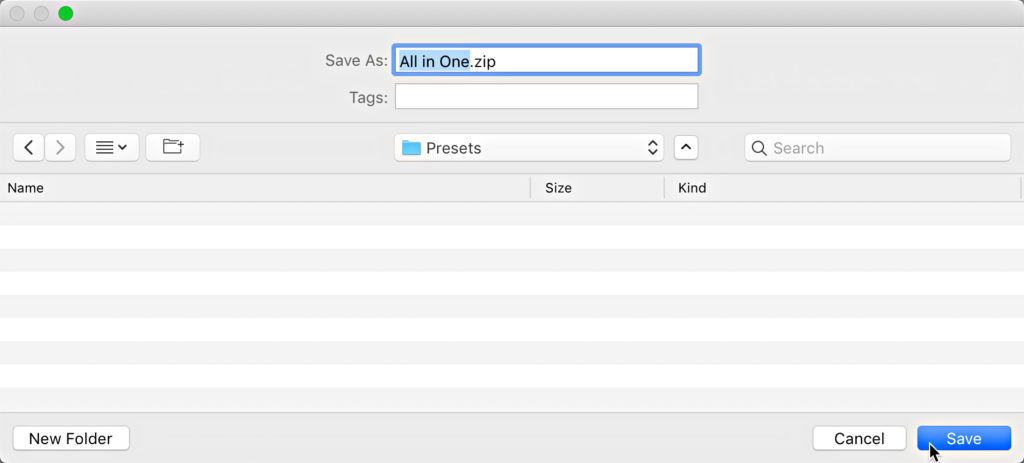
Step 2: Choose where on your computer that you want to save this file (pick an easy place to find), and note that it will be compressed into a zip file for easy delivery or storage. Also note that the name of the preset group will be used for the name of the zip file. Handy.
Note, you can also export individual presets by right-clicking a preset and choosing Export from the contextual menu.
I created a couple of “starter” presets that I loosely identify as either landscape or portrait that give me my desired settings for beginning to process a raw (or JPG) file based on the primary subject of the photo. The settings I chose to include are:
- Profile
- Auto
- Texture
- Clarity
- Dehaze
- Sharpening
- Lens profile correction
- Remove Chromatic Aberration
There are just subtle differences based on if there is a person in the photo or not (basically). If you’d like, you can download that zip file for your own use.
Import a Preset Group
If you decide to download that preset group (zip file), here’s how to import it into Lightroom Classic (note those presets will only work in the latest version of Lightroom Classic):
Step 1: Open Lightroom Classic, and switch to Develop module.
Step 2: Go to File > Import Develop Profiles & Presets (if it is grayed out, make sure you are in Develop).
Step 3: Navigate to where you downloaded that zip file (most likely your Downloads folder), choose it, and click Import.
The new preset group should appear in your Presets panel, and there will be four presets (raw & JPG variations). If you don’t like them (no hard feelings), just right-click the preset group and choose Delete Group from the contextual menu.
This functionality makes it much easier to share presets as I am here, but more importantly a way for you to backup your presets and transfer them to your other computer(s). Enjoy!
Side note, you can also import those into the cloud-based version of Lightroom for Mac/Win (if you use it), and those presets will be available across all of your devices.


How do I prevent exported images overwriting each other. I can put them into different subfolders, but that may create as much effort as using individual exports.
On the Export dialog, in the Export Location panel, set the Existing Files drop-down menu to Ask what to do OR Choose a new name, to prevent any exported copy from overwriting an existing file of the same name.
When I’m importing a presets, LR always put it under User Preset. It doesn’t create a new group or ask me to choose a group. Is there anything else you have to do before importing? Like putting them in a separate folder? Thanks. LR classic, latest version.
It can depend on how the presets were bundled, what version of Lightroom was used to create them, and how you choose to import them. In my example, with the latest version of Lightroom, it will create the group as part of the import process, but that hasn’t always been the case. Use the steps above to move your presets from User Presets to a custom group, and then in the future, you can also use the Import function that appears when you right-click a preset group to import presets to that group.