
Making Lightroom Panos and HDRs From Just The Smart Previews
OK, this didn’t get much attention in last week’s Lightroom CC update, but I think it’s actually pretty significant, and that’s the ability to create Panos and HDR images using just the Smart Preview (without having to have the linked original file).
Previously, if you didn’t have the original, both Panos and HDR were grayed out in the menu, but there’s enough resolution in those smart previews to actually make decent images, and now you can. Take a look:
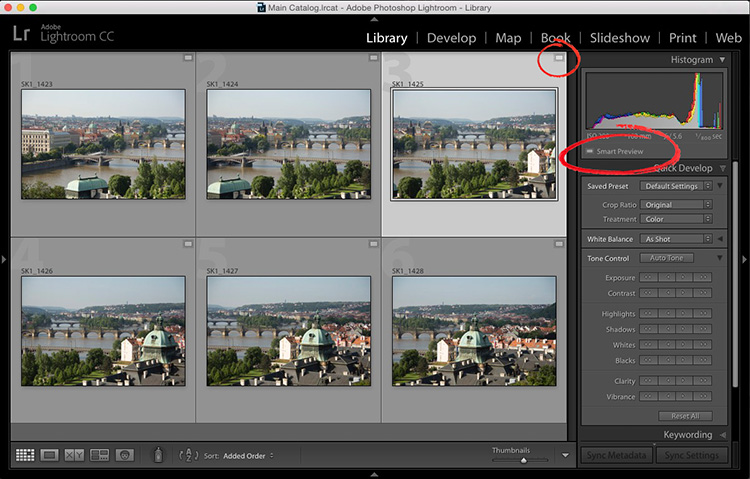
Above: Here are the thumbnail for a pano, and you can see (over in the Histogram panel, and in the thumbnail badges themselves, both circled in red above), these are just the Smart Previews — the originals are not available. Select all and go under the Photo menu; under Photo Merge, and choose Panorama.
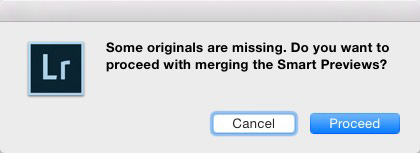
Above: This little warning dialog will appear letting you know you’re only working with the Smart Previews (and not the high resolution originals). Click the Proceed button.
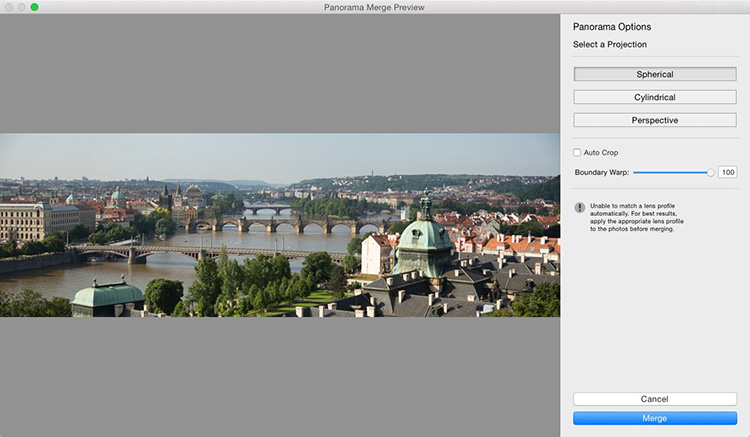
Above: It brings up the Panorama Merge Preview window just like always (shown above), and here I used the incredibly awesome Boundary Warp feature to fill the gaps around the edges of the image (rather than cropping them away).
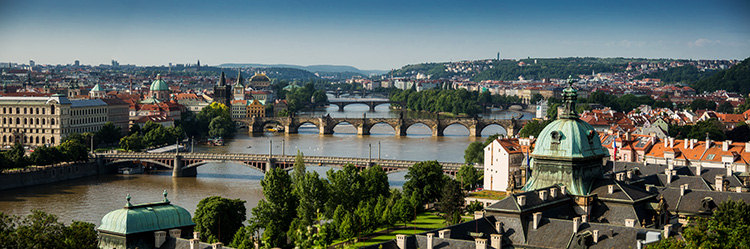
Above: The resulting pano is more than 21-inches long at a resolution of 240 ppi, all made from the Smart Previews.
A high-five and a big thanks to the engineering wizards at Adobe for making this happen. 🙂
Best,
-Scott
Great picture from Prague…
Scott, What happens when you reconnect your original photos does the panorama get updated?
I asked Abobe over at the Photoshop Family Forums. The panoramas made from smart previews do not synch back with the original files. They are always separate and if you want a high level panorama then they advised making it from the original files in Lightroom and not the smart previews.
I’m guessing the panoramas made from smart previews are probably decent enough for sharing on social media but if they are going to be printed big it is probably better to use the original files. I have not tested this theory yet!
Hope that helped
Hi Scott – have you (or any of your team) tried the new Gel-sticks for sensor cleaning that Moose is so excited about? It looks really easy & I trust Moose to be supremely careful with his gear (having read ‘Captured’), I wondered if you might add it to a course on (for example) “caring for your gear when tough-touring” as it is something that could be done in a hotel room or even a tent….. Moose would be the guy for teaching that one.
Is it my imagination or did LR slow down with the latest update
Without a doubt – I thought I was going crazy this last weekend, it was REALLY slow starting and when I moved into the Develop module – on a PC
Interesting, not something I’ve noticed…yet. Seems to be working fine for me.
Haven’t noticed a difference at all, but I’m on a Mac.