
How To Use Lightroom’s Awesome Range Mask
Awesome is right — the Range Mask feature is pretty darn awesome, but any time I show it, I get lots of comments from Lightroom users who didn’t realize it even existed. That’s why today I’m doing to a quick introduction — kind of a beginner’s “get started with Range Mask” tutorial to…well…get you started. Let’s go!
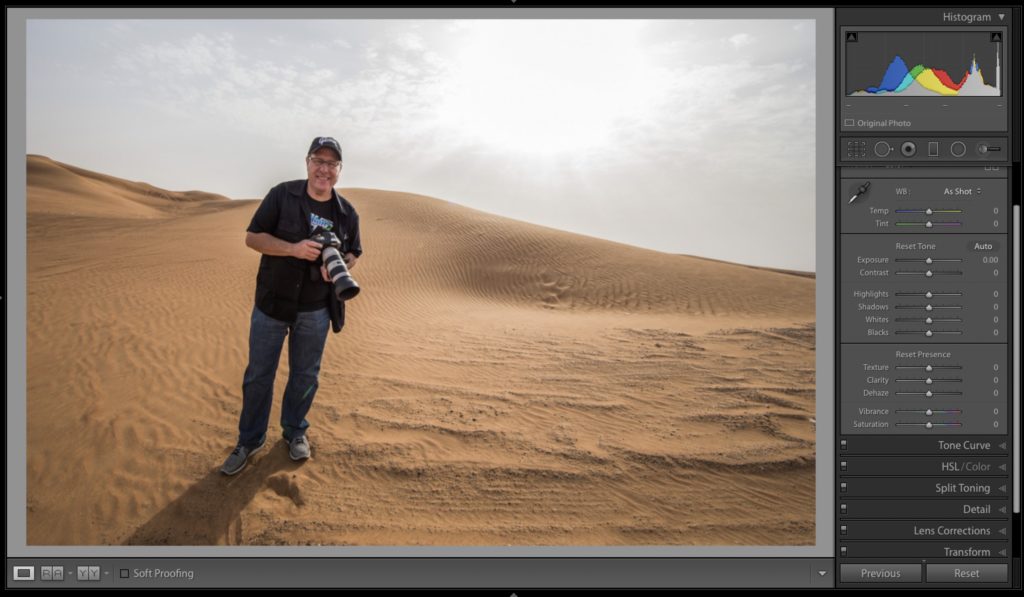
Here’s our original image (photo of me in the desert outside Dubai by Brad Moore) and the sky is pretty washed out, so we’ll want to darken it a bit.
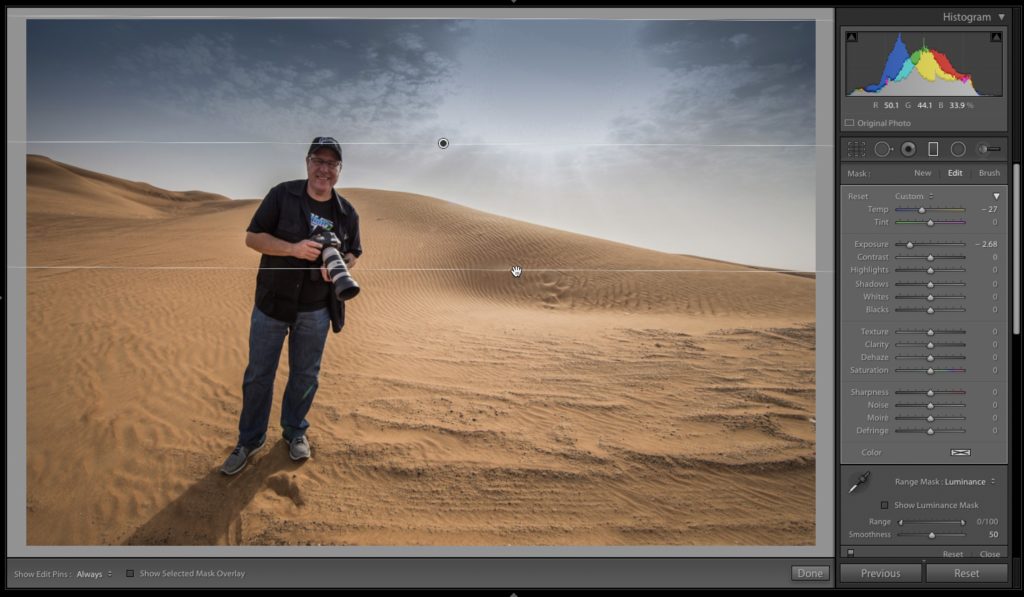
STEP ONE: my first thought would usually be to grab the Graduated Filter tool to darken the sky. Here I clicked on the tool; lowered the Exposure slider by more than 2-1/2 stops; dragged the Temperature slider a little toward blue (to help the sky not be just a boring gray) and then I took the tool and dragged from the top of the image down to about my waist (as seen above). This is where problem comes in that the awesome Range Mask tool can fix. Look at my face now. The darkening that added to the sky with the gradient, also darkened my face and part of the sand dunes as well. Yes, I could carefully paint over my face and part of the dune to mask away those areas so they’re not dark, but Range Mask is faster, and in many cases does a much better. job.
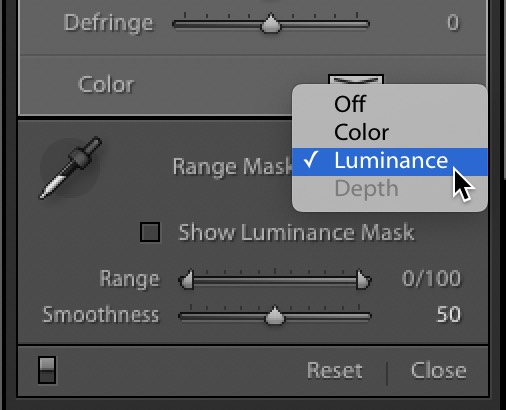
STEP TWO: Go to the bottom of the Graduated Filter panel, and you’ll see a Range Mask pop-up menu. Today, we’re going to look at my favorite, and my go-to Range Mask feature — Luminance, which lets you mask parts of the image based on their brightness, so choose Luminance (as shown above).
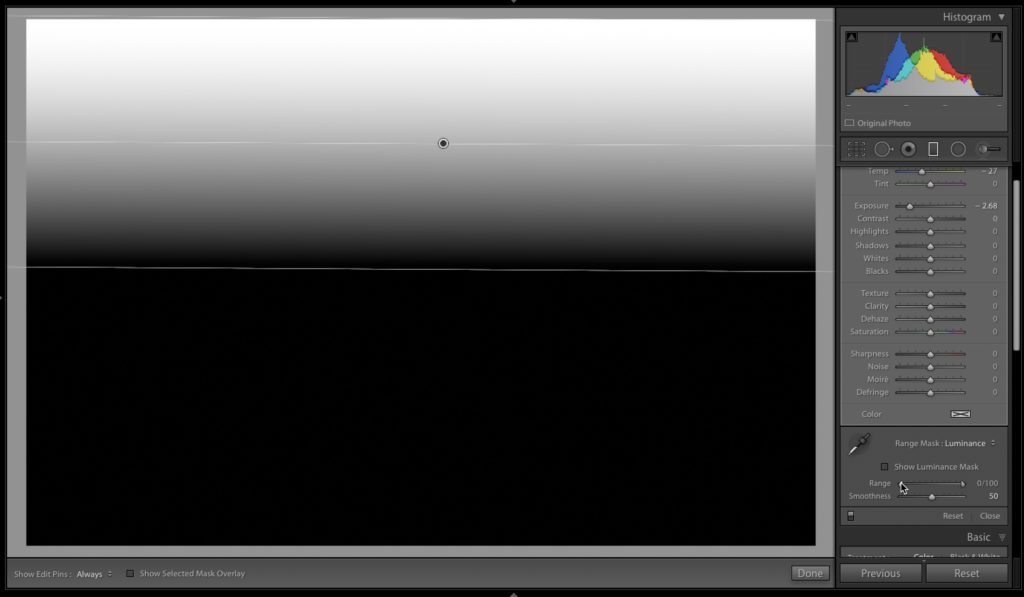
STEP THREE: If you hold the Option key on Mac (the Alt key on Windows) and you click and hold directly on the slider nub on the left side of the Range slider, it gives you a preview of the mask that the Graduated Filter creates by default. The white area you see at the top of the gradient is the part of the image that’s getting affected by that darkening you added by dragging the Exposure slider to the left. You can see how it gradually goes from darkening at the top down to transparent (the black areas) at the bottom.
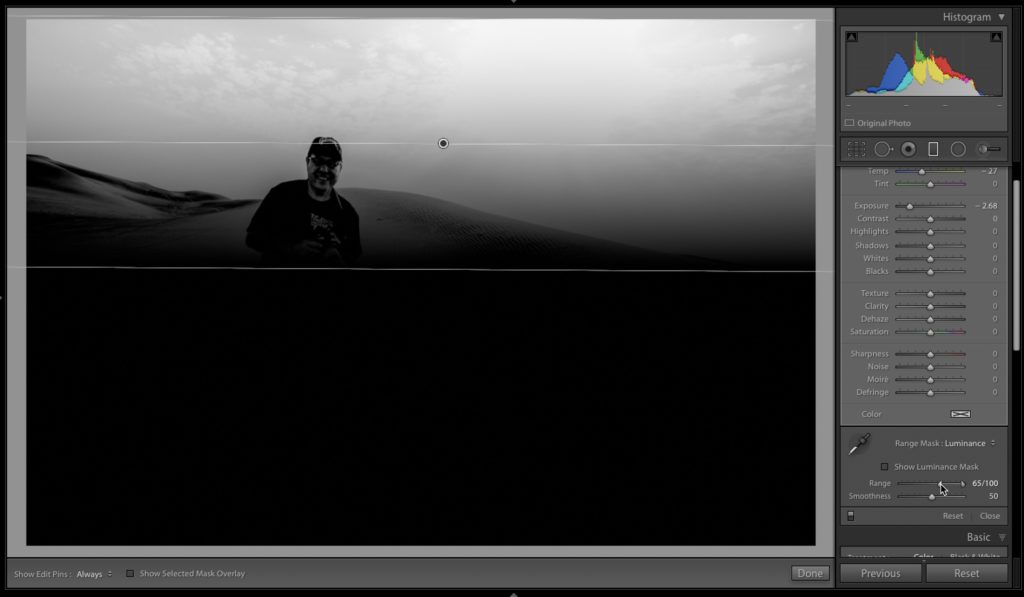
STEP FOUR: Now drag that Range slider to the right and it detects the dark areas of your original image and it masks them for you. In the image above, you can see how it cut most of my head and a lot of the sand dunes out of that darkened we added. Those darker areas aren’t getting darkened now nearly as much. The black areas aren’t getting darkened at lot. Pretty awesome, right? Add you did was drag the slider. That’s one pretty smart slider.

STEP FIVE: If you look at the photo now, you can see my face clearly , and the darkening at the top of those sand dunes is mostly gone as well. Right under the Range slider is a Smoothness slider. It controls how soft the falloff is (kind of like a feather slider, if that helps), and if you drag it to the left, you get a harder edge, but the masking is more effective and in this case, I can get away with it. If you drag to the right, it doesn’t mask as aggressively but the transitions are nice and smooth. It pays to drag it back and forth once or twice and you’ll see which way looks better for your particular image. In this case, it looked better to drag it all the way to the left, but you can see a little gap in the top corners (we’ll deal with that next).
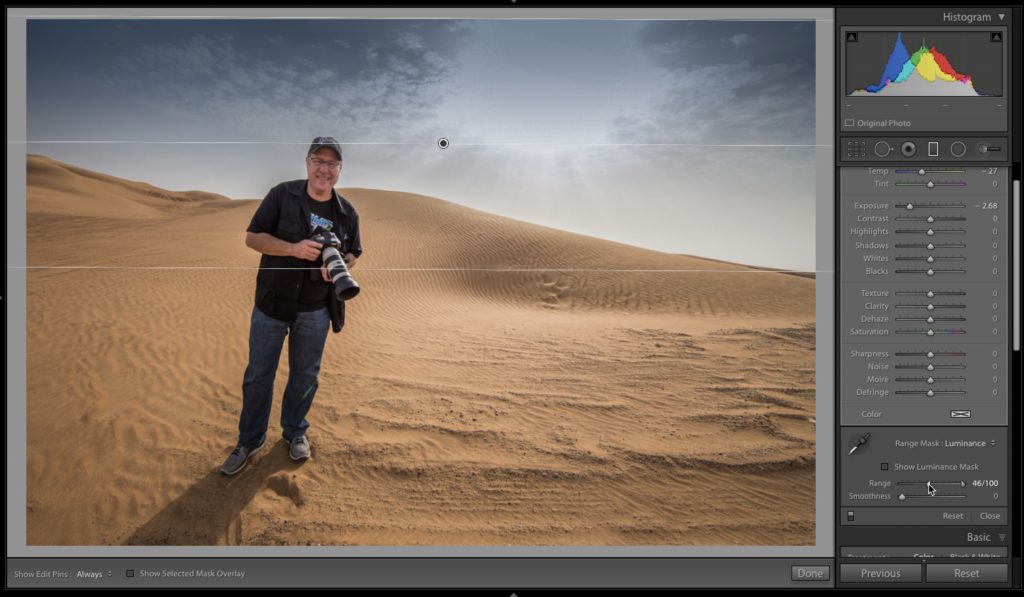
STEP SIX: In this case, dragging the Range slider back to the left just a little bit fixed the problem, and now I have the best of both worlds — my sky is darker and more blue, and it doesn’t cover my face or the dunes, and it did it all by me simply dragging a slider or two. The whole thing takes about 15-seconds, but it makes a big difference.
How would I Edit Your Photos?
That was our topic last week on my weekly photography Podcast “The Grid,” and when I showed a bland sky and how to mask it like this, I got lots of questions and comments, and that’s another reason I wanted to share this today. We asked our audience to send a RAW unprocessed image, and I would show how I would take that image from the RAW or original JPEG photo to the finished image. It was a HUGE hit with our viewers (we had nearly 900 comments), and I’m sharing it with you below in case you want to check it out (and I hope you will). Give it a quick look and see what you think.
That’s it for today. Make sure you come back tomorrow — we promise to make it worth your while. 🙂
Have a good one!
-Scott


Scott, great post – especially the tip on Option-clicking the range slider. I suppose it is obvious since the same technique works on the Tone panel but good to be reminded.
A great follow-up post would be how to use the Range slider with the new Hue slider to do a targeted color adjustment.
That is an awesome adjustment technique! I often find myself struggling to bring detail back to washed out skies without affecting the rest of the photos and I can’t wait to use this new-found tool. Thanks a bunch, Scott !!
Washed out skies are terrible and should be avoided at all costs.
But the “washed out” sky looks better and fits better than the darker sky.