
How To Organize Lightroom’s Develop Panel
PROGRAMMING NOTE: Today at 11:00 AM ET I’m doing a free webinar – everyone’s invited, that takes you on a journey about your own photography, and has the power to take your work to the next level. It’s based on a series I’ve been running once a week on my blog, and today’s Webinar is the culmination of that. It’s live; I take your questions on the air, and you’ll totally dig it. Here’s the link to watch the live stream (and comment) on my Facebook page – 11:00 AM ET today.
Happy ‘House Arrest’ Monday (LOL!!). While we have this indoor time together, here’s another thing that we’ve been putting off — getting our Lightroom Classic Develop Module more organized. Super easy to do. Here we go:
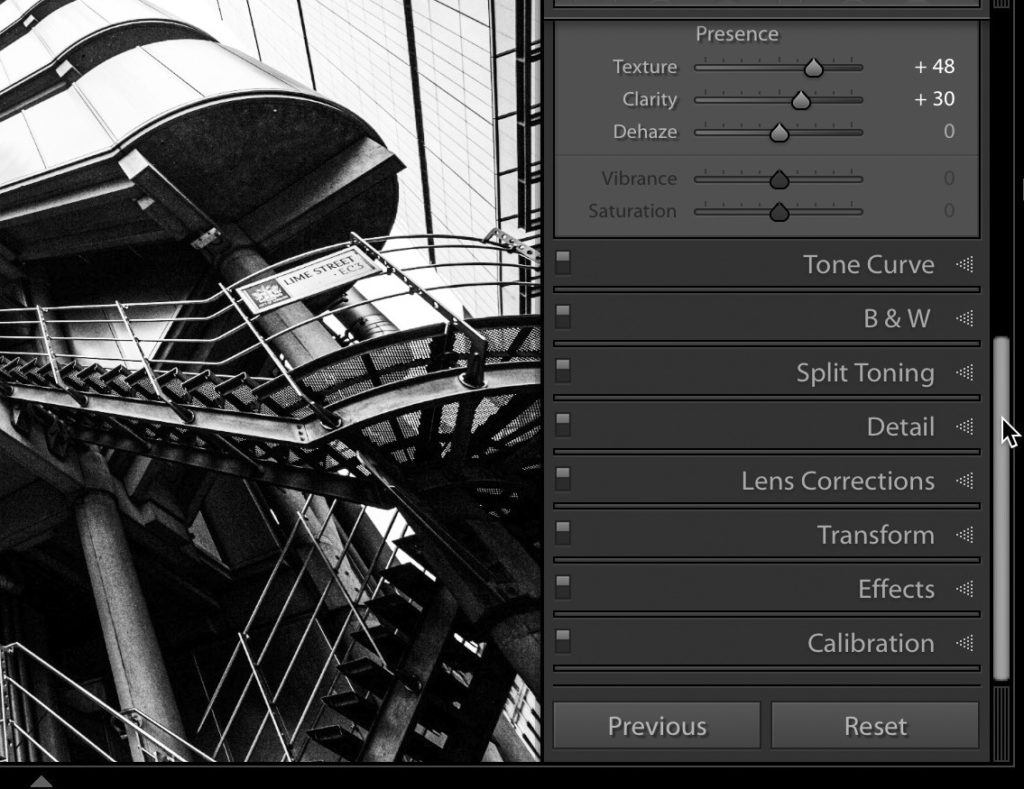
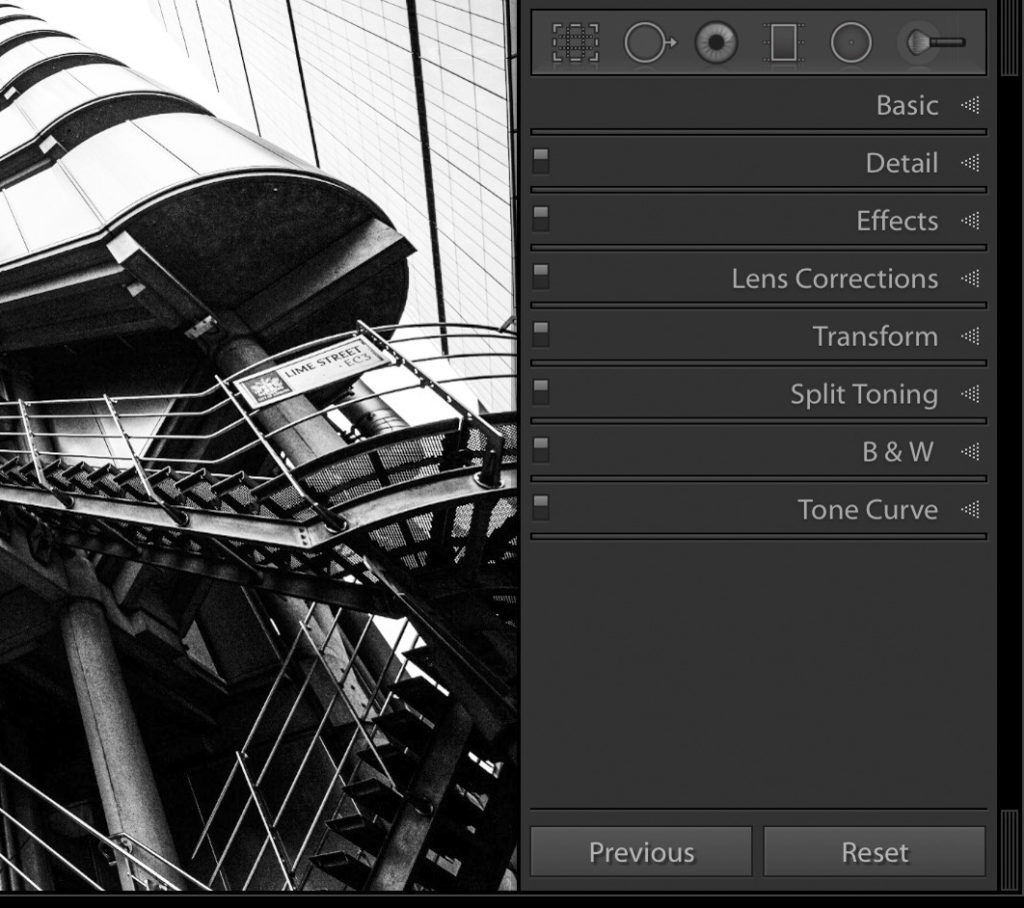
STEP ONE: Here’s Lightroom Classic’s Develop Module, and the right side panels are in their default view and order from top to bottom. The first thing you might consider is hiding any panels you don’t use. For example, I don’t use the Calibration panel at all (I’m guessing many of you don’t either), so there’s no sense in seeing it, and having it take up physical and mental space in our Lightroom lives.
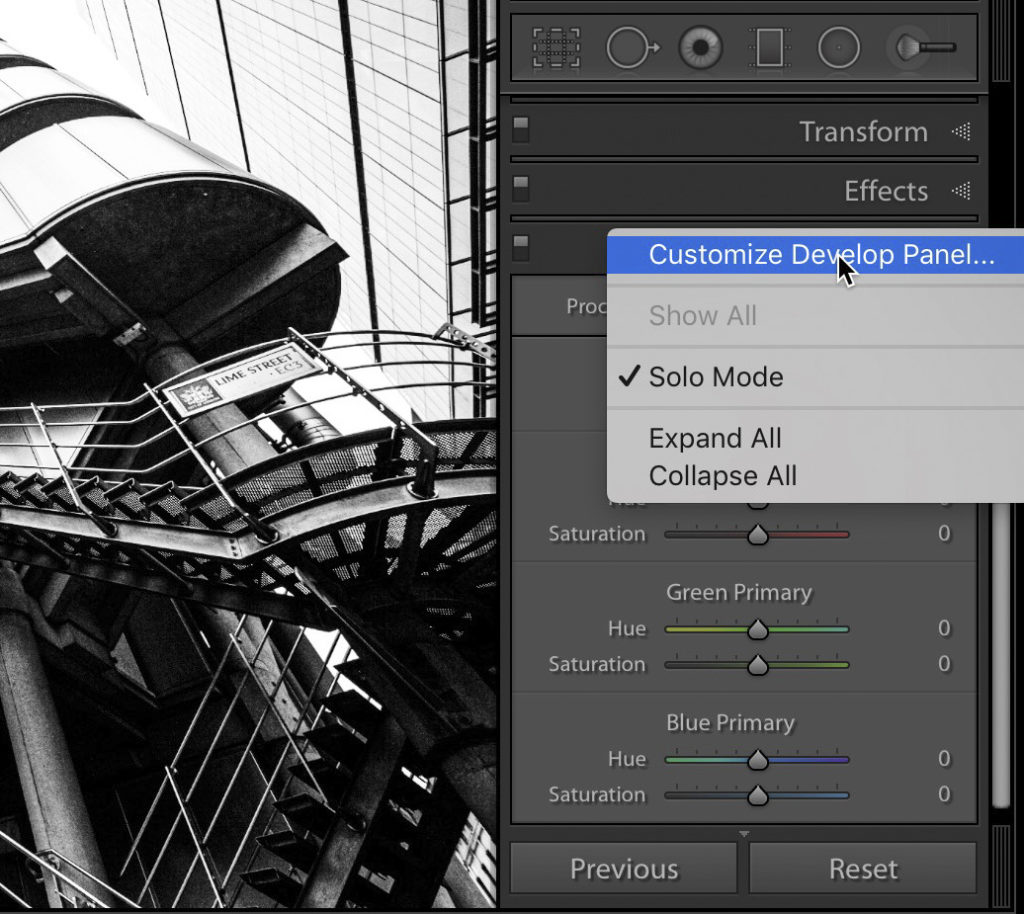
STEP TWO: Now we Show/hide panels and rearrange their order all in one place. Right-click (or Ctrl-click) on the title bar for any of the panels and from the pop-up menu that appears, choose ‘Customize Develop Panel’ as shown above.
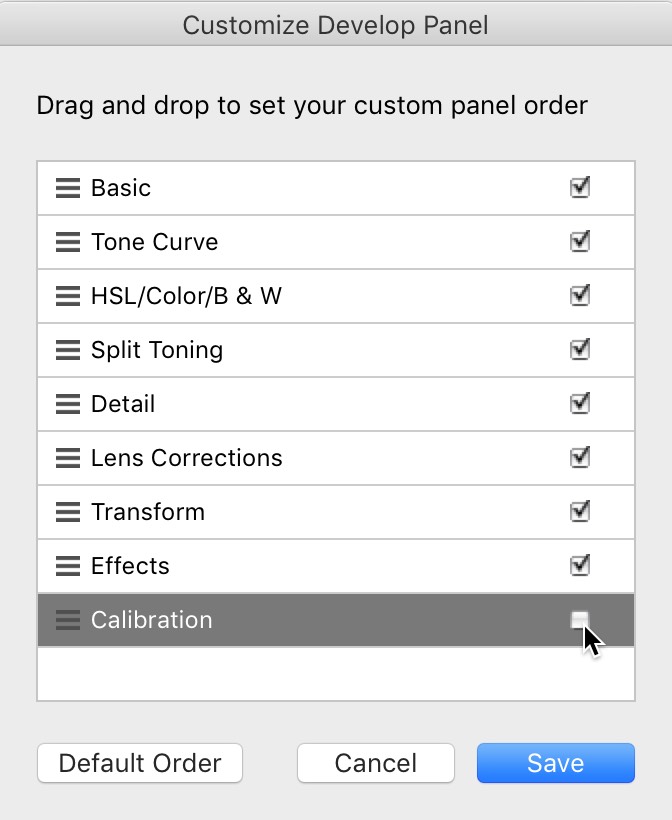
STEP THREE: When this gloriously simple window appears, turn off the checkbox beside any panel you want hidden from view. Don’t worry — you can always see it again by coming back to this window and turn on the checkbox back on. Don’t click the Save button quite yet.
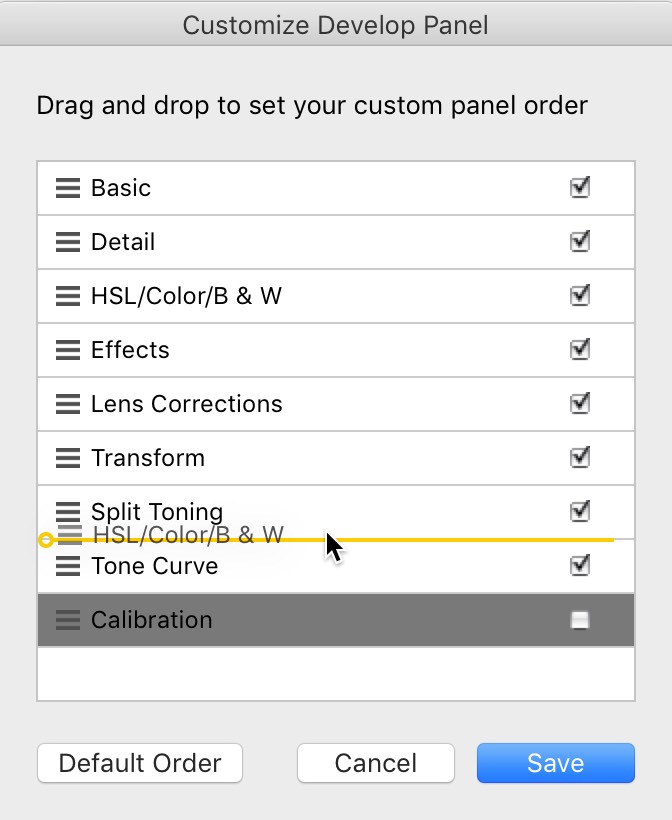
STEP FOUR: To put the panels you use most at the top of the stack of right side panels (so you do a lot less scrolling), click on the panel’s name and drag it into the order you want it to appear in the panel. You’ll see a yellow line appear as you drag (as shown above where I’m dragging the HSL/Color/B & W panel from it’s default position as the third panel from the top, and I’m dragging it down so it’s third from the bottom. Now click the Save button.
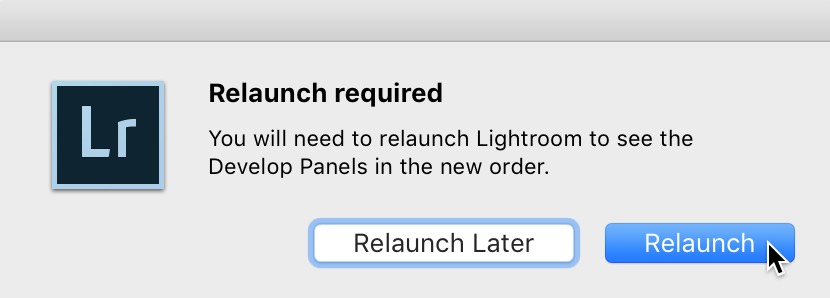
STEP FIVE: When you click the Save button, a dialog pops up letting you know you’ll need to Quit and Restart Lightroom for your changes to take effect. Just click the Relaunch button (as shown here).
STEP SIX: That’s it — now your Develop Module panels are organized to suit your workflow.
Hope you found that helpful. 🙂
See you online today for my free Webinar open to everybody! We’re even live streaming it on my Facebook page. 11:00 AM ET. Wishing you and your family good health. 🙂
-Scott


It would be helpful in the future if the tips are qualified for what versions of Lightroom Classic. In other words, this tip for customizing the develop module is not applicable to LR Classic ver 7.5 (I cannot upgrade due to being hobbled by both Apple for OS upgrade and Adobe for LR upgrade).
Worth keeping this one in mind for when you can upgrade, which is Apple updating some OS level for your HW ? Do you need newer hardware too ? (I don’t follow Apple gear, asking out of genuine interest)
Otherwise, it’s not all that critical of a tip – just useful.
Mac Pro 4.1 is dead-end at El Capitan and Adobe requires higher OS for current SW. They want me to spend another $2.5K on newer HW and toss a perfectly working HW so I can use the newer SW. Getting tired of forced obsolescence.
Great article
Jim, look for INSANE COLORS & TONES! Unlock In Lightroom Calibration Panel in YouTube. Hope it’s OK to post it here.
Is it OK to post the link here? Maybe this vid of the calibration panel is of interest. https://www.youtube.com/watch?v=Xg7SblduXsI&feature=emb_logo
Scott,
Thanks for the info. You mention that you, “don’t use the Calibration panel at all.” I can’t seem to find any documentation on the Calibration panel. Even Adobe is rather mute on the topic.
What, exactly, is it used for?
Jim