
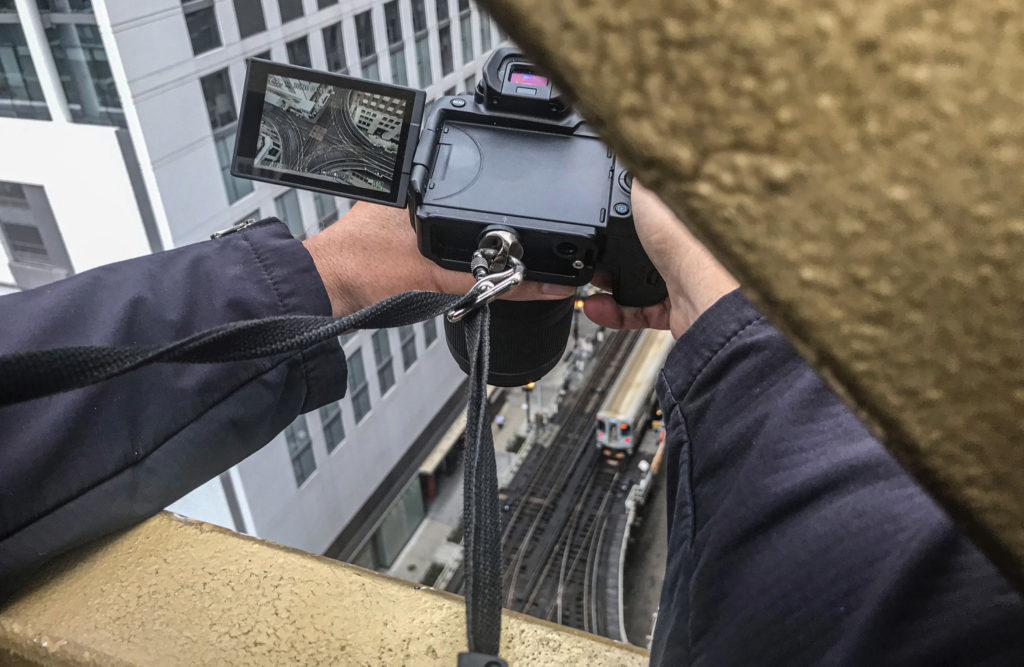
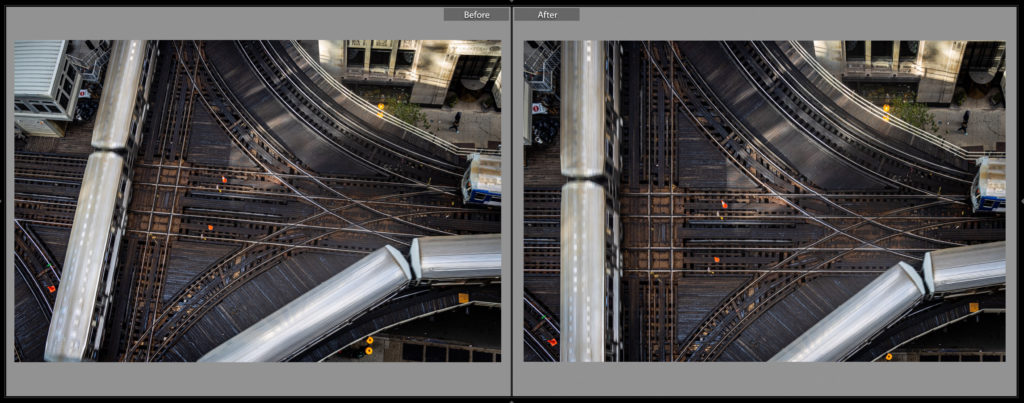
This one’s by request: a while back I created an online course called “A Photographer’s Guide to Chicago” and one of the locations I talked about was a parking garage where you can shoot down on an intersection of the “L” (Elevated trains). When my co-host for the course, Larry Becker, saw the behind-the-scenes shot of me taking the shot (shown above), he asked how could I possibly get the shot straight at the angle I was shooting from. The answer? Lightroom’s Guided Edit. Here’s how I used it to fix the perspective issue:
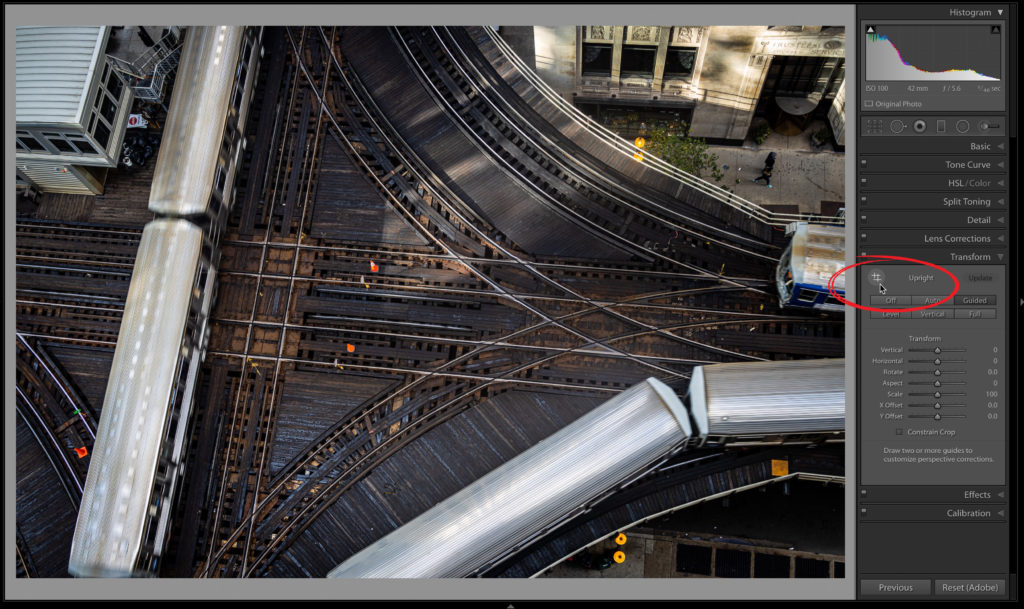
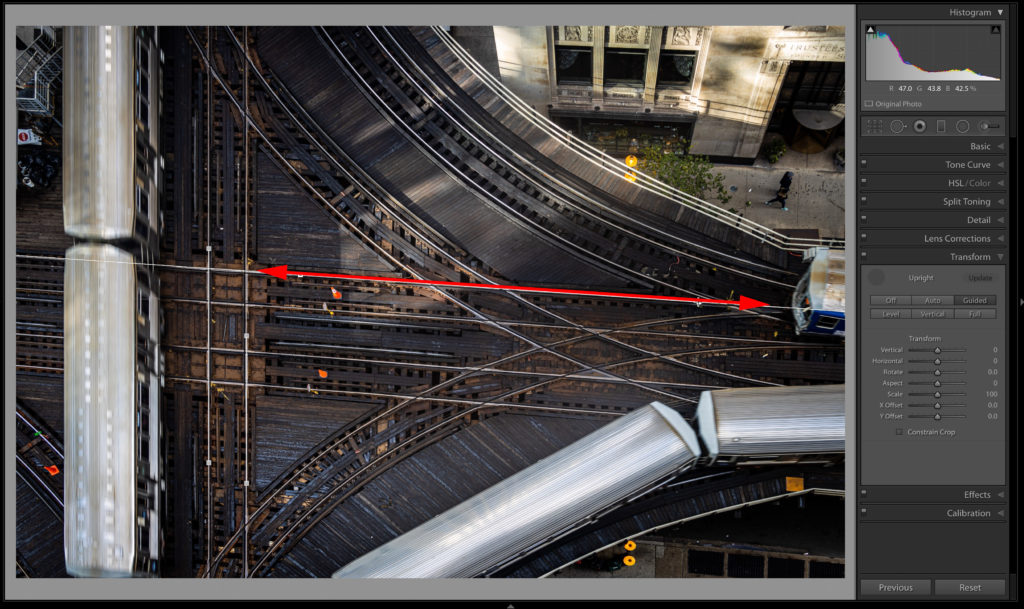
STEP ONE: Here’s the shot, taken at the angle you see in the behind-the-scenes shot. To straighten the photo, go to the Transform panel and click on the Guide Button. When you click on this, nothing happens because there are two other steps. One is to click on the Guided Upright Tool (shown circled above), and then next is to drag it out over areas you want to be straightened (we’ll do that in the next step).
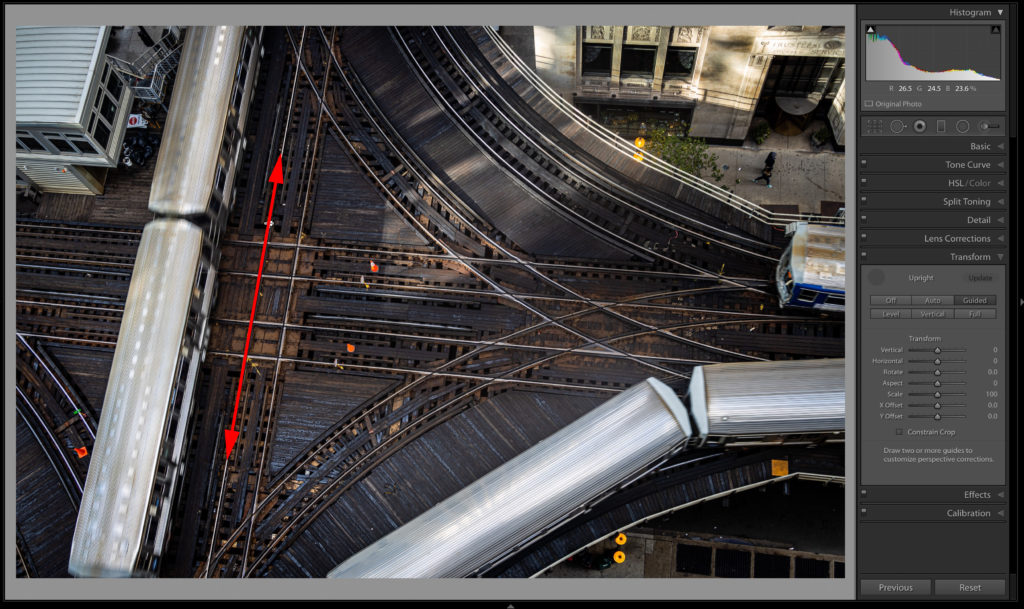
STEP TWO: I’m going to click and drag out the tool along the left track (I added a red two-headed arrow here to show you where I’m dragging. The tool itself lays down a white line, but it was hard to see it in this small capture, so I added the red line just as a visual. When you use this tool, the lines will be white. When you drag out the first line, nothing happens yet either.
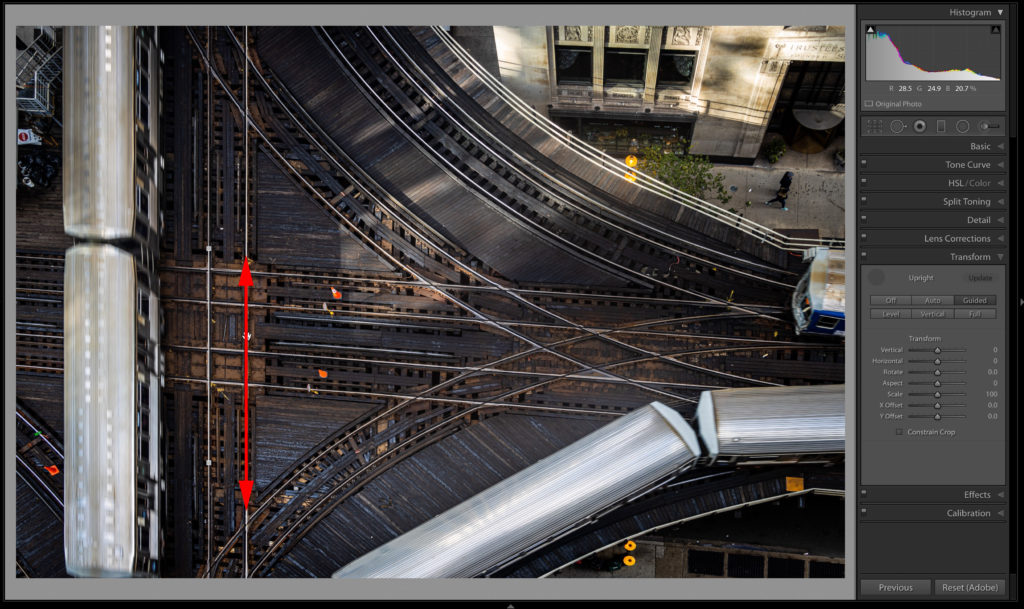
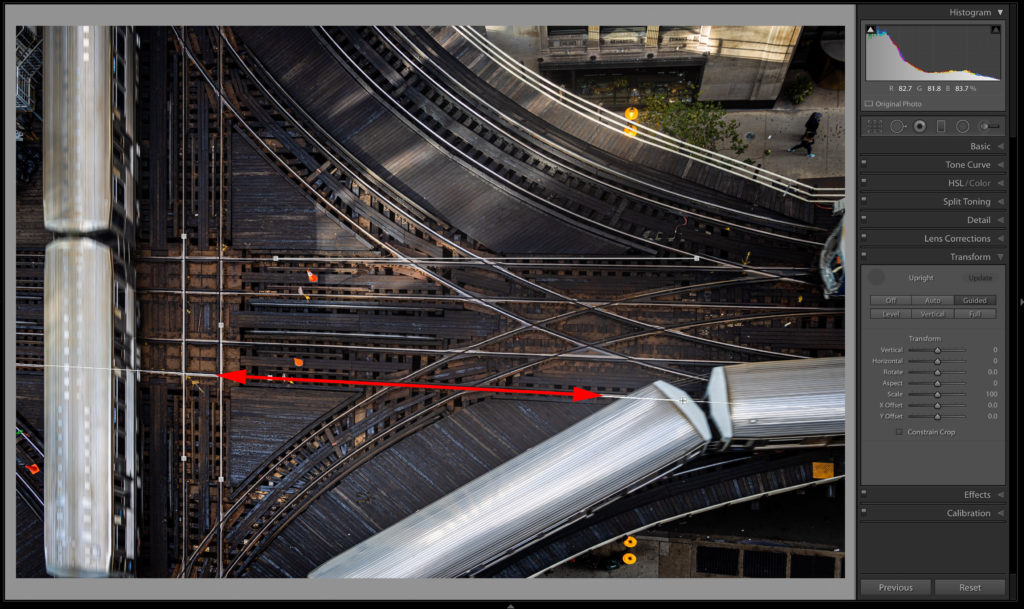
STEP THREE: When you draw the 2nd Guide Edit line out (as seen here, where I dragged along the track on the right of my first line) you can see the image starts to straighten out. Depending on the image, you might only need two lines, but in this case, the image still looks skewed (the tracks look like they’re leaning downward from right to left through the horizontal middle of the image).
STEP FOUR: Here’s the third line — right down the tracks in the center.
STEP FIVE: I dragged the fourth and final line down the opposite tack and you can see, it’s pretty close now, but look up at the top center track and you can see that when the fourth Guided Edit line did its thing to straighten out the image, it make the top centerline off by a little. Easily fixed because you can reposition the lines once they’re in place by clicking and dragging.
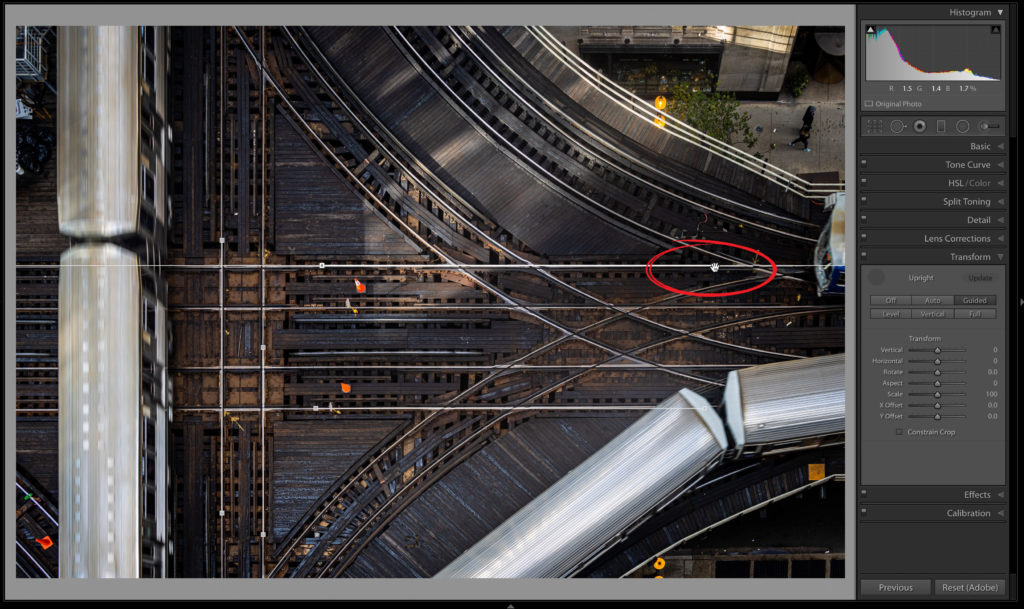
STEP SIX: I dragged the little repositioning dot on the top line, (not quite sure that’s its real name) shown circled above in red and dragged it upward so it’s straight along the track again, and the image readjusts (as you can see here) and now it’s nice and straight.
Have a great week, everybody!
–Scott


Step One seems to have been deleted from the post.
Holy cow – thanks for catching that. I fixed it. Doh!
I love my EOS R’s tilty screen.
Thanks for the tip- I didn’t know you could drag those points around. This will be very useful
You are very welcome, Lisa (and that tilty screen is one of my favorites features, too!). 🙂