
This is another one of the questions asked during our Lightroom Conference (which we’ll get to below). It brought up another question: If you were to create a preset that applied an Auto Adjustment, would it use the same Auto Adjustment to every image (moving the sliders to the exact locations for every shot), or would it analyze each image separately as it imports them, so each image would be Auto corrected individually, even if they were imported as a group of images?
Note: If you’re wincing at the thought of using Auto at all, I will tell you that today it’s vastly better than it has ever been. It’s actually now quite useable as a starting place to being your editing, and for some folks, it will look good enough as an ending point, too (just depends on the image and the person editing it). Anyway, thought you’d want to know that Adobe has really worked to improve the Auto Feature big time.
Let’s answer both questions:
First, how to create an “Auto Preset,” which is a bit different than you might think because usually, you would open an image, make all your edits, then save those edits as a preset. If you opened a picture, hit the Auto button, and then made a preset, it would apply those same sliders in the same position to every photo, which is not what we want. To create an Auto Settings preset that works, you don’t do anything to your image (leave it untouched), then follow these steps:
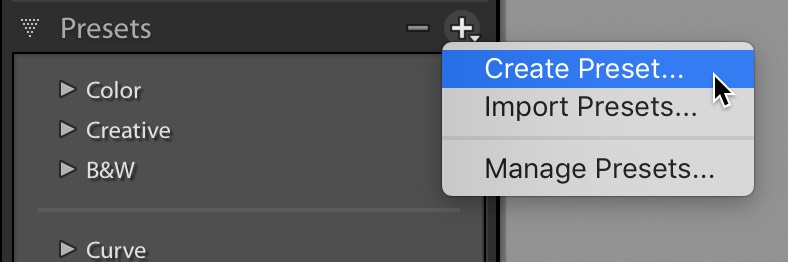
STEP ONE: Don’t make any edits to your image; leave everything at zero and just head straight over to the Presets panel and choose ‘Create Preset’ as shown here).
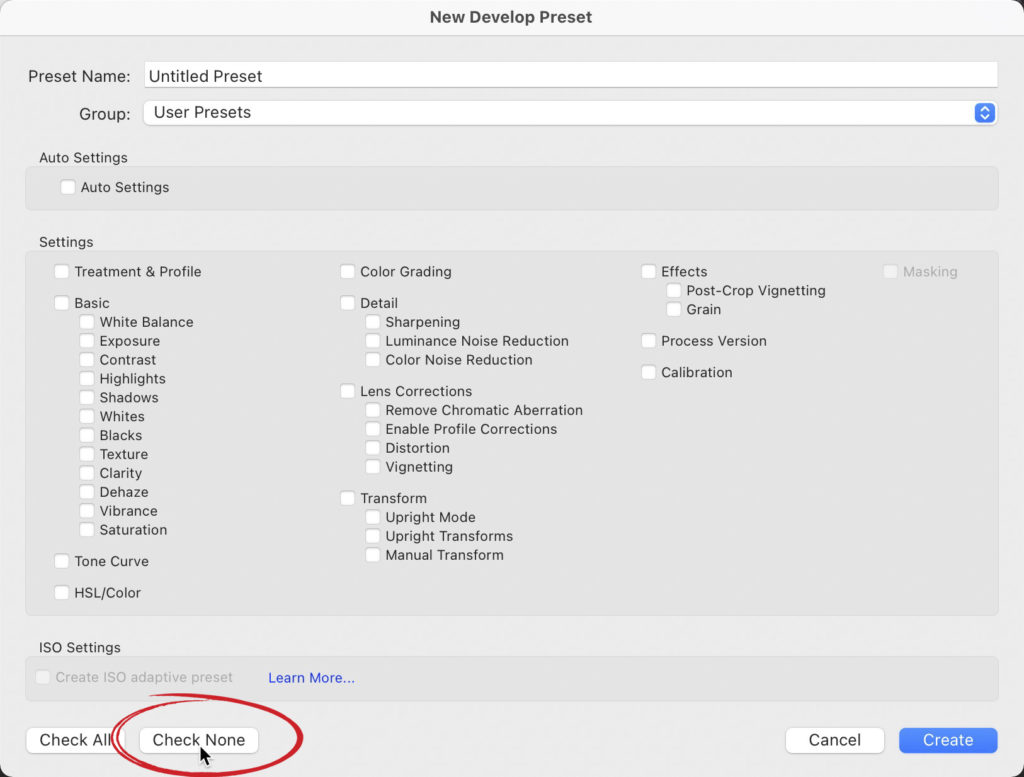
STEP TWO: When the New Preset window appears (seen above), click the ‘Check None’ button (shown circled above in red) to deselect all the different Settings checkboxes.
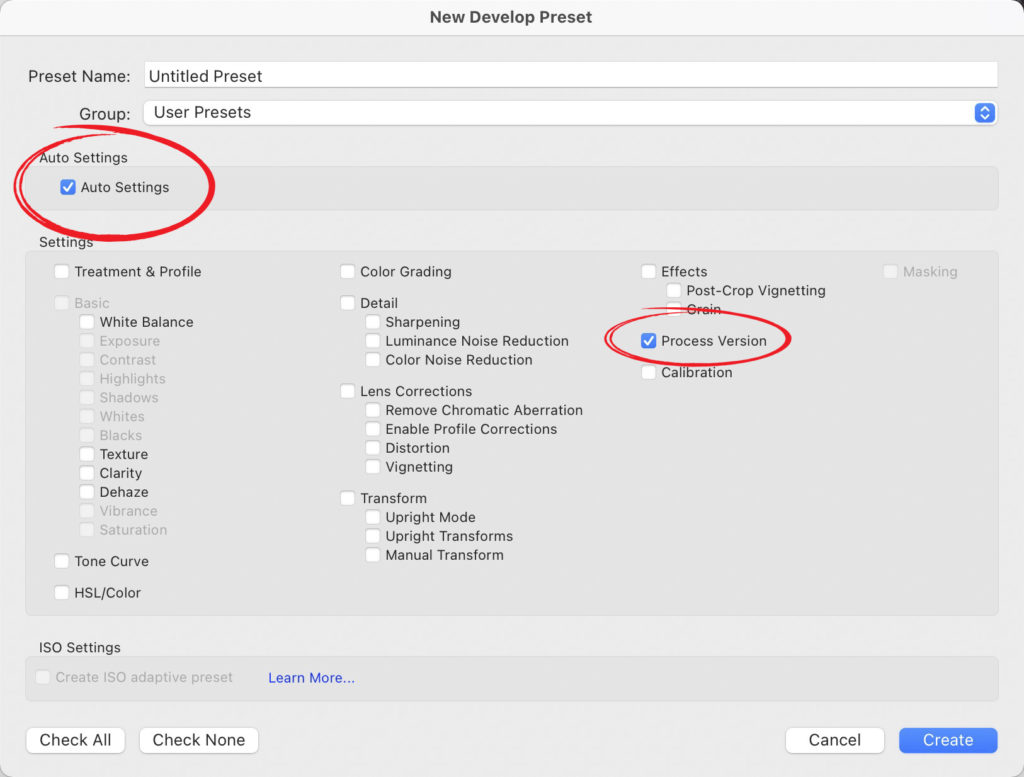
STEP THREE: Now, in the Auto Settings section up in the top third of this window, turn on the checkbox for Auto Settings (as seen here). Also, you’ll notice that down in the regular Settings section; there is still one checkbox checked for ‘Process Version.’ Leave that turned on, so you’re using the most recent Lightroom math behind the scenes. Now click the Create button, and your preset is done. In the next step, let’s set it up to apply this preset automatically when you import any images.
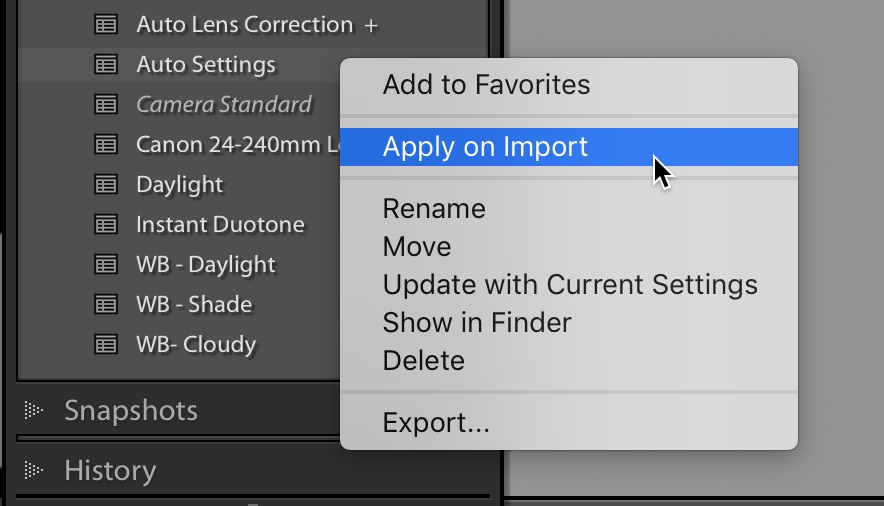
STEP FOUR: Go to the Presets panel and right-click directly on your Auto Settings preset, and from the pop-up menu that appears, choose ‘Apply on Import’ (as shown here), and you’re good to go.
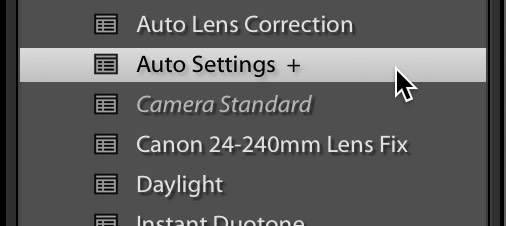
NOTE: After choosing this preset as your ‘Apply on Import’ choice, it adds a + (plus sign) after the preset’s name (as seen above) to let you know that preset has been designated as the Apply on Import preset. (NOTE: If you ever want to turn this feature off, just right-click on it and choose “Apply on Import” again).
Now the 2nd part of this question…
…which is, will it apply the same settings to each image, or will it analyze each image separately and apply the appropriate Auto Correction for each image? Luckily, it’s “Smart” and will correct each image individually (though it’s amazingly fast at it).
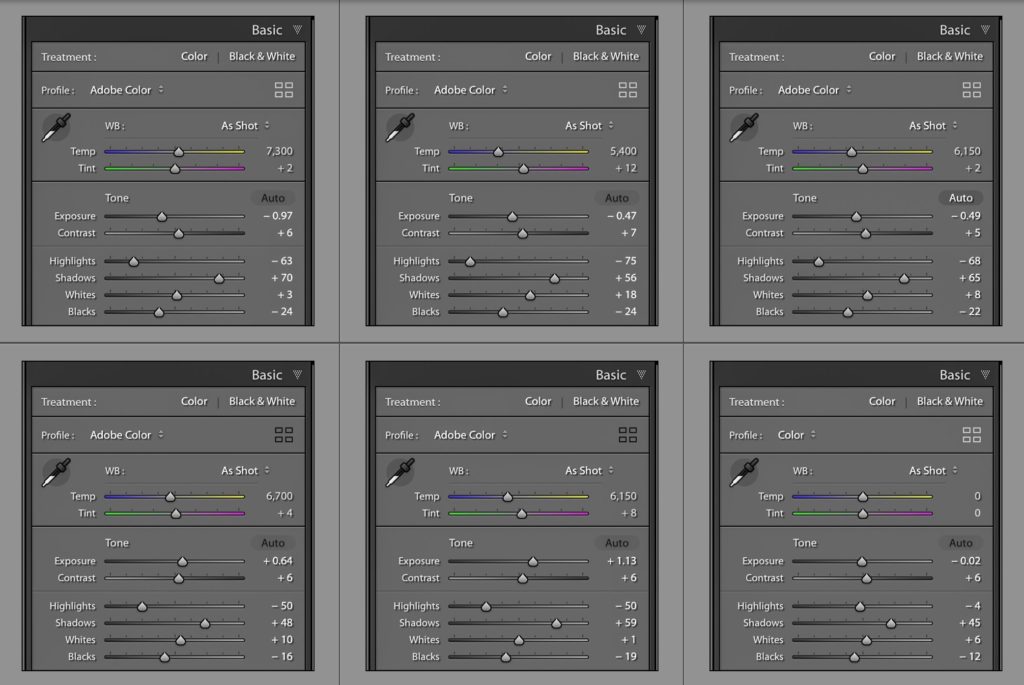
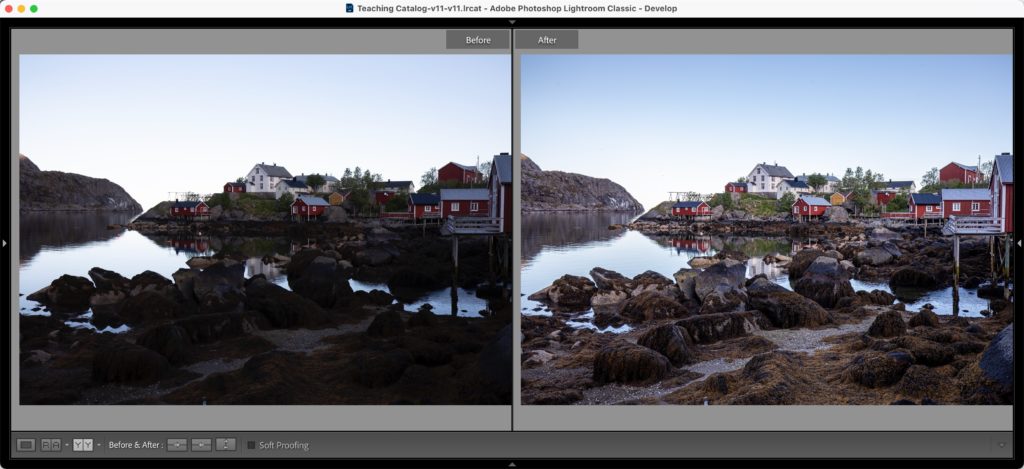
Above: I imported six different images at the same time, all very different in tone, subject, etc., and applied the Auto Import preset as they were imported, and I took a capture of each of the images after the Auto Settings feature had been applied, and you can see that each of the photos has a very different Auto Correction applied to it. So, yes, it does analyze each image on its own and applies the correction, even when you import a group of images.
I hope you found that helpful. Keep being safe out there — here’s wishing you good health and a super Monday. 🙂
-Scott
P.S. Don’t forget, B&H Photo’s OPTIC 2022 outdoor, travel, and wildlife conference kicks off in just a few days – you can attend this multi-day event either in person, or all online, for FREE – just RSVP to let ’em know you’re attending, and you’re all set, ’cause registration is free, free, free!!! Here’s the link.


Hi Scott,
I also have the same question that Alec Dann & Frank Doyle asked above: “Why the Auto option when applied on in Import is different from the one in Develop?”
I am not an expert photograph so I don’t have either the equipment or trained eyes to judge in which of the two cases Auto works better.
Do you have any thoughts on this?
Thanks!
Because in Develop it uses the full raw data, but in Library/import it uses the preview. It is a tradeoff for performance’s sake when not in Develop.
I have followed your advice and have been using Auto Import as a start to my process. Can I add “Lens Correction” to this process ?
Sure, just create a preset that contains those settings and then apply it on import.
Scott,
I’ve noticed that the Auto option when applied on in Import is different from the one in Develop. For example, I have an import preset which includes the Auto option. When I view that image later in Develop, I can click the Auto button and see changes in the sliders. This also occurs if I use the Auto option in Library > Quick Develop and then change to Develop and apply Auto
Yes, this is what I would like to know…why is there a difference?
Because in Develop it uses the full raw data, but in Library/import it uses the preview. It is a tradeoff for performance sake when not in Develop.
Does this work the same way for the “auto” button under Transform? I use that all the time, but obviously need each image evaluated individually.
Scott, how would you do the same thing in Adobe Camera Raw.
Thanks,
Bernard
You don’t import into Camera Raw like you do Lightroom – there’s no Import window or function for applying images on import, so….I’m not sure of a way to do that. Sorry ’bout that.
In Camera RAW preferences there is an option to specify a preset to be applied when opening new RAW files so that would appear to offer the same functionality as applying on Import in Lightroom. Can specify different presets to apply to different cameras, e.g. to use correct Linear RAW profile.
Under what circumstances would you want to turn this off e.g. stacked images, panos etc?
Hi, Cliff. Even if you apply these corrections on import, they turn off automatically when you go to do a Pano or HDR – however, there is an “Apply Auto Corrections” checkbox in both of those preview windows so you can turn it on there, and it will apply it to the complied Pano or HDR.