
Exploring the New Lens Blur Panel
One of the brand-new features included in the latest version of Lightroom Classic, Lightroom (even mobile), and Camera Raw is the Lens Blur panel. You’ll notice right away that it has an Early Access label, which means you can think of it as a beta version feature that Adobe felt was close enough to being fully baked to include it for us to utilize. It is important to keep this in mind as this tool remains a work in progress. There’s also an opportunity to provide feedback to Adobe to help this tool improve simply by clicking the “share feedback” link within the panel. While the tool is available on mobile, I’ll be demonstrating the experience in Lightroom for desktop as it looks and works the same as it does in Lightroom Classic and Camera Raw.
[Editor’s note: It seemed fitting that my last blog post of the year should be my last column in Photoshop User magazine, which ceased publication with the December issue. I’m incredibly grateful for the opportunity to have written my Under the Loupe column for so many years. – Rob]
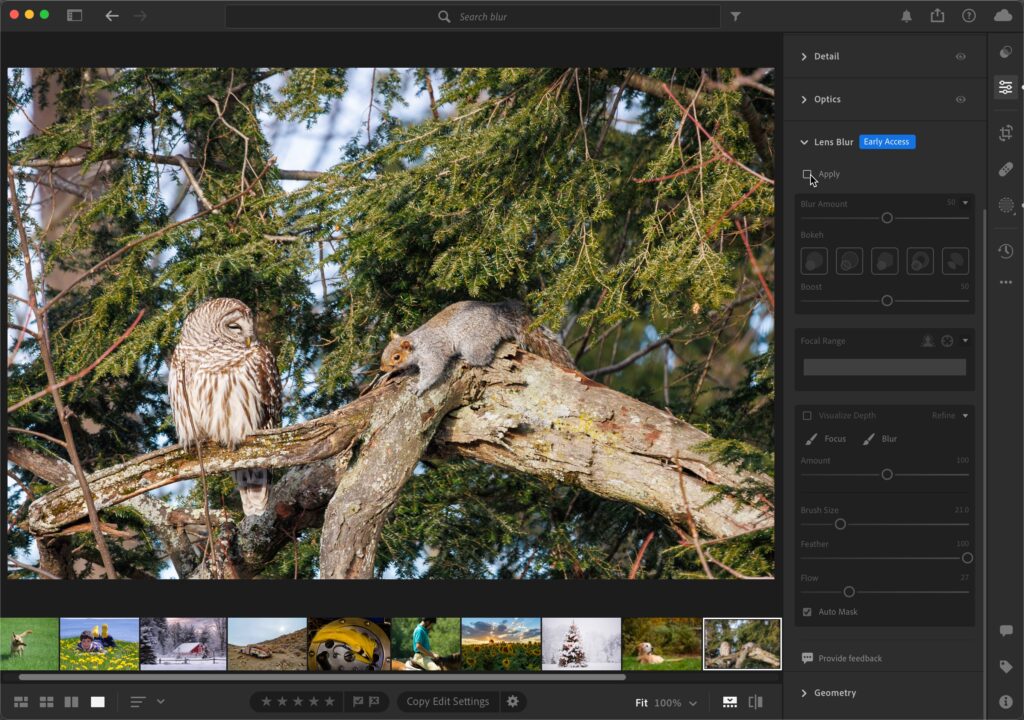
When you first expand the panel, you’ll see everything is grayed out until you check the box next to Apply, which brings it to life and applies the settings to the selected photo.
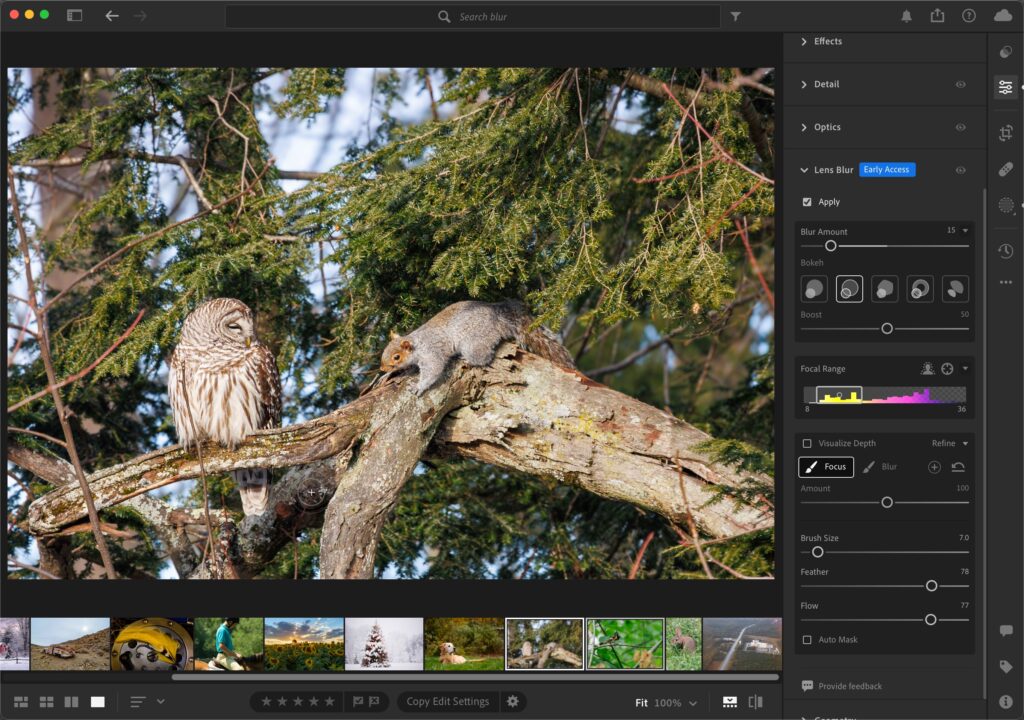
By default, it uses AI to create a depth map of the photo and applies the default blur amount of 50. Having a photo with a clearly distinguishable subject will improve the quality of the depth map it creates. With this photo, I was impressed with how well it detected the subjects and even the default settings helped to separate them from the background. This tool is no replacement for in-camera depth of field blur and won’t replace any of my fast lenses, but in this case the photo was shot with the Canon RF600mm f/11 lens, so I couldn’t open the aperture any wider. My goal is to use Lens Blur to help the owl and squirrel stand out more from the busy background, without it looking too fake (obviously in the eye of the beholder).
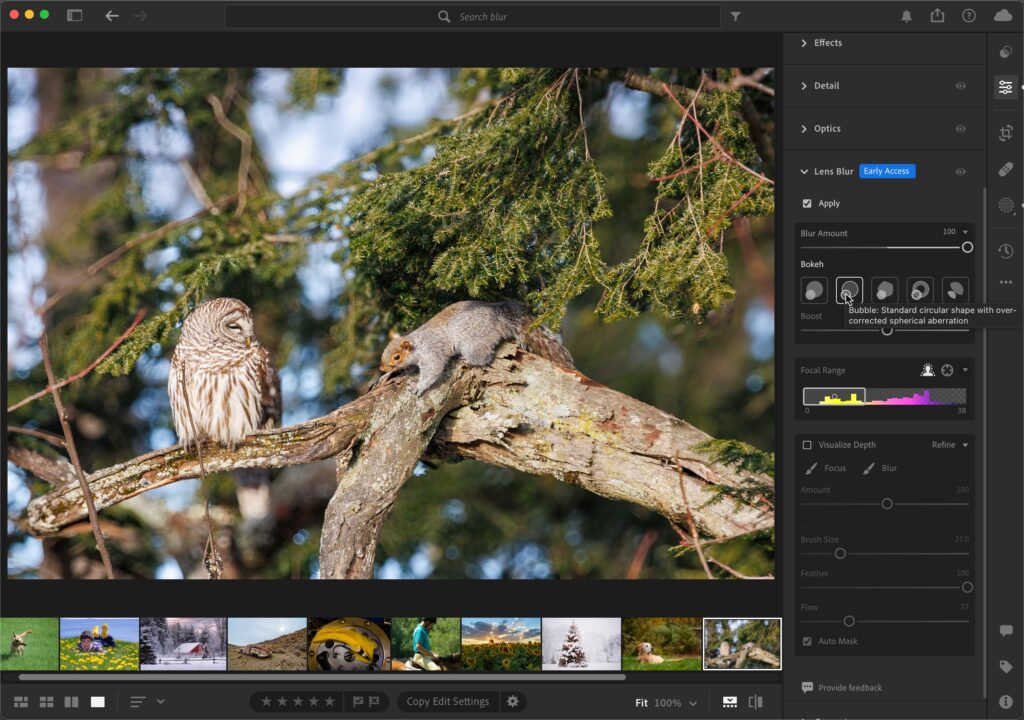
Let’s get oriented to the panel. The Blur Amount slider does exactly what it says, and if you take it to 100, you’ll see we’re heading into fake looking blur territory. Below that slider are five different bokeh options, and hovering your cursor over each will reveal a pop-up with its name and description. The first is the most normal looking, but definitely worth clicking each one and exploring how each affects the photo. A photo with out of focus light sources will really show the differences between each option. If your photo does contain out of focus light sources (imagine a string of holiday lights in the background), then the Boost slider can be used to adjust the brightness of those light sources (the effect is very subtle on a photo like this).
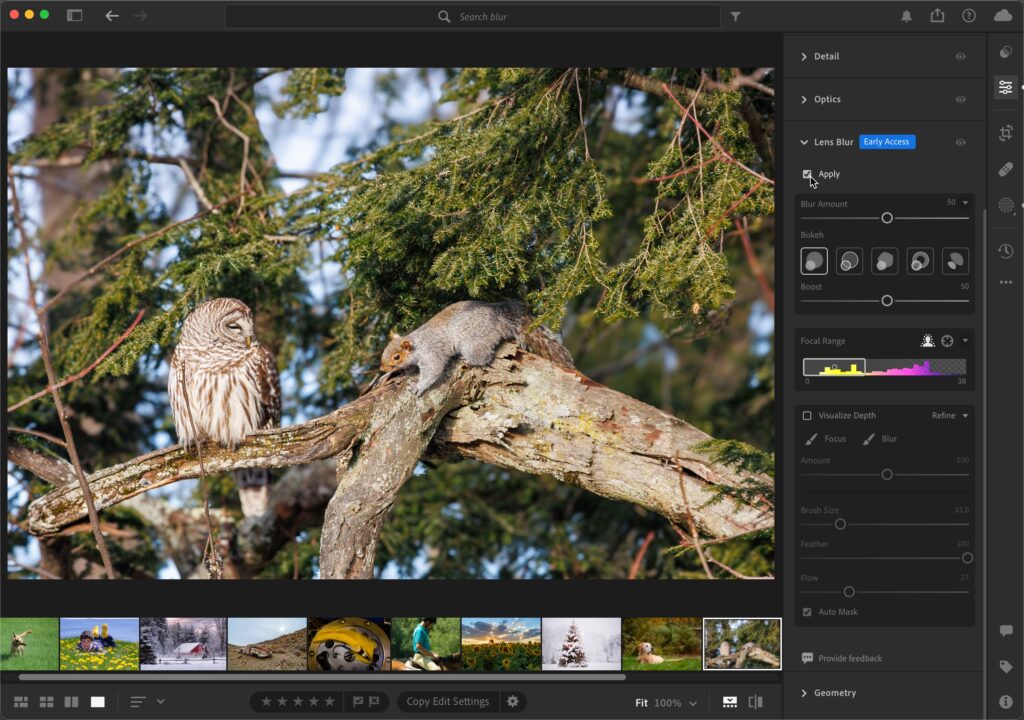
For some photos, simply adjusting the desired Blur Amount and Bokeh option may be all you need to get the desired effect. If you want to fine tune things further or if the AI generated depth map doesn’t quite work for your photo, you can manually select what is in focus using the Focal Range controls. At the top of the Focal Range pane are icons for the AI generated depth map and a crosshair icon that allows you to click (or click-drag) over the region of the photo you want to be in focus. I think the AI did a good job of finding the desired subject, but there are some areas I want to refine, so I’ll leave the AI depth map and explore how I can modify what is in focus and what is blurred.
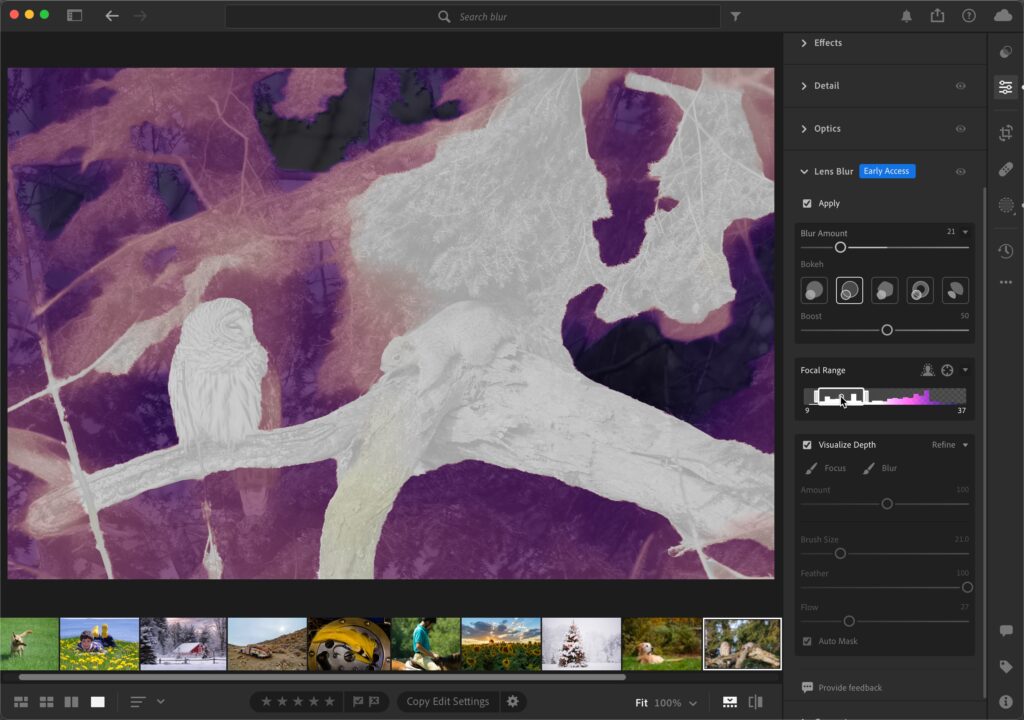
To really see how the depth map is working you’ll want to check the Visualize Depth box, which displays a color-coded depth map overlay on the photo. The warmer the color the nearer to the camera while the cooler the color the further away. You can see these are the colors displayed in the Focal Range pane as well. To visualize what exactly is in focus, keep the checkbox checked, then click on the handle within Focal Range. Dragging left or right will change what is in focus and you’ll see the in-focus area of the photo displayed in white. You can also reduce or increase the size of the rectangle to further refine what is in focus and what is blurred.
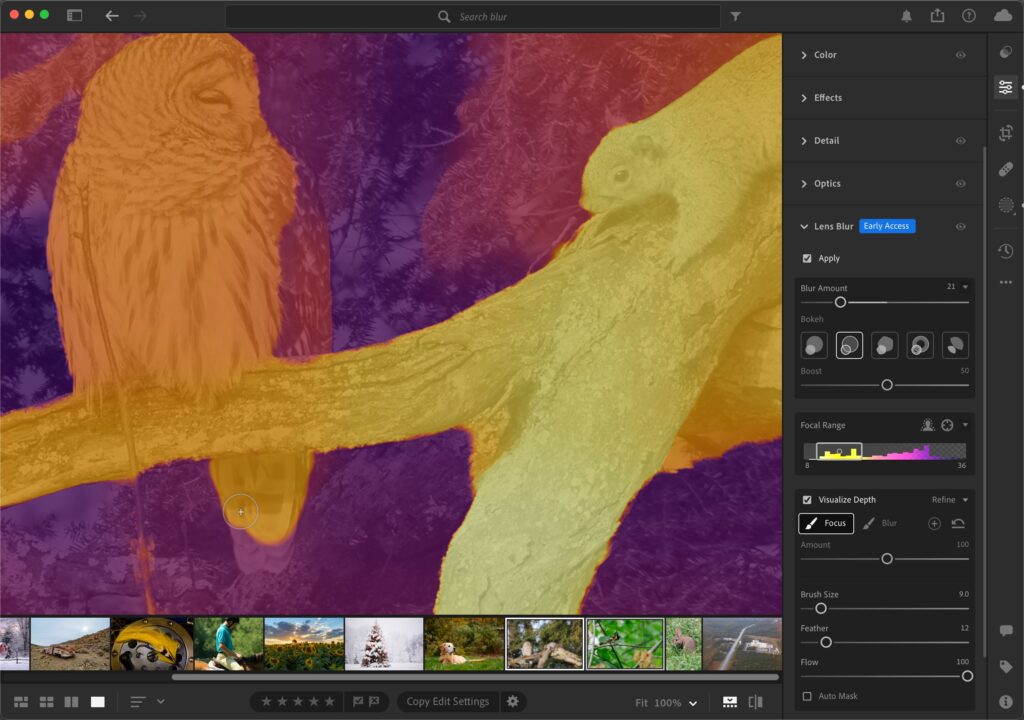
For this photo, I tried to reduce the size of the in-focus area as much as possible to ensure the owl and squirrel were in focus along with the branch they are on, but there were still some areas of the owl that remain slightly out of focus, and this is where the Focus and Blur brushes at the bottom of the panel come into play. The Focus brush allows for painting in areas that we want to be in focus, while the Blur brush allows for painting in areas that we want more blurred. The Size, Feather, and Flow sliders work just the same as they do for the brush in the Masking panel. There is even an Auto Mask checkbox that works great when brushing over an object with clear edges between it and the adjacent area. In this case, I’ll select the Focus brush, reduce its size (the left and right bracket keys also adjust brush size here) to fit within the area of the owl not fully in focus, and paint over its back and tail to include those areas in focus.
You can paint with the overlay on or off as desired. Use the Amount slider to blend your adjusted area in with the rest of the photo. Zooming into 100% shows some areas along in focus objects that need help along the edges, such as the branch coming up in front of the owl. Switching to the Blur brush, I can fine tune those edges to clean that up and match the blur along the edge to the background’s level of blur. Just as when brushing in Masking, hold the spacebar and click on the image to zoom in/out, or to click and pan around.
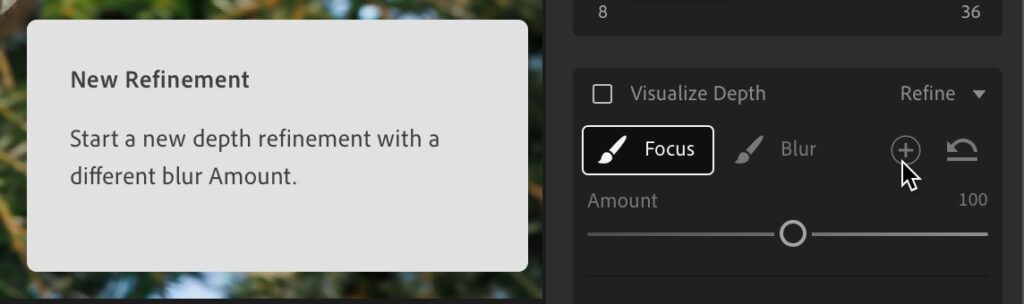
When done brushing with either tool, use the Amount slider to fine tune the look to all the areas you brushed and blend with the rest of the photo. If you want to make a new brush adjustment, click the + sign next to the brushes to begin a new adjustment with a different amount setting. In this case I wanted to ease the transition of blur on the bottom branch as it heads into the background below the animals. Now, I know this is not the same as true lens blur done in-camera, but I do like having the ability to make the subjects stand out of a busy background in a subtle way with quite a bit of control. Be sure to use the eye icon on the Lens Blur panel as you go to see the photo without Lens Blur for comparison.
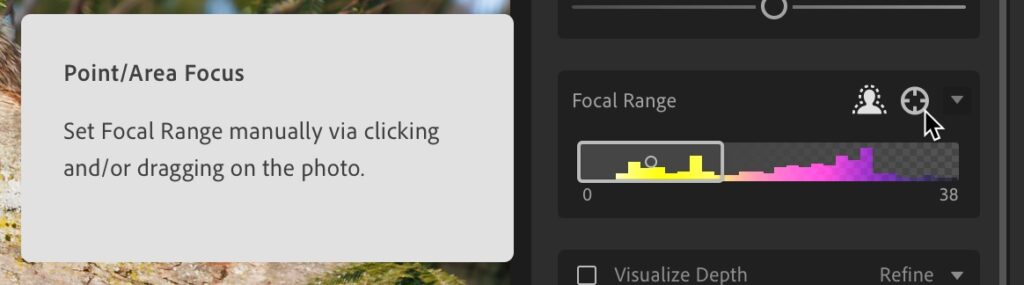
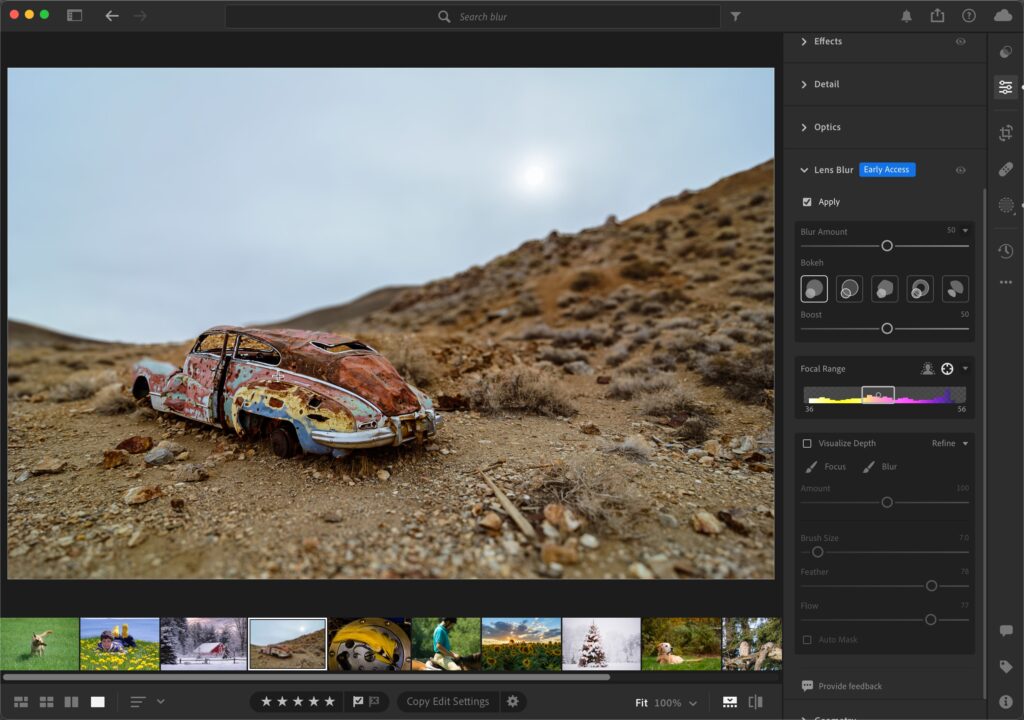
For a more exaggerated example, I’ll take a photo with a very wide depth of field and give it a strong blur effect to simulate a shallow depth of field. After letting Lightroom create its AI depth map I’ll grab the Point/Area Focus tool to manually click on the car to tighten the area of focus even more.
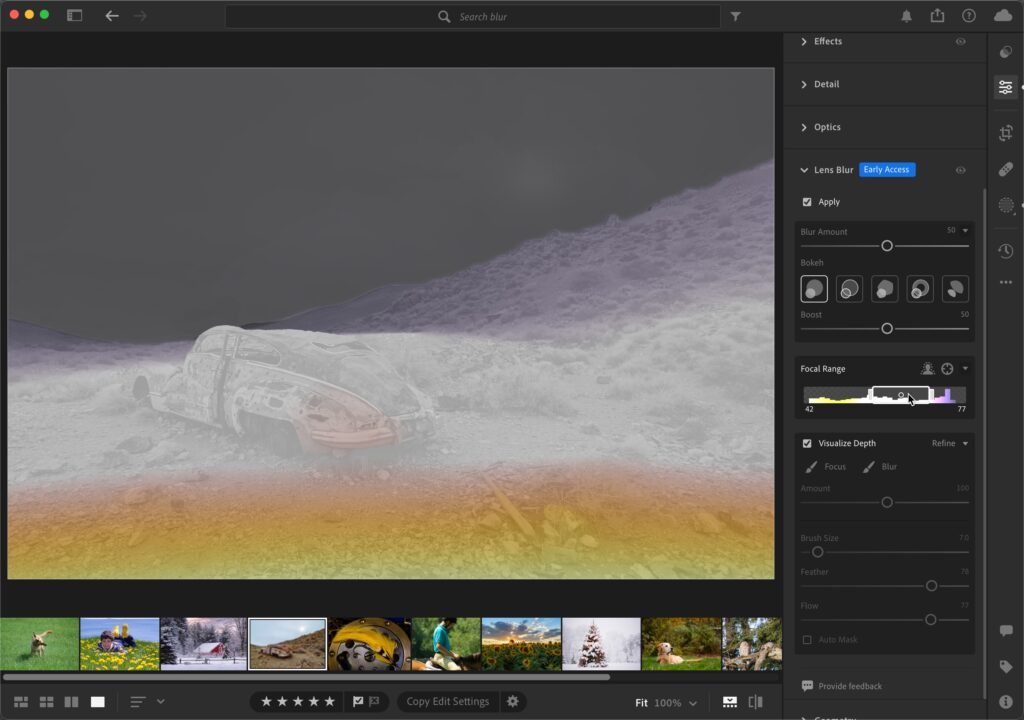
I’ll turn on Visualize Depth, and further refine the area I want to be in focus around the car.
I’ve got the area dialed in, but due to the car windows we can see into the background, but those areas are still in focus. Grabbing the Blur brush, I can brush over the areas within the windows to match the blur with the background.
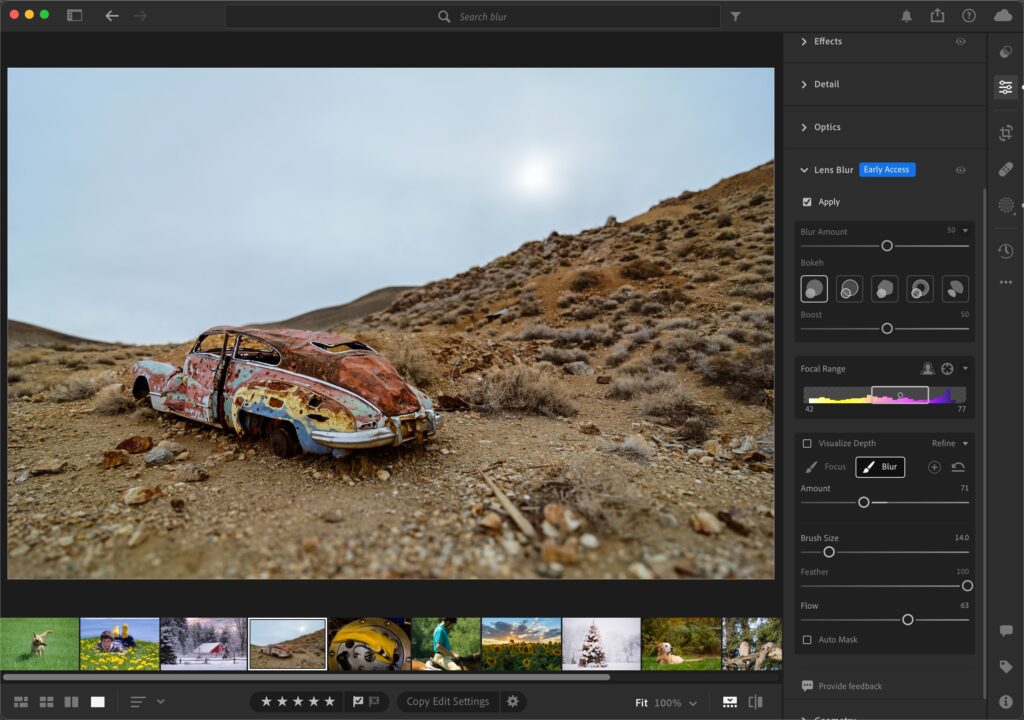
With a new Blur brush, using a lower Flow setting to slowly build up the effect, I can paint on the hill behind the car to separate it from the car with a more subtle blur. If you accidentally paint over the wrong area, you can hold the Option (PC: Alt) key to flip the brush to an eraser to erase any errant strokes. By using a lower flow and multiple brush instances, you can build up layers of blur. In an otherworldly image like this, I think the added blur can enhance its look (again, subject to taste), and the Lens Blur tool provides a pretty high degree of control even in its Early Access state. I look forward to seeing how this tool evolves and how it can help us achieve a final look beyond what our cameras and lenses can do alone.
As a final note I’d like to thank Scott Kelby, Chris Main, Kim Doty, Barbara Thompson, Jessica Maldonado, Margie Rosenstien, and Angela Naymick, along with all the rest of the behind-the-scenes team that have made Photoshop User magazine so wonderful for so many years. I’m sorry to see this is the final issue, but it has been an honor and a privilege to have been able to write for it since Lightroom first came on the scene. Thank you to all who have read these issues, and I hope to see you still in the KelbyOne community and LightroomKillerTips.com. – Rob

Thanks for the great articles Rob! I learnt a lot from you.
Always look forward to your articles Rob. Hope to see you continue here with Scott.
Thanks, Matt! I hope so too!