
Range Mask is an addition to the local adjustment tools (Adjustment Brush, Graduated Filter, and Radial Filter) in Lightroom Classic (and Camera Raw 10.x) that provides a way to fine-tune the area being adjusted by either color or luminance values within the photo, or in some cases depth map information (currently limited to HEIC files captured on dual lens iPhones). This means that you’ll only see the Range Mask option after you’ve applied one of the three local adjustments, and then scrolled to the bottom of the local adjustment panel.
Heads Up
Note that your photo must also be set to at least Process Version 4 (in the Camera Calibration panel) to use Range Mask. At the time of this writing, all newly imported photos into Lightroom Classic will be Version 5 by default, and any older photos from an updated catalog will automatically upgrade to Version 5 as soon as you make a new adjustment in Develop (except photos where Auto Mask was used previously, which have to be manually updated). That said, check out this previous post I wrote about a Process Version situation you might encounter, and how to resolve it.
Over the course of my next few posts I want to dive a bit deeper into each Range Mask option to learn how to get the most out of these in our workflow. This week we’ll focus on the Luminance option.
Luminance
So far, the most common way I’ve found myself using Range Mask is based on luminance values. Let’s go through some examples to see how this can be useful in your workflow.
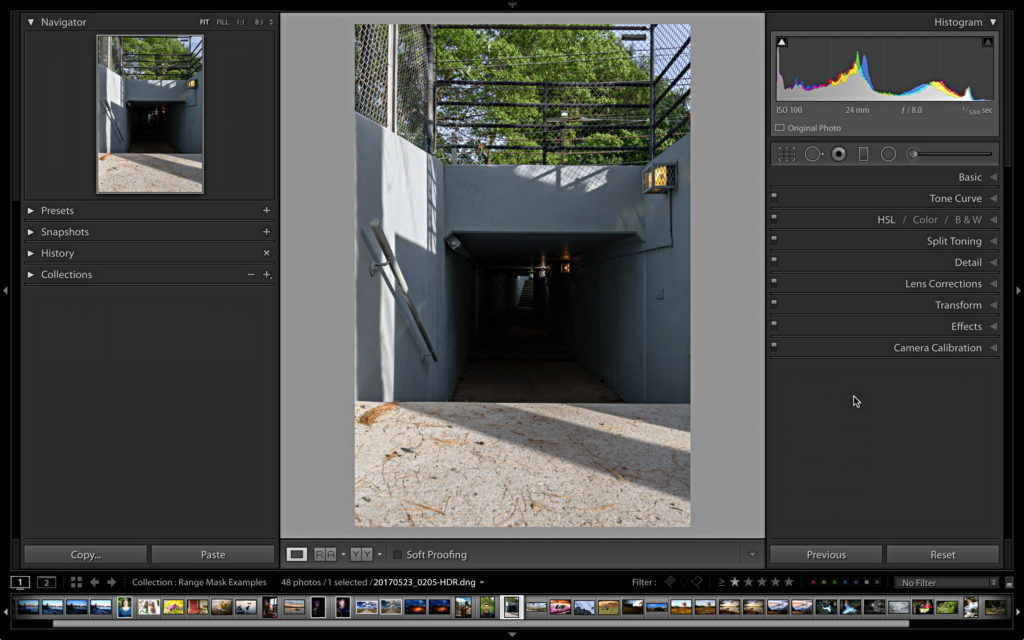
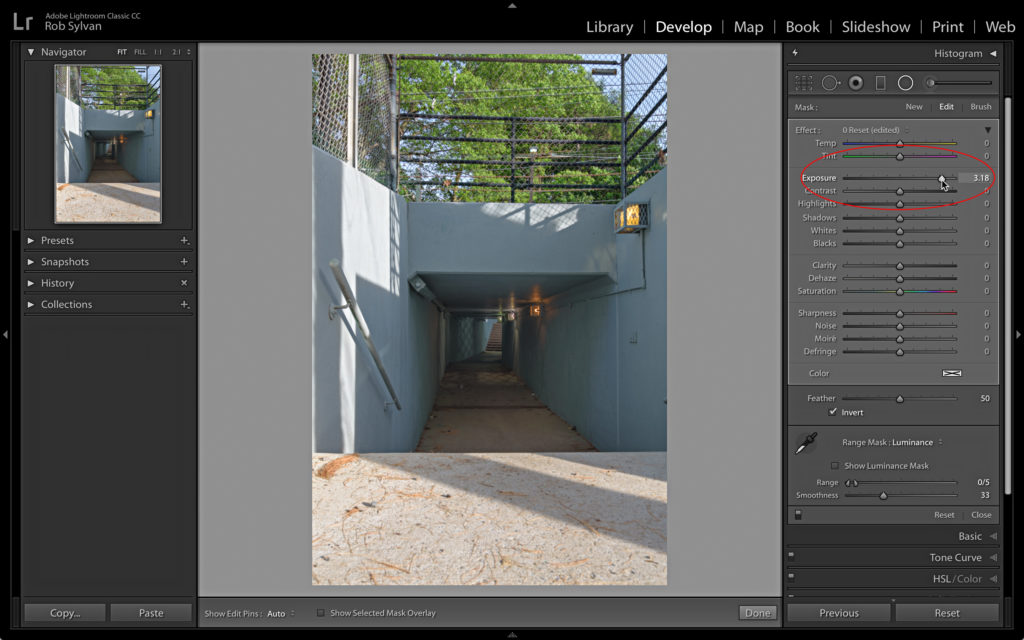
Step One: To start, I have a photo of a pedestrian tunnel, and although there are lights in the tunnel, it’s still pretty dark in there. I want to brighten things up, but I want to avoid blowing out the lights along the ceiling and the entrance on the other side. A Radial Filter with a luminance mask makes the job much easier.
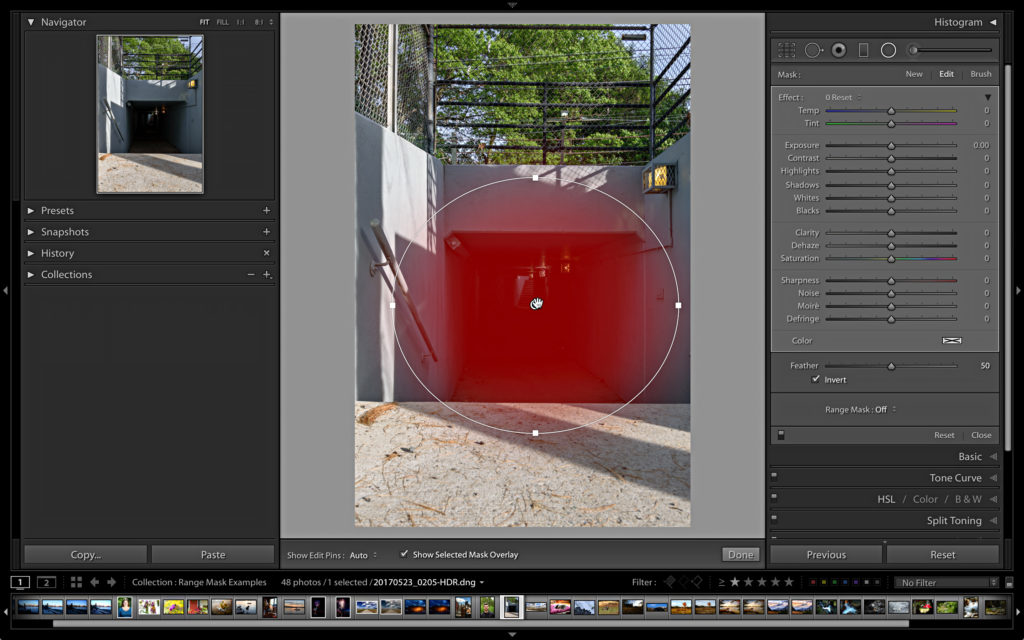
Step Two: I drew the Radial Filter (Shift-M) large enough to completely cover the interior of the tunnel (I’m only concerned about covering the darkest area). Enabling the Mask Overlay by pressing the O key is helpful to see what area the mask is affecting. If a red mask isn’t good for the image you’re adjusting, press Shift-O to cycle through green, black, and white overlays for a better match.
Step Three: I’ll use the Range Mask set to Luminance to fine-tune the mask to affect only the darkest tones. To do this, set the Range Mask drop-down menu to Luminance, which activates the Luminance controls. By default, the entire range of tones is included in the mask. Looking at the Range slider, there’s a knob on the left side, which represents the dark tones, and a knob on the right side, which represents light tones.
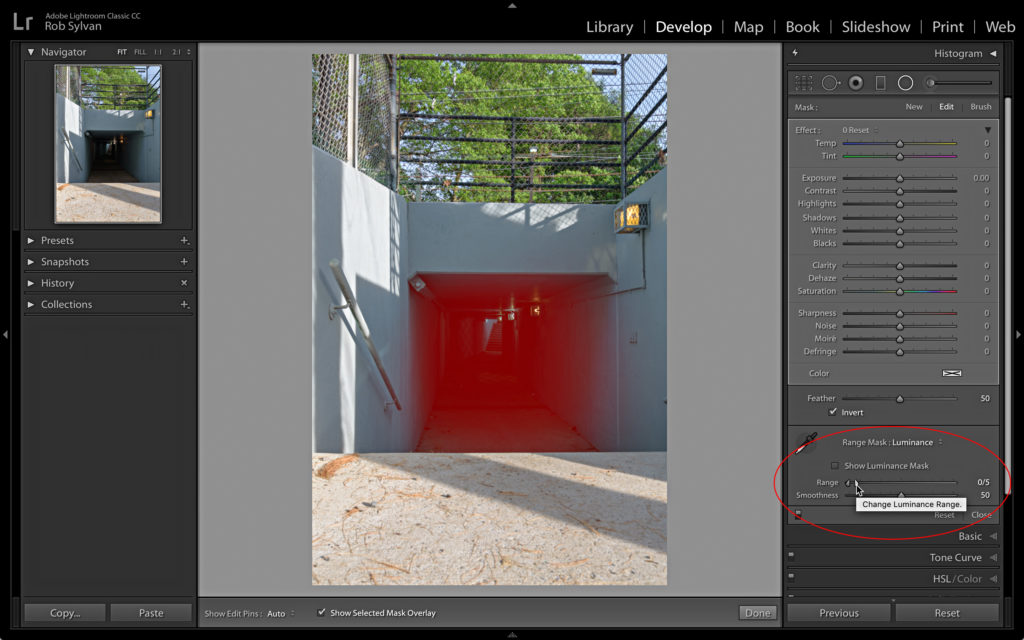
If you want to limit the range of tones to just the darkest tones, drag the right-hand knob all the way to the left. If you want to limit the range of tones to the lightest tones, drag the left-hand knob all the way to the right. If you want only the midtones, drag both handles toward the center. By leaving the red Mask Overlay enabled, as you drag the right-hand knob to the left as far as it can go, the red Mask Overlay covers only the darkest tones within the area of your Radial Filter.
A new(ish) addition is the Luminance Range Selector tool (looks like an eye dropper) that you can also use to select the initial range of tones. The Show Luminance Mask checkbox was also added to provide an additional means to see the areas affected by the range mask.
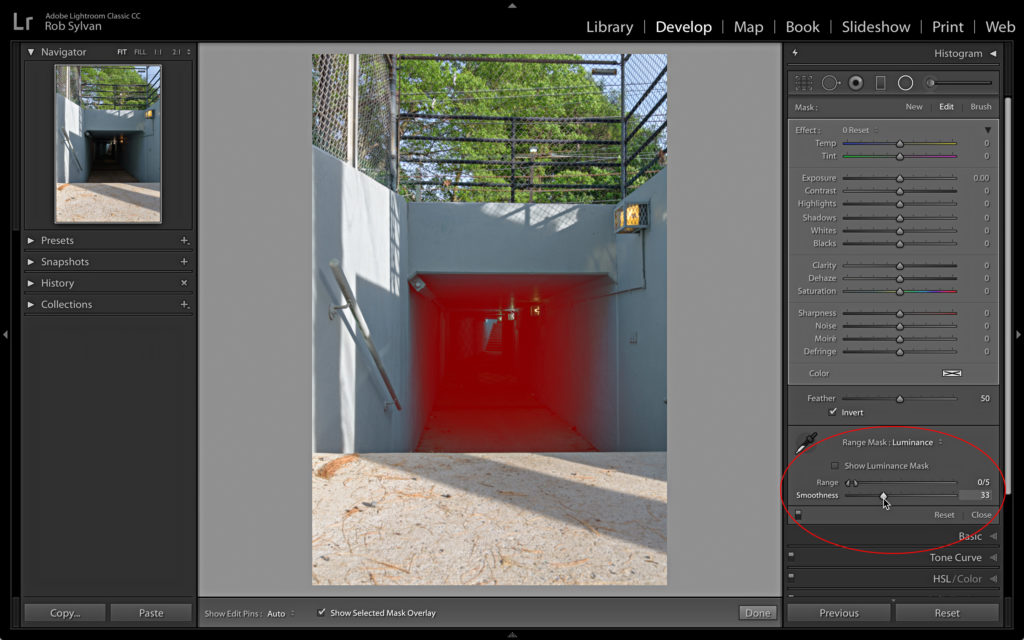
Step Four: You can fine-tune this even further with the Smoothness slider, which controls how the affected area blends or falls off into the unaffected area. By default, Smoothness is set to 50. Increasing Smoothness extends the affected area further out into the photo. Decreasing Smoothness contracts the fall-off area. Some smoothness is needed to avoid abrupt transitions, so I only slightly decreased the value to 33.
Step Five: With the range of my Radial Filter limited by the bounds of the filter and by the Luminance Range Mask, I can turn off the Mask Overlay and set about adjusting the tunnel’s interior. I ended up increasing Exposure over 3 stops, which would have completely blown out the lights if I hadn’t been able to exclude them from the Radial Filter.
Come back next week and we’ll dive into the color option. See you then!
In addition to the range and smoothness sliders, I’ve got an eyedropper tool option when using the range mask option in luminance mask mode. I’m on Lightroom 8,1, and I see it with the brush, gradient and radial gradient tools. Anybody else seeing it?
Yes, that was added to Luminance Range Mask after I wrote that. I’ll update the post, but all it does is provide an alternative means to select the initial range of luminance values, which you can then fine tune with the sliders.
Updated to include. Thanks, Chris!
Very nice. Thanks, Rob!
Thanks for this! I have been using the range mask to darken and add contrast to bland skies. Maybe I need to increase the smoothness? If I darken too much, I seem to get a halo around the other elements next to the light areas I’m darkening. Any tips on avoiding this? Am I darkening too much, or is this a combination of using the range mask and something else I am doing?
Appreciate the post.
nice tuto on a difficult case.
I would be interested in tutos about :
– the color range slider (sky, flowers,…)
– how using linear gradient tool outside image to apply to the whole image
and then use brush in erase mode+color range slider… to make local HSL
great one!! I have to do this when I lighten the shadows on a face inside a (football, baseball, lacrosse) helmet.