
Awhile back I wrote about how you can create a custom Raw Default preset and configure it to be your starting point for all newly imported photos. I do this myself, and occasionally update that preset as my tastes, needs, or curiosity dictate. One additional preset I’ve found useful on occasion is having a preset that just zeroes everything out.
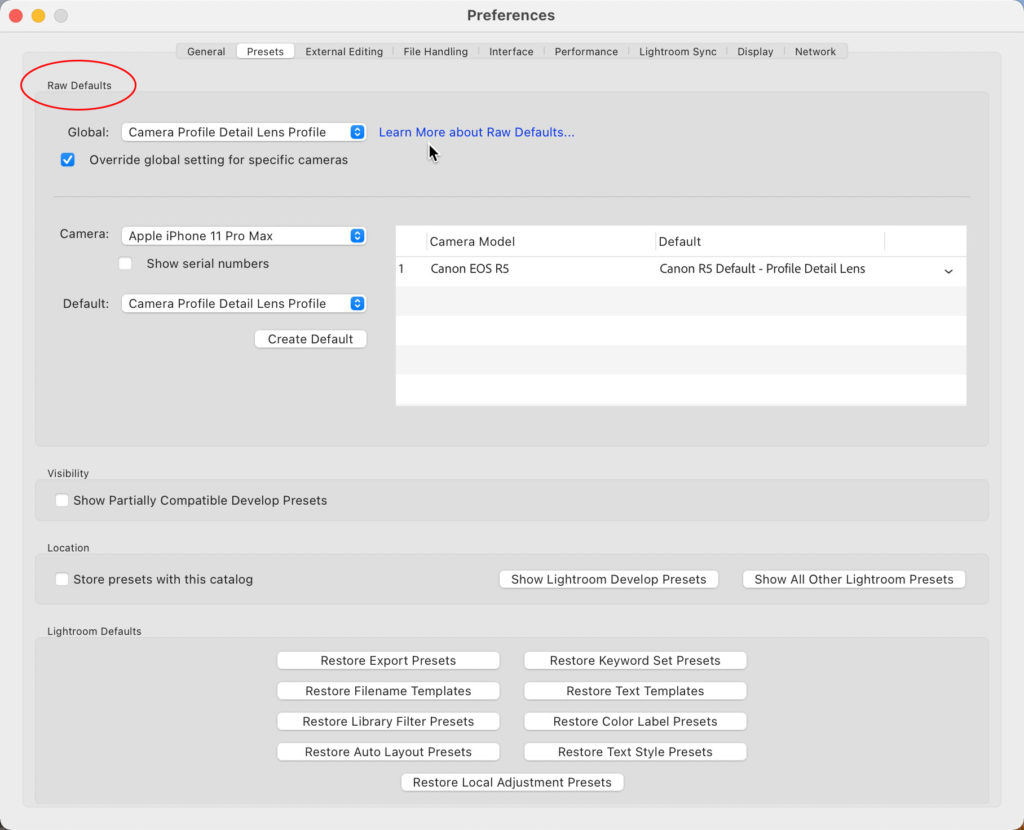
Reset to Zero
At the risk of stating the obvious, after setting a Raw Default it becomes your new default state for all raw photos. Meaning as you import raw photos they will automatically get those settings applied to them without you having to do anything else, which can be a real time saver. As such, while editing, if you click the Reset button all settings revert back to the Raw Default state defined by the preset you’ve configured. That makes sense when you think about it, but I have encountered situations where I’ve wanted to clear away all global settings for whatever reason, and for that you’ll need to create a preset that contains all possible settings set to zero or disabled (depending on the setting in question). Here’s how to do that:
Step One: Select a non-raw photo (JPG, PSD, TIF, PNG) that has not been edited in Lightroom Classic (LrC), and press D to go to Develop. Non-raw photos have a default state of no settings being applied to them, so that’s a quick way to get the Develop module zeroed out (you can of course start with any photo and manually zero out all settings if you wish). Visually confirm this by looking at the settings in each panel before creating the preset.
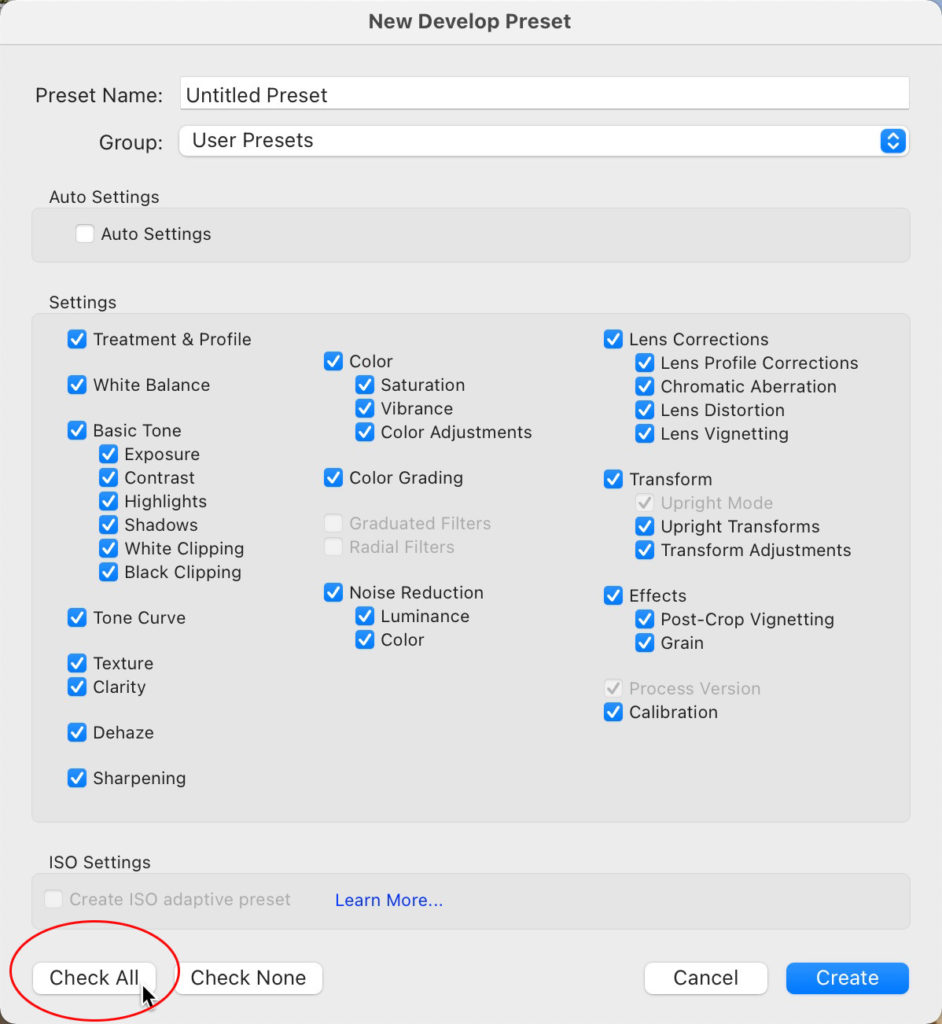
Step Two: Expand the Presets panel and click the + sign to choose Create Preset and open the New Develop Preset dialog box.
Step Three: In the New Develop Preset dialog box, click the Check All box to include all settings. By starting with a photo that has no settings at all, then including all of those zeroed out states in the preset we’ll have a one-click way to turn everything off at once (see caveats at the end of article).
Step Four: Give the preset a meaningful name and put that preset in a logical group so that you can find it when you need it.
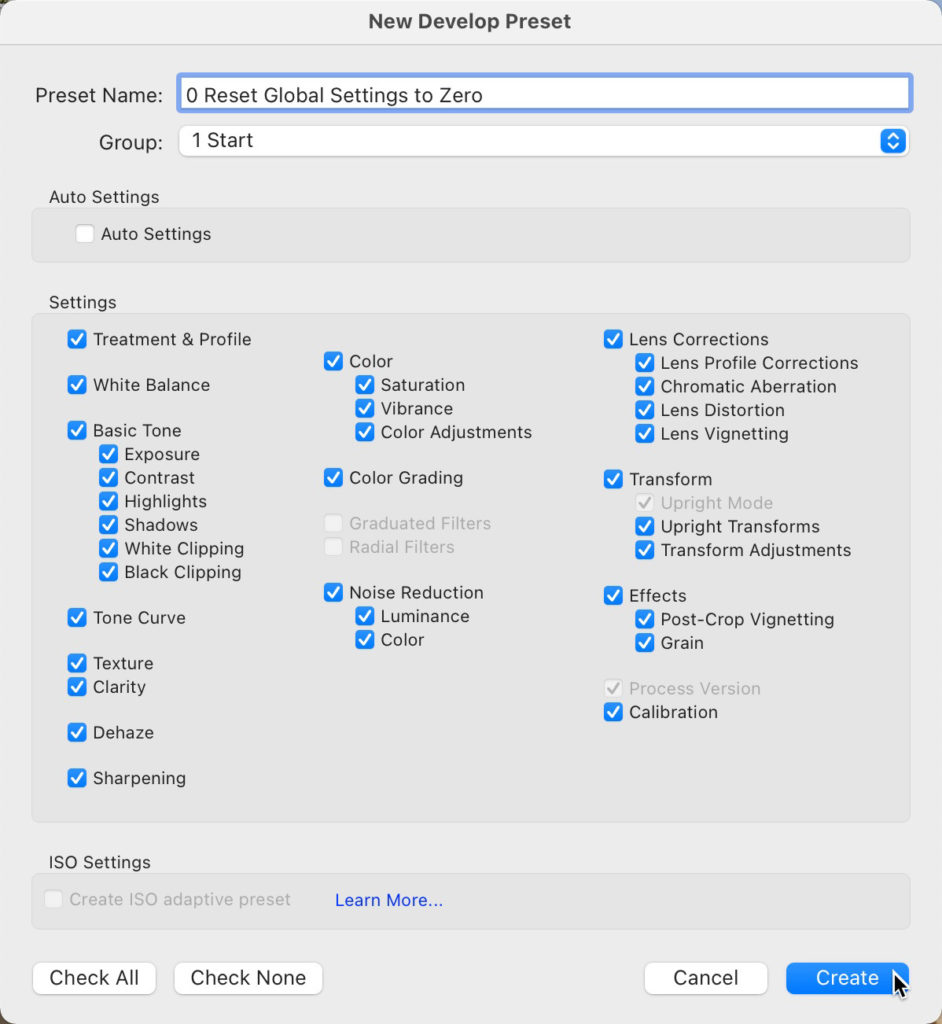
For me, I named it with a leading number (0 in this case) so it sorts right to the top of the list within its group. The added bonus of having it readily accessible is that you can preview the photo with all settings zeroed by just placing your cursor over the preset (the Before view only takes you back to import state).
A Few Caveats
There are limitations to what this preset can do and as such where the Reset button may also be required depending on your end goal. This preset will not remove local adjustments because while you can include Radial and Linear Gradients in a preset you can’t include Adjustment Brush strokes or Spot Removal applications, so I just leave all of them out and work within the limitations. Along those same lines Crop can’t be included in a preset, so applying (or previewing) the preset won’t change the crop ratio applied. If you want to clear away all local adjustments and the crop to go back to the Raw Default state, click the Reset button. If you want to go even further after that to zero out all settings, use your new preset.
Admittedly, I only use this in rare situations where I want to compare the zeroed out state to my default or some combination of global settings, but since writing the article on creating a Raw Default I’ve been asked how to get everything to be set to zero, so now you know. I’d love to hear if you find this useful in other ways or if you use this for your Raw Default itself.
I don’t understand the advantage of using a preset instead of using the reset button instead? I always use the reset and it does all the things…
If you apply a custom raw default, then that raw default is what is applied when you click Reset. There may be situations where you want to remove all settings, including those in your custom Raw Default. It is for those cases that you would want a preset that did the job.