
Adding A Background Light Behind Your Subject, All in Lightroom
This one works in either Lightroom Classic or Cloud, and it’s quick, easy, and really effective. Here goes:
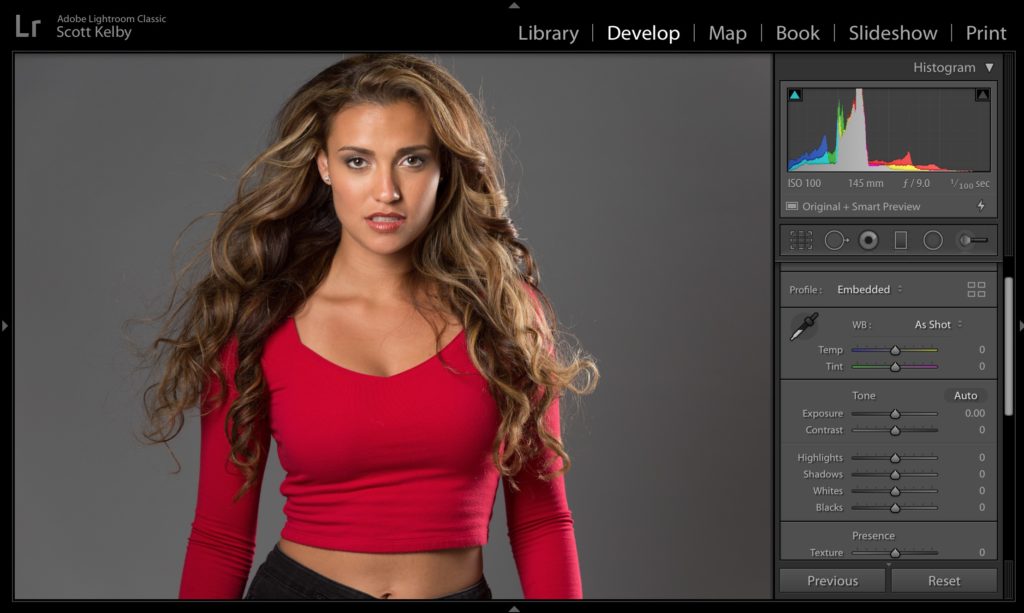
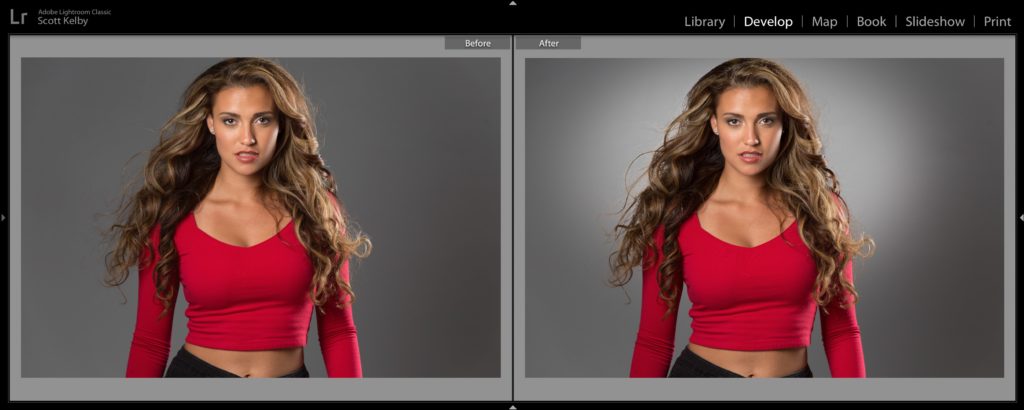
STEP ONE: Well, this isn’t a step, but here’s our starting image with our subject photographed on a gray background (I shot it on gray seamless paper — I think it was Savage Gray seamless I got from B&H).
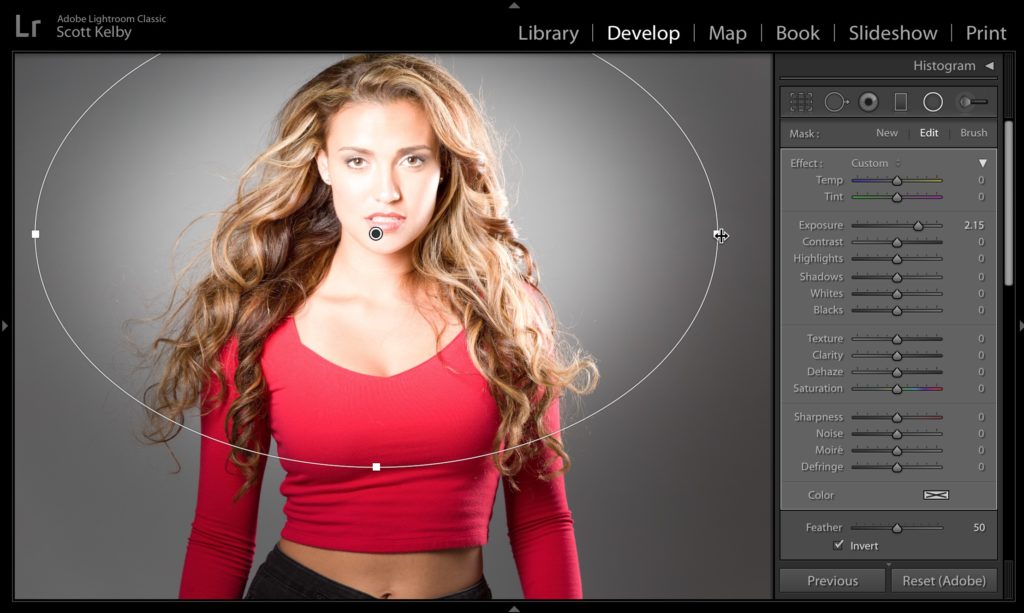
STEP TWO: Get the Radial Filter tool; Increase the Exposure amount by at least 2-stops (here I went to +2.15, but you can always change the brightness amount later, making it brighter or more subtle). Drag an oval out over your subject (as shown above) making sure it extends out to the background behind your subject. Of course, this oval doesn’t just light the background, it lights your subject as well, but that’s what we’ll fix in the next couple of steps.
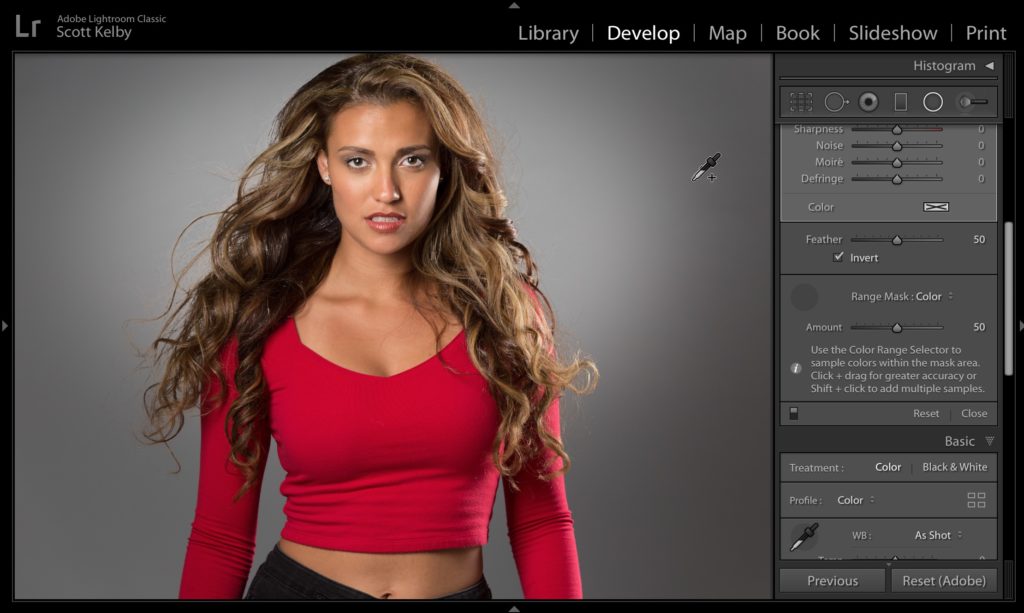
STEP THREE: Scroll to the bottom of the Radial Filter panel, and from the Range Mask pop-up menu, choose ‘Color.’ Now get the Range Mask eyedropper tool and click it on the background color behind your subject (as shown here), and that will mostly mask away the bright are of the oval from your subject (as seen above). Depending on the image, this will either work amazingly well or just pretty decent with a little tweaking need. If yours falls in the “tweaking needed’ genre, read on to the next step.
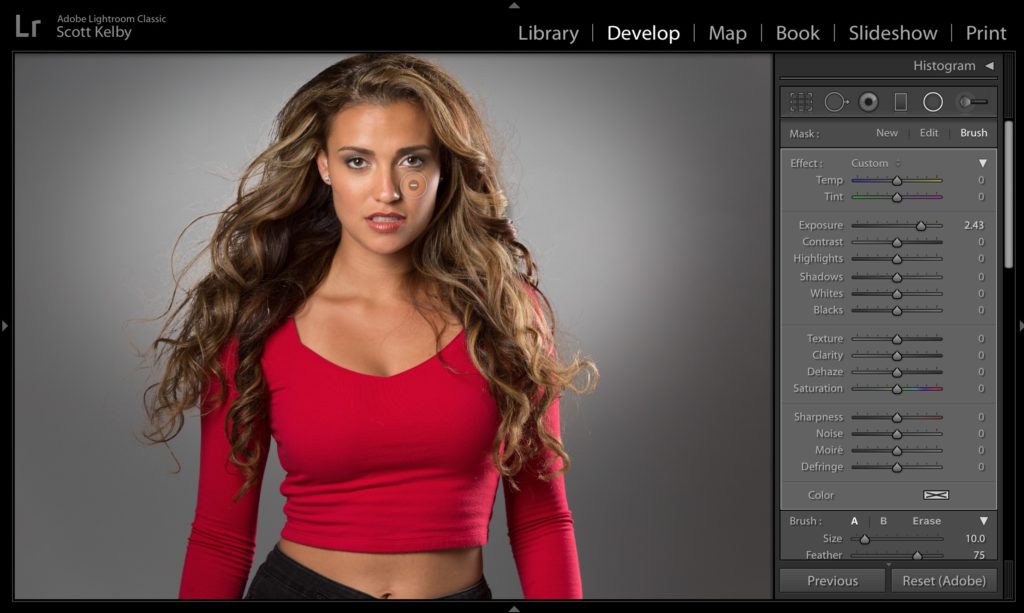
STEP FOUR: At the top of the Radial Filter panel; click on the Brush tab, then hold the Option key on Mac (Alt-key on Windows), which changes the brush into an “erase” button. Now paint over any areas on your subject that look light they have a little of that spotlight left over them (like I did here painting away any leftovers on her cheek). That’s it!
Hope you all have an awesome weekend. Hope to catch ya back here on Monday. 🙂
-Scott


Brush BAR = Brush TAB
Dope!
Brush BAR
NOT Brush TOOL………….
All good……..
I must be doing something wrong or there is a glitch in LR 9.2
Was working before.
Now does not work following the instructions above. Everything does work until I need to Brush away the overexposed subject. Opening the Brush tool and Pressing option does not brush away the overexposed Subject.
Thanks.
Great ideas and tips!!
When i see these I try to work them out myself first before looking. I did come up with a way but i didn’t know about the range mask eyedropper – very cool. Thanks Scott
Wow! This is so much easier than the way I had been doing it. Martin
Nicely done, Scott. I like this one!
Thanks, Kelly 🙂
Great tip but I don’t have the CC version . I might sign up
Great tip! Thank you.
You are very welcome, James 🙂
This is a great tip!
Short, sweet & simple. Best of all, a great tip Scott!
Thanks, Matt 🙂