Lightroom Classic (LrC) has three important tools to help you explore different editing looks, create different versions of your photos, to go back in time, and to compare where you are now to where you were before. Some of these tools only exist in the Develop module, but one of them is visible in all modules, and one can even travel with your photo outside of LrC. What am I talking about here? I am referring to the ability to create virtual copies and snapshots, as well as utilize the functionality found in the History panel of the Develop module. These features can work together but can also be used separately.
[Editor’s note: This article first appeared in the October 2021 issue of Photoshop User.]
The History panel and virtual copies are unique to LrC because they only exist in the catalog file that contains all the work you do inside of LrC. Snapshots can be created inside of LrC’s Develop module but can also be written to a photo’s own XMP metadata (virtual copies and history cannot be written to XMP), which allows snapshots to be saved with the photo and even accessed in Adobe Camera Raw (we’ll explore this later). Let’s drill down a little into each of these features to better understand them, and then look at how they can be used in your workflow.
Virtual Copies
The key to understanding virtual copies is remembering that all the work you do in LrC is stored in the catalog file, and that the catalog file is only ever referencing each imported photo wherever it may be stored on your system. In other words, each imported photo has a record in the catalog (database) that contains all the information about that photo, and all edits are stored as a set of instructions that are applied to all copies created on export/output. By default, each photo has one set of instructions (represented by the preview we see inside LrC), but the virtual copy functionality allows us to create multiple sets of instructions that all reference the same source photo. Each time we create a new virtual copy we see what looks like a duplicate of the photo in LrC, but it is only the set of instructions that are duplicated along with a corresponding preview that is stored in the preview cache.
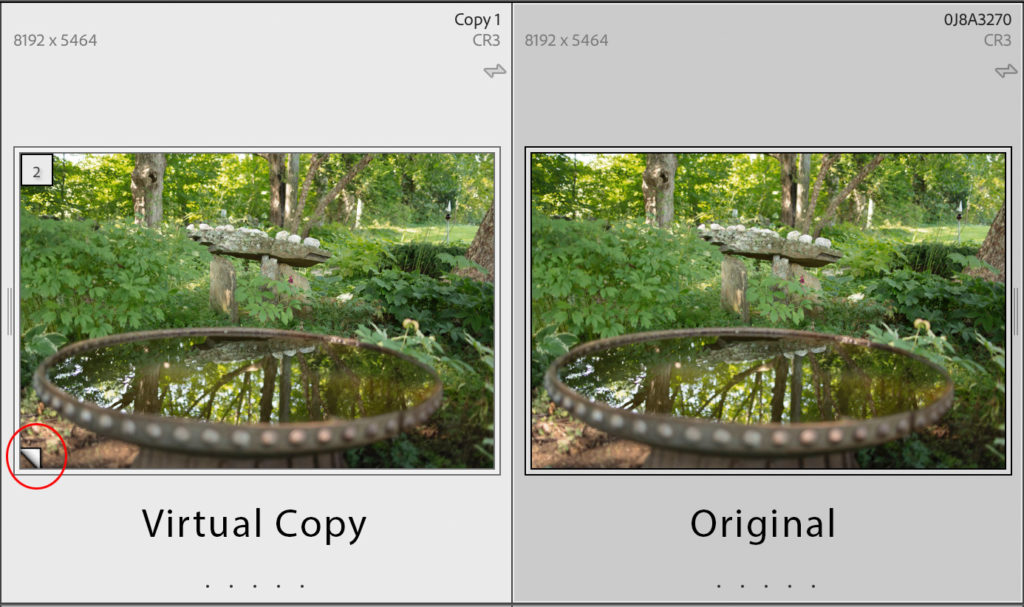
A virtual copy is visually identified by the page curl icon in the lower-left corner of the thumbnail (whereas the original has no such icon), as well as the Copy Name field of the Metadata panel will be automatically populated with the word Copy and a number that increments with each virtual copy made.
The moment the virtual copy is created we have free reign to take the edits in any direction that is separate from the original and any other virtual copies of that original. Because LrC does not duplicate the source photo this is a huge savings in disk space (keeping in mind the preview created does take up a relatively small amount of disk space in the preview cache).
Because the virtual copy appears as a duplicate copy in LrC it allows for easy side-by-side comparisons of multiple versions of the same photo. This also allows for virtual copies to exist separately from the source photo in different collections if that is useful to you (knowing that all virtual copies can easily be found in the source folder next to the original). And since these are all just separate sets of instructions for the same source photo you can even select a virtual copy and go to Photo > Set Copy as Original, which will designate that set of instructions (virtual copy) as the original photo and what was formerly the original instructions will become a virtual copy. This is useful if you prefer the edits in that virtual copy and want to ensure they are kept while relegating any edits made to the original as a separate virtual copy.

Snapshots
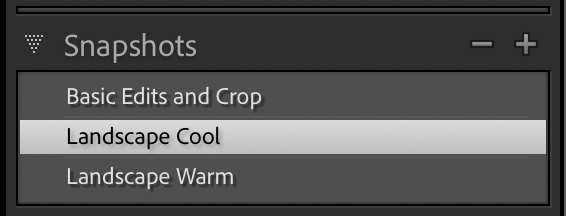
A snapshot is a way to preserve an editing state, or version, without creating a duplicate iteration of the photo. Located on the left side of the Develop module, the Snapshots panel is where you will find the functionality to create and manage snapshots. You can also find the command to create a new snapshot under the Develop menu (along with its shortcut).
Because snapshots are only visible within the Develop module you can think of these as a means to track or preserve different steps in your editing workflow, as well as a way to create different versions of edits as you explore possibilities with an easy way to go back to a former state.
History
The History panel is always quietly working in the background and is easy to overlook. Again, thanks to the fact that we’re working in this catalog file all the work we do is recorded to the catalog as we go without us having to manually save that work. If you switch to the Develop module and expand the History panel you will see all the individual edit steps, the import state, and more, recorded in an ever-growing list. Some steps are easy to discern, like Exposure +1, but others may indicate nothing more than that an adjustment brush stroke was applied.
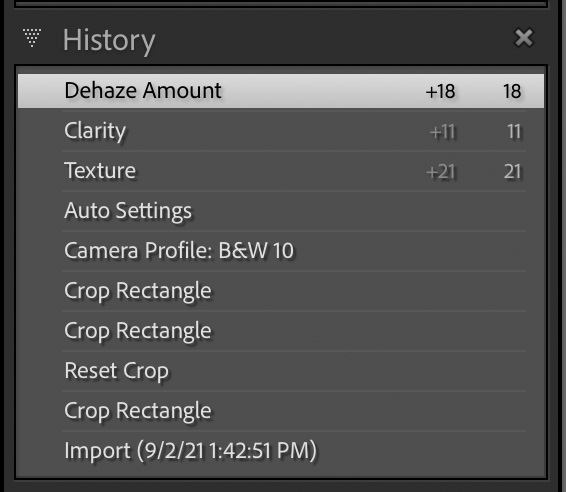
The important thing to know about the History panel right now is that we can go back in time in our editing history of a selected photo just by clicking a previous step in the history panel. This can be useful when we’ve made a mistake (or made a creative exploration of settings) and want to go back to a last known good state, or even if we just want to compare where we are now with where we were before. By default, the Before/After view function compares where we are now with how the photo looked at import. That may be helpful sometimes, but there may also be times when we want to compare where we are now with a more recent point in our history, and that’s where this panel can help. If you right-click any step in the History panel, you’ll see an option to Copy History Step Settings to Before appear in the contextual menu.
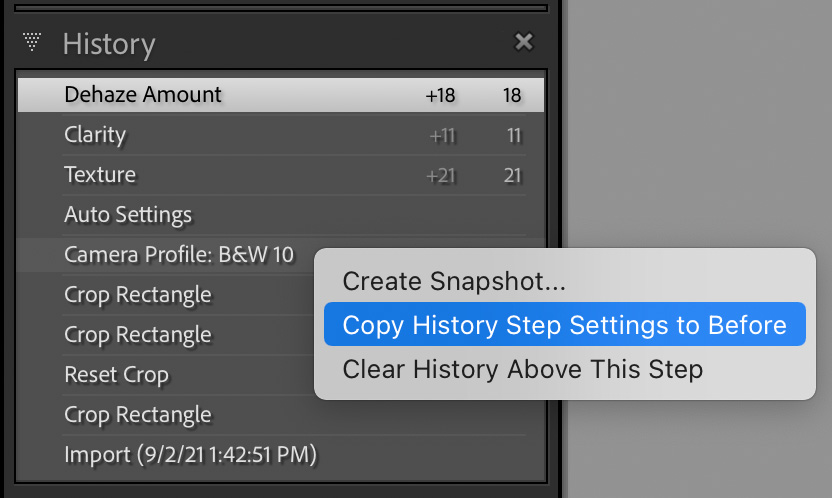
That means you can set the behavior of the Before state to display the way the photo looked at the selected history step. For example, say you completed the edits in the Basic panel and applied a B&W profile, and as you continue to refine your edits with other tools you want to be able to use the Before/After function to compare against the moment after you converted to B&W not back to when it appeared in color after import. Simply right click the Convert to Black & White step in the History panel and set it as the Before state. Now when you invoke Before/After view (press the \ key) you will compare against that history step until you change it to something else.
Using These Together
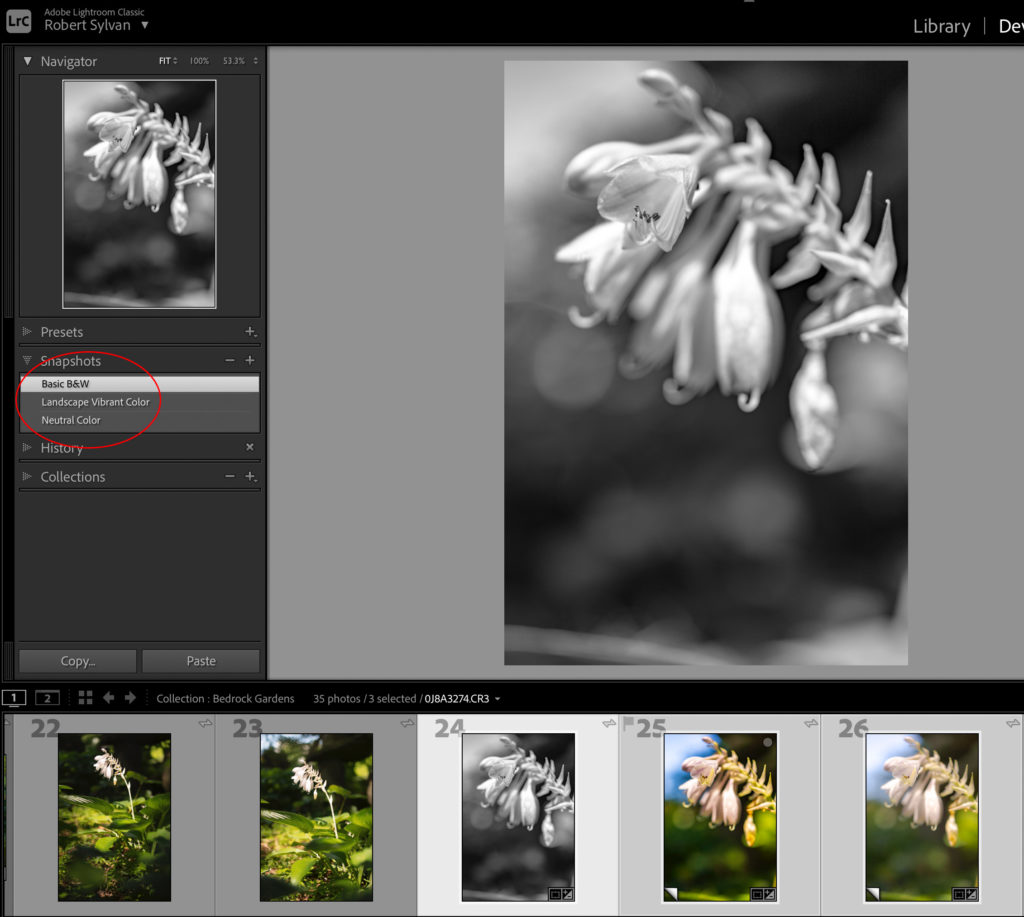
You might be thinking that there are some similarities in purpose between snapshots and virtual copies, and you would be right. The main difference is that virtual copies appear as separate files within LrC and snapshots can only be accessed from within the Develop module. However, because virtual copies of a single photo all reference the same source photo they also all have access to the same snapshots created for that photo.
So, let’s say you created two virtual copies of a single source photo, which would appear as three separate previews/instances/photos within LrC. You could edit each one independently in LrC, and when you’ve finished editing you could preserve the final state of each one in a snapshot from within each instance of that photo. It can be very useful to see those different instances side-by-side, but that can also really clutter up the folder or collection you are viewing. If you no longer need to see the separate virtual copies you can simply delete them knowing that you’ve preserved the different versions in the Snapshots panel accessible from the original.
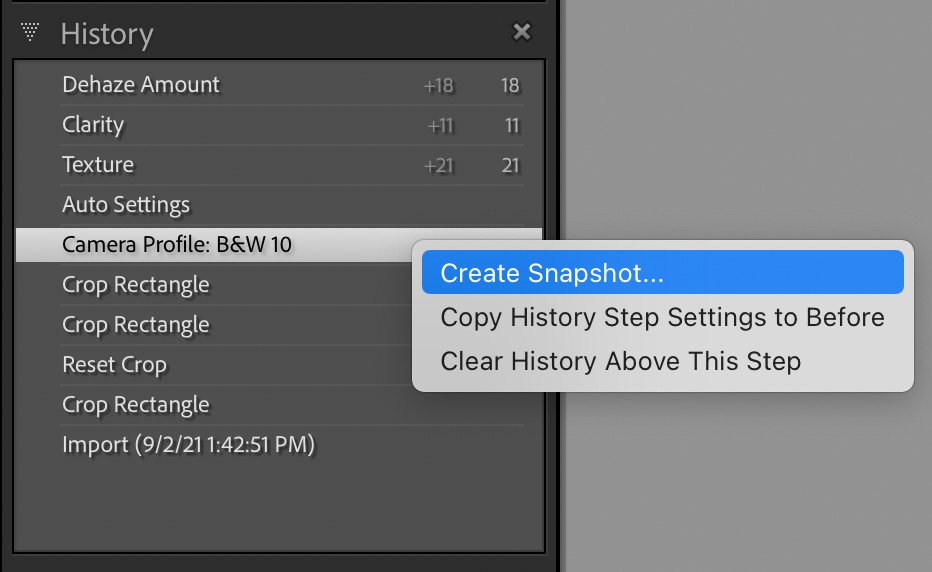
What about making snapshots from a history step? Yes, that’s possible too! Earlier I showed you how to set the Before state to a history step. In that same contextual menu when you right-click a history step you’ll see the option to Create Snapshot. This can make accessing a step in your development history a lot easier as a means to go back to a known good point or to preserve a creative exploration before going in a different direction.
Additionally, if you are the type of person who likes to have LrC write to each photo’s XMP metadata you can take comfort in knowing that your snapshots are included in that process. This is not something everyone needs to do (or wants to do), but it is worth knowing if that fits your workflow. To have LrC write the data stored in the catalog to a photo’s metadata just select that photo in Library and use the Metadata > Save Metadata to File(s) menu. You may get prompted by LrC to let you know that it will create sidecar .XMP files for non-DNG raw files but can write to the file itself for all other file types. Click Continue if that works for you.
Access Snapshots in Photoshop
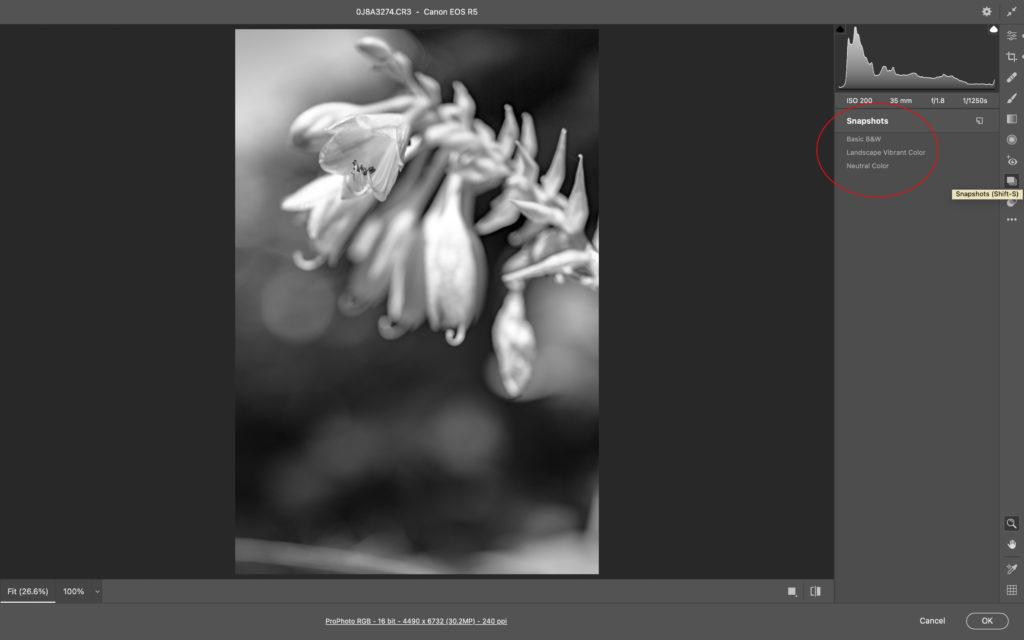
Another cool thing about snapshot functionality is that if you use the Photo > Edit in > Open as Smart Object in Photoshop command to embed a copy of the raw photo in a smart object layer while opening it in Photoshop, then you can access your snapshots in the Camera Raw plug-in too! When you send a copy to Photoshop in this way all the edits that can be written to XMP should go along for the ride (no need to manually invoke the write to metadata command first). So when the copy opens in Photoshop, just double-click the smart object icon in the Layers panel to open the embedded copy of the raw photo into the Camera Raw plug-in. Open the Snapshots panel in Camera Raw, and there you will find all the snapshots you created in LrC, which can open up new creative possibilities for working with different versions of your photos in Photoshop too.
Hopefully this has shown you that when used together these three features have the ability to really enhance each other’s strengths and your workflow.