I love encouraging people to consider customizing their Raw Default for Lightroom Classic (LrC) and Camera Raw because it allows you to start post-processing right from the moment you import without having to configure anything specific to that import job.
You can get super specific and detailed in your Raw Default if that suits your needs, but an easy way to test drive the feature is to configure it to Camera Settings.
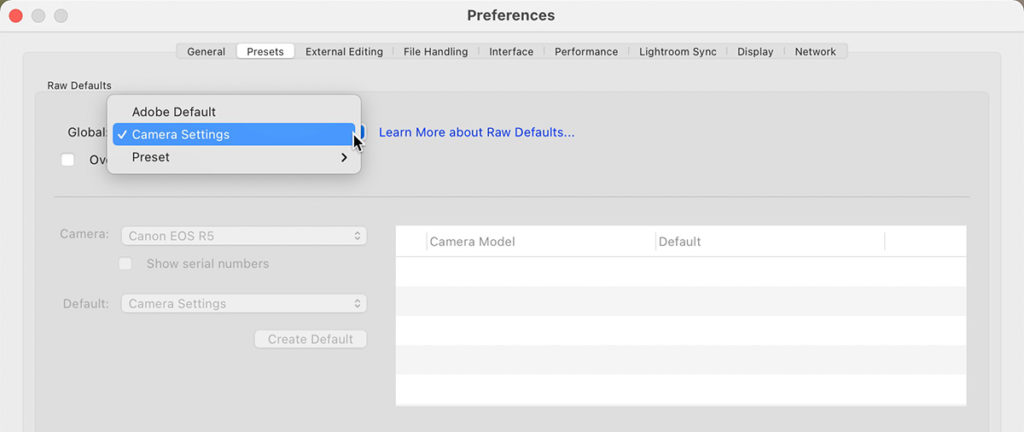
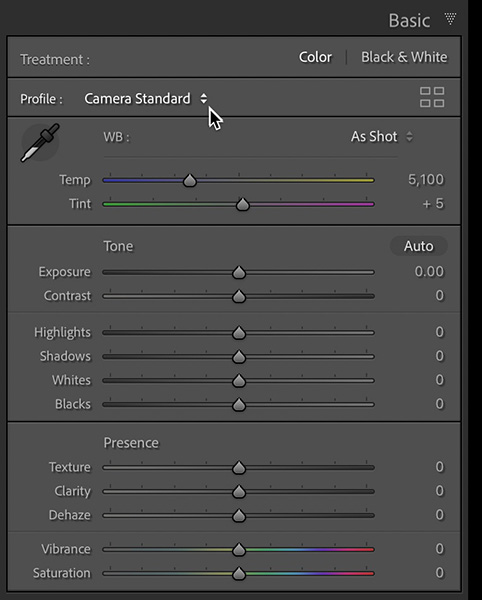
When you choose Camera Settings it uses all the same settings as the Adobe Default, so no huge changes in your settings if you’ve never configured anything before. The one distinction with this setting is that LrC attempts to discern the in-camera picture style you choose when shooting and then apply its own version of the raw profile that corresponds to that picture style. So, if you deliberately set your camera to shoot using the Standard picture style, then on import the only difference you would see is that LrC set the profile for all raw photos to Camera Standard instead of Adobe Color.
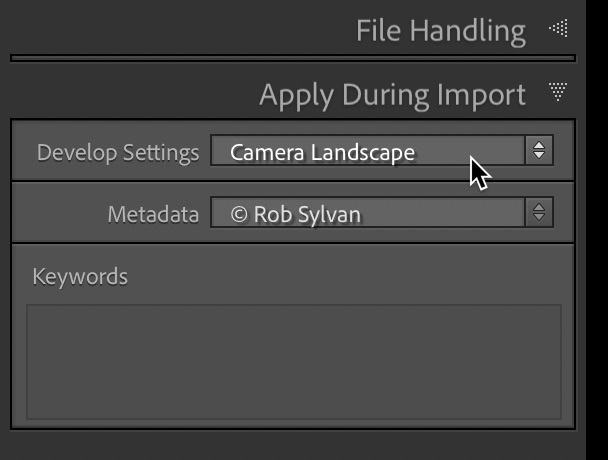
The obvious benefit is that it puts you in control of this setting at the camera level, and what photographer doesn’t want control from the moment they press the shutter? As with any default setting, it is just a starting point, and you can absolutely change the profile to whatever you wish after import, or even during import if you choose to apply a Develop preset at the import stage. When it comes to the Raw Default, it is applied first, and then any preset selected at import is applied on top of that, so let’s say you went out on a landscape photography trip, but you left the in-camera picture style on Portrait. Realizing this you selected a Develop preset that simply sets the profile to Camera Landscape, and that preset is what will determine the profile applied when you view that photo in Develop.
One Caveat
There’s always a caveat, isn’t there? What if LrC doesn’t have any camera specific profiles that correspond to the in-camera picture style? In that case it defaults back to apply Adobe Color as the profile. If you shoot with a camera like the Canon R5 or R6 then you may have realized that there are not any camera specific profiles for those cameras (just the generic Adobe profiles). Could there be in the future? That’s up to Adobe, and they don’t usually announce those things in advance, so we’ll just have to wait and see [Editor’s note: since this originally posted Adobe has added camera specific profiles for Canon mirrorless cameras]. Camera matching profiles are just a best attempt at emulation, so you can create your own profiles with product like the ColorChecker Passport or you can buy pre-made emulation profiles from third-party vendors, or you can just stick to the Adobe profiles if you like those. There is no wrong answer, but I wanted to alert anyone in case they encounter this type of situation, as it can happen to other cameras as well.
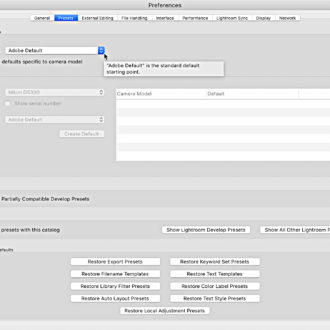
If you shoot with a mix of camera bodies where some may have camera matching profiles and some do not, you can override the global setting by specifying defaults for individual cameras too (scroll down to the Make Defaults Specific to Each Camera section).
So give it a try and see how you like that as a starting point.