Transferring Your Lightroom Classic Catalog and Photos to a New Computer: Part 2
Ok, last week we went over what to do first, getting the new computer prepped, and migrating your photos. Let’s wrap this up with bringing your presets, templates, plugins, and most importantly, your catalog to the new computer and making them work.
Presets, Templates, and Plugins
Time to gather up all your custom presets, plugins, and templates! If you’ve never created custom presets or templates, and you’ve never installed a third-party plugin or web gallery, then you can skip this part of the process and we’ll see you in the section on the catalog. When you install LrC on your new computer you will get all the default presets and templates, so we are just concerned with all the custom bits you added.
The words presets and templates often get used interchangeably within LrC, and broadly speaking there’s nothing wrong with that. However, since we are trying to be specific at the moment I will refer to the presets you use in the Develop module as presets, and everything else we’ll call templates. In this way, templates would include filename templates, metadata templates, print templates, import templates, and so on. The reason for this is that awhile back Adobe moved Develop presets to be stored away from the rest of the templates (this was so that Develop presets could be shared with Adobe Camera Raw). We’ll start with grabbing the templates and then come back to Develop presets separately.
In my experience, most people leave their templates in the default central location. The simplest way to access this location is to go to Lightroom Classic > Preferences > Presets (PC: Edit > Preferences > Presets), and click the Show All Other Lightroom Presets button. This will open the folder, named Lightroom, containing all of your templates into Finder (PC: Windows Explorer), which is located here:
Mac: Users/[username]/Library/Application Support/Adobe/Lightroom
Win: Users/[username]/AppData/Roaming/Adobe/Lightroom
Note: Windows can hide the AppData and other important folders. In Windows Explorer, go to Tools > Folder Options > View, and check Show Hidden Files and Folders. Mac does a similar thing with the Library folder. Open a new Finder window, click Go in the Menu bar and hold the Option key to make Library magically appear in the list of places to go. Choose Library, and then follow the rest of the path above.
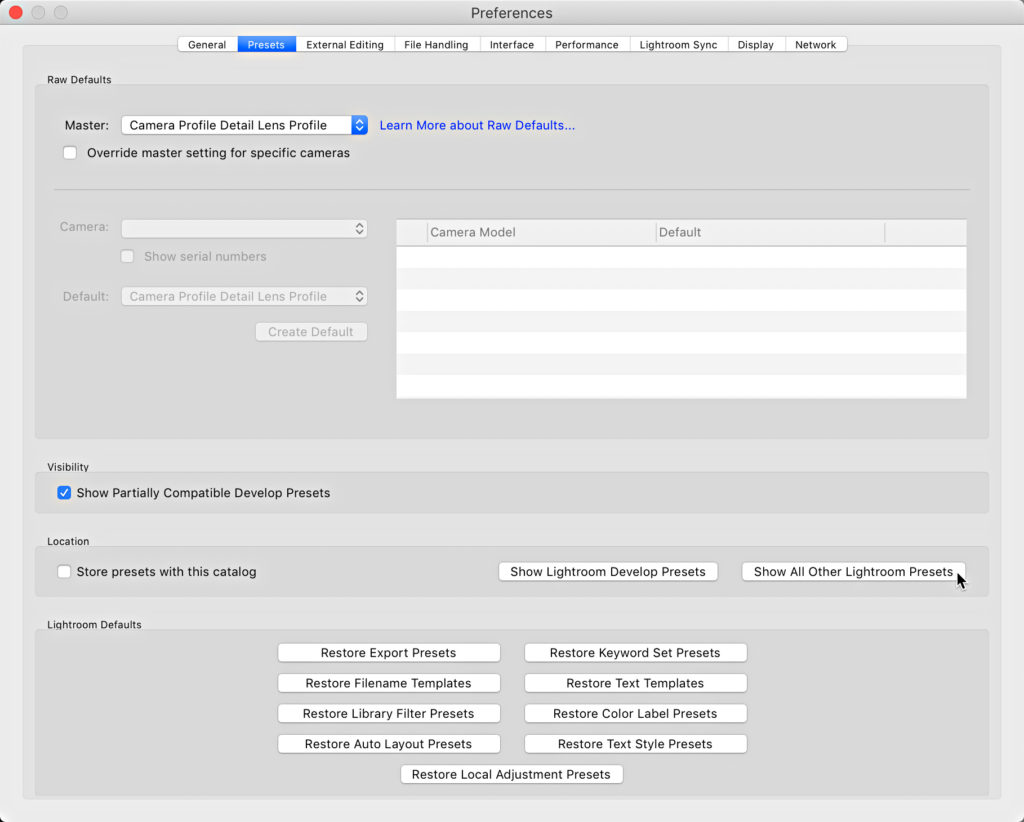
On the Preferences > Presets tab, if you already had Store presets with this catalog checked then I will assume you know where all your templates are, and you can skip ahead to the catalog section. If you don’t have Store presets with this catalog checked then don’t check it now, as it will simply create a new folder (named Lightroom Settings) alongside your catalog with only the default presets, which won’t help us with your custom presets.
Within this Lightroom folder are all your templates, third-party web galleries (if installed), and the most common location for third-party plugins (the Modules folder), within their respective subfolders. Your task is to place a copy of all your custom files on the external drive destined for the new computer, and the easiest way to do that is to copy the entire Lightroom folder to the external drive. That said, on Windows, the LrC preference file is also stored within the Lightroom folder in a folder named Preferences. I don’t recommend bringing a copy of this file to the new computer, as I think it’s wiser to start with a fresh preference file on the new computer. In addition, if you are migrating from Windows to Mac the preferences are stored in a different location on Mac anyway. So, leave the Preferences folder behind.
Tip: While you have LrC open take note of all of your preference settings so that you can re-configure them on the new computer.
In regards to third-party plugins, I’ve always found it simplest to place a copy of the .lrplugin file within the Modules folder so that the Plugin Manager will automatically add and enable the plugin. However, you may have chosen to store your plugins in a different location, and manually add them via the Plug-in Manager. There’s no wrong answer, but I’ll leave it to you to know where your plugins are stored if not in the Modules folder. Lightroom plugins (.lrplugin file extension) are typically cross-platform, but some may have special requirements for each operating system, so be sure to check the web site of the plugin author for all compatibility concerns. If you have installed plugins that are more like external editors, such as the ones from Topaz Labs or ON1 that you access via the Photo > Edit In menu, then you will want to go to the developer’s web site and download the installers for those plugins to the new computer and install them like new software at the end of the transfer process.
Now that you have all your photos, presets, and plugins copied to your external drive let’s turn our attention to the LrC catalog.
Copying the Catalog
When it comes to migrating the actual LrC catalog I advocate creating a copy of your working catalog to transfer to the new computer because there is no other way to transfer the Publish Service connections you previously set up, as they are not included in a catalog export. In addition, a catalog export only includes keywords that are applied to exported photos, which may leave out parts of your entire keyword hierarchy that have not yet been applied to photos (though it is possible to export a keyword list and import it into a new catalog). Additionally, if you had synced this LrC catalog to the Lightroom cloud, this will maintain that connection (if you have not done this, then you can disregard).
To find your catalog, go to Lightroom Classic > Catalog Settings > General (PC: Edit > Catalog Settings > General), and click the Show button to reveal its location. The default location of the catalog is in the Pictures (PC: My Pictures) folder, but the LrC catalog can exist at another location of your choosing.
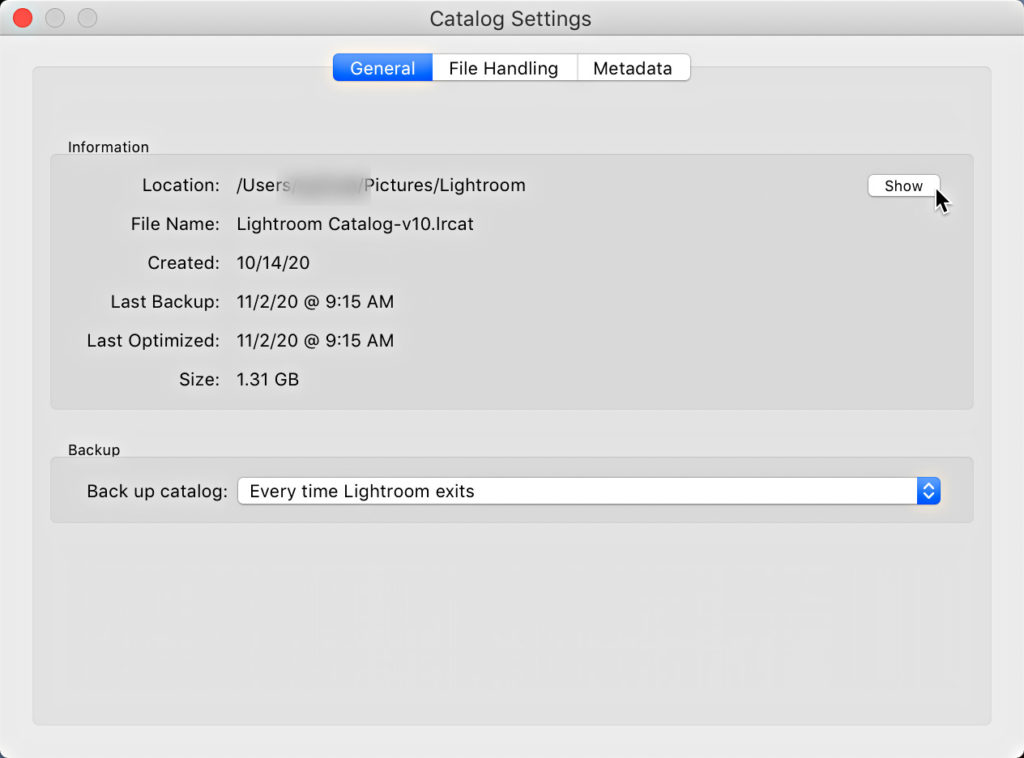
Within the folder containing the catalog are several files, including the catalog itself with the .lrcat file extension and the associated cache files with the .lrdata file extension. If you see a .lrcat.lock or .lrcat-wal file, then close LrC and they will go away, as they are temporary files that assist the catalog. If you’ve never changed the default location of the catalog backups then you might see a Backups folder as well, but we can leave that folder behind (and run a fresh backup on the new computer). With LrC closed, copy (not move) the .lrcat and .lrdata files to a folder on the external drive. If you can fit them on the same drive holding your photos then go for it. If you need to use a separate drive that’s fine too.
Note: Here’s a good reference of all default catalog file and preferences locations: https://helpx.adobe.com/lightroom-classic/kb/preference-file-and-other-file-locations—lightroom-6.html
Ok, the last bit to tackle are your custom Develop presets. I think this is a great opportunity to get your Develop presets cleaned up and organized (and ditch those ones you never use). To this end, I’ve written articles to help you get your presets under control, and they can all be found here (be sure to follow the links to the related tips to see all three):
Managing Develop Presets in Lightroom Classic
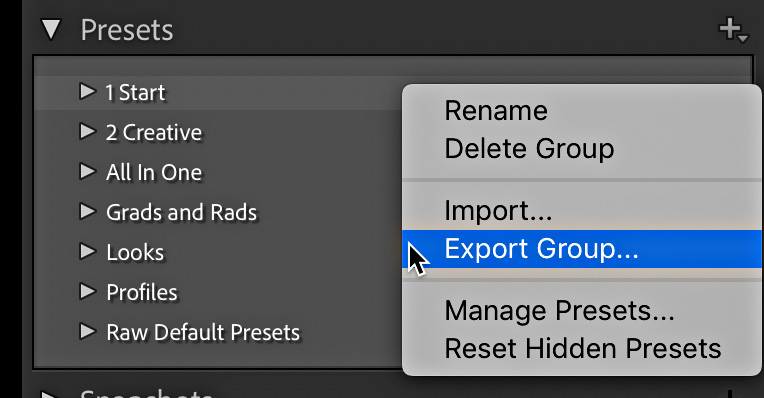
The end result will be a tidy preset panel containing groups of Develop presets organized in a way that makes sense to you. The tutorial linked at the end of the one above shows you how to export preset groups, and how to import preset groups. Your goal will be to export each preset group to your external drive for transfer, then you can easily import them all into LrC on the new computer.
You should now have a copy of your photos, your presets, and your catalog on an external drive. Safely disconnect the external drive from the old computer and connect it to the new computer.
Transferring to the new computer
Launch your file browser on the new computer and view the contents of the external drive. For illustration purposes I am transferring my catalog from a Mac machine to another Mac. First, copy the folder containing the LrC catalog (and caches) to a location of your choosing on the new computer (nothing wrong with the Pictures folder). Then, copy your photo’s folder structure to a new location of your choosing (or leave them on the external drive if that is your plan). Once those copy operations are complete, navigate to the catalog in its new home and double-click the .lrcat file to open it into LrC.
Don’t panic if you see question marks on your folders in the Folders panel, you just need to update the catalog to point to the new location of those folders. This is when having a single parent folder showing in the Folders panel comes in handy. It is also possible that all of your drives and folders will appear functional and normal, which just means that the path to your photos has not changed on the new computer and you are good to go. If you do see question marks on folders though, here’s how to fix that:
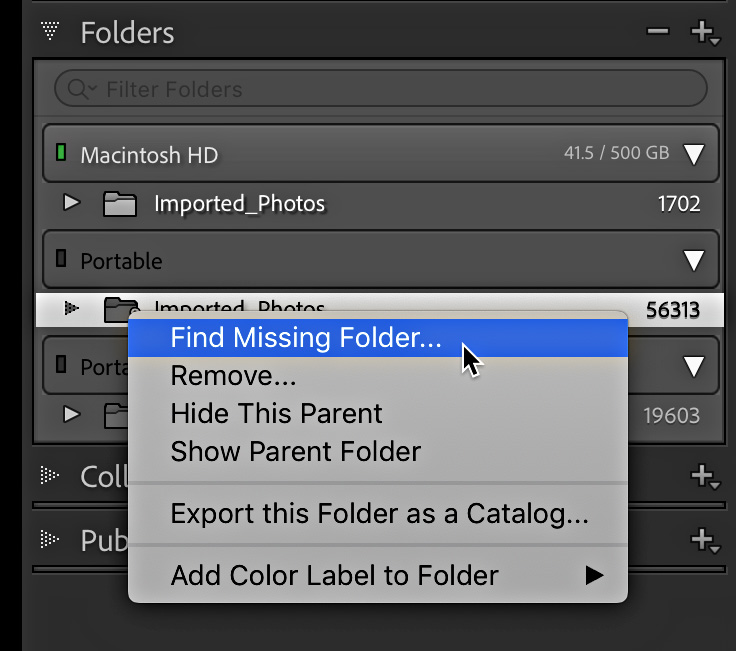
STEP ONE: Ctrl-click (PC: right-click) the top-level parent folder and choose Find Missing Folder.
STEP TWO: Navigate to and select that exact folder in its new location and click Choose (PC: OK).
LrC will then go through the process of updating the catalog to reference that folder (and everything inside of it) at this new location. Repeat the process for any folders not contained within that parent folder (if you have any).
Next, go to Lightroom Classic > Preferences (PC: Edit > Preferences) and re-configure your settings. I suggest that you configure the Default Catalog on the General tab to reference this catalog specifically instead of loading the most recent catalog. Once configured, go to the Presets tab and click the Show All Other Lightroom Presets button to open it in your file browser. Copy all your custom presets, templates, and plugins from the external drive to their respective folders on the new computer. Restart LrC when the copy operation is complete to see your custom bits inside of LrC. If you did previously sync your LrC catalog to the Lightroom cloud, then go to the Lightroom Sync tab of the preferences and configure the Location section as desired (this controls where photos downloaded from the Lightroom cloud are stored).
When LrC relaunches, go to the Develop module to import your Develop presets. Go to File > Import Develop Profiles & Presets (if it is grayed out, make sure you are in Develop). Then, navigate to the location on the external drive where the exported zip files containing your presets are located (you will have a zip file for each preset group you exported) select them all, and click Import. Each of your preset groups should appear in the Presets panel.
Go to File > Plug-in Manager and make sure all your plugins are installed and running. If you haven’t already, this is a good time to make sure you are running the latest version of each one. You will need to re-register any third-party plugins you had running on the old computer.
A Word about Publish Services Connections
Connections that were setup on the old computer to online sources such as SmugMug or Flickr should still work, but give them a test drive to make sure. However, existing hard drive connections will display any photos they contain, but may no longer function due to the change in drives. The export location of an existing connection cannot be changed after the connection is created, and it will have to be rebuilt by making a new hard drive connection on the new computer. Once you create the new hard drive connection you can re-populate its contents to match the old connection and you’ll be back in business.
Give your catalog a thorough walk through to make sure there are no lingering question marks on any files, that all your presets are accounted for, and everything is functioning as it should. If you are satisfied that all is well you can close LrC and install any additional third-party plugins if you have them. Congratulations on the successful migration!
As I mentioned back in Part 1, there are other (and simpler) ways to do this migration to a new computer, but I really wanted to provide a process that puts you in the driver’s seat throughout, and allows you to tidy things up on the way. Feel free to add what’s worked (or not worked) for you in the comments.
Here’s to a better new year for us all!