
Syncing Automated Settings
There are a few different ways that Lightroom Classic can analyze a photo and apply an auto setting based on that analysis. Quite often we may have multiple photos that we want to batch apply one or more of those automated settings to all photos at once. However, you need to be mindful of how you sync those settings so that you are getting the automated analysis on a photo by photo basis and not just syncing absolute settings from one photo to the rest in the batch. While there are a few ways to batch apply settings, I’m just going to focus on Sync and Auto Sync for now.
Auto White Balance
The easiest one to check off the list is the Auto option on the White Balance drop-down menu. The goal of using Auto WB is to try to automate the process of neutralizing color cast.
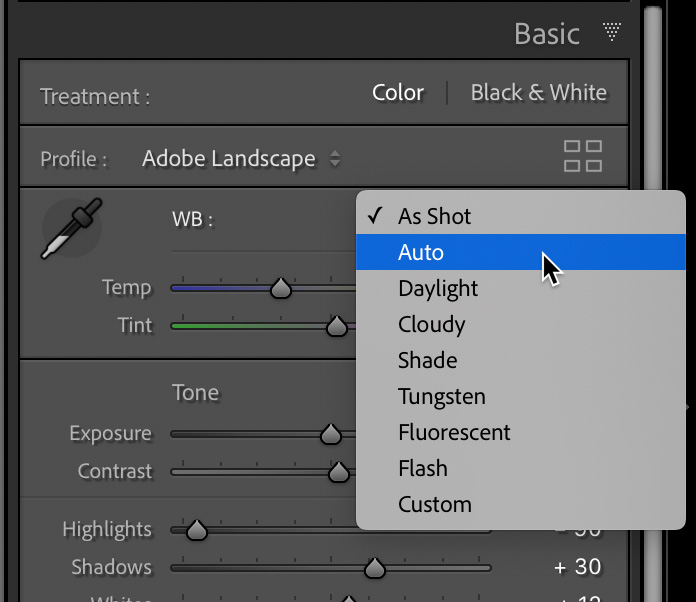
I selected four raw photos with very different subjects and lighting situations, and all four are currently set to As Shot for WB. If I want to set all four photos to Auto WB I can use either Sync or Auto Sync and get the same results.
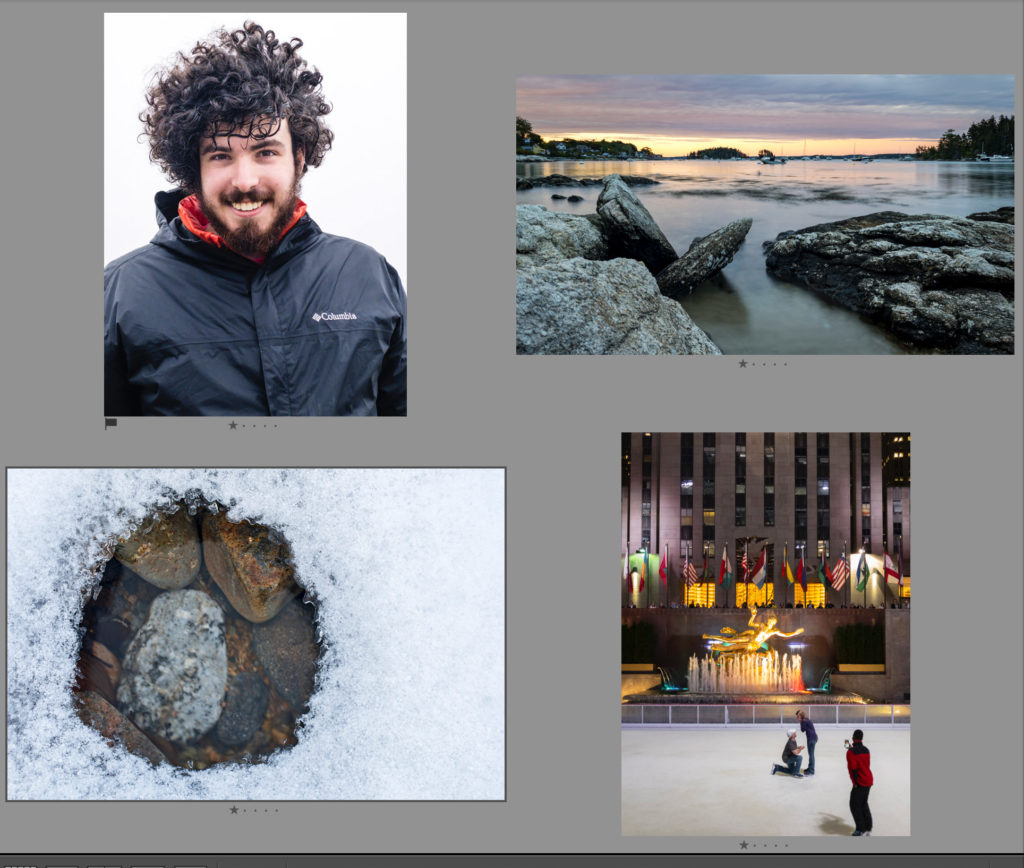
Whether I had all four photos selected, with Auto Sync enabled, and selected Auto from the WB drop-down menu, or just one selected and Synced Auto WB to the remaining three photos, the end result is that LrC does an Auto WB to each photo based on its contents, which is what we want. I’m not saying it will always be the choice you want to make, but I am saying that all four photos in my group end up with unique WB settings, which were also the same WB values if I had set each photo to Auto WB individually.
Auto Tone
The next Auto button to explore is also in the Basic panel, and while not technically called Auto Tone anymore, that is still how I think of it.
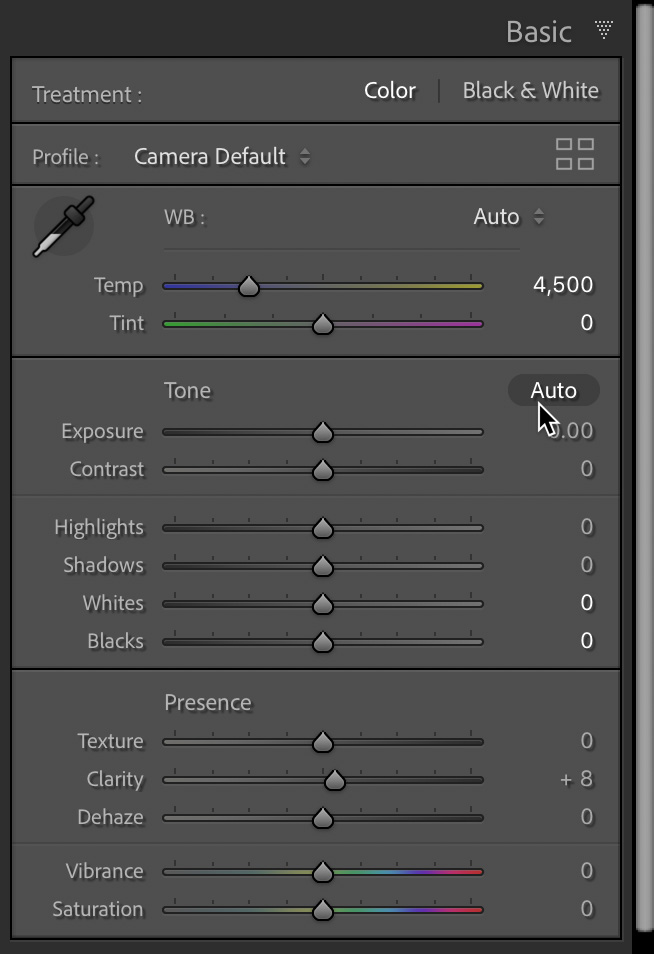
I reset the tonal value sliders (by double-clicking Tone) and wanted to see how I could apply the Auto function to all four photos so that each photo got its own unique analysis and settings (as opposed to just syncing absolute tonal value settings across all four photos). If I select the first photo in the batch and click Auto, that photo gets the full Auto treatment.
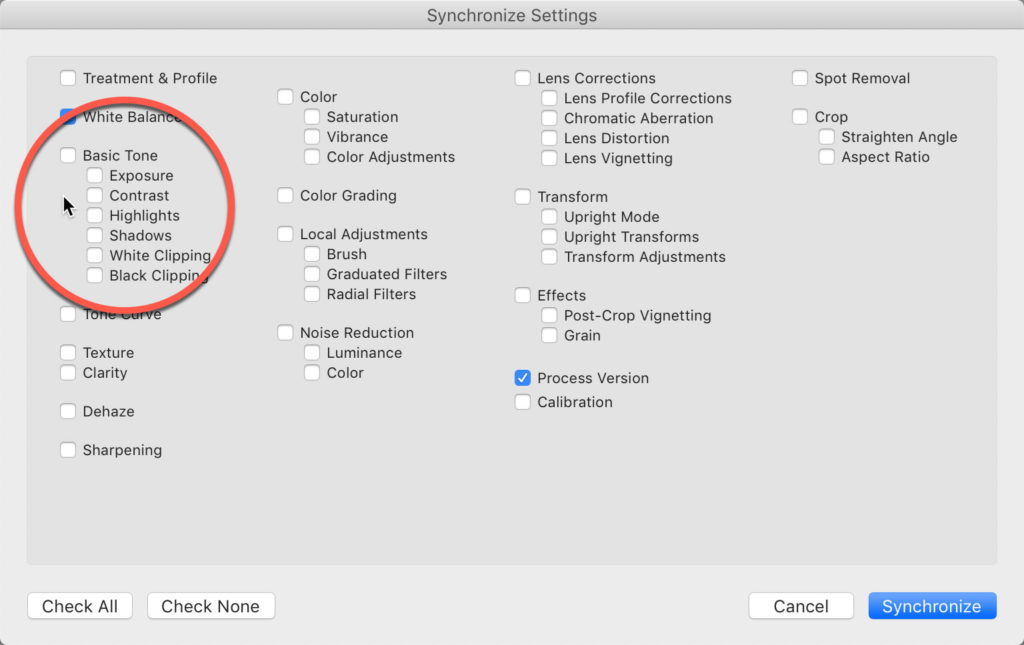
If I were to select the remaining photos in the Filmstrip and click the Sync button, it would open the Sync Settings dialog, and as you can see, there is no Auto option in there. I can only select the individual tonal value sliders, and this is not what I want.
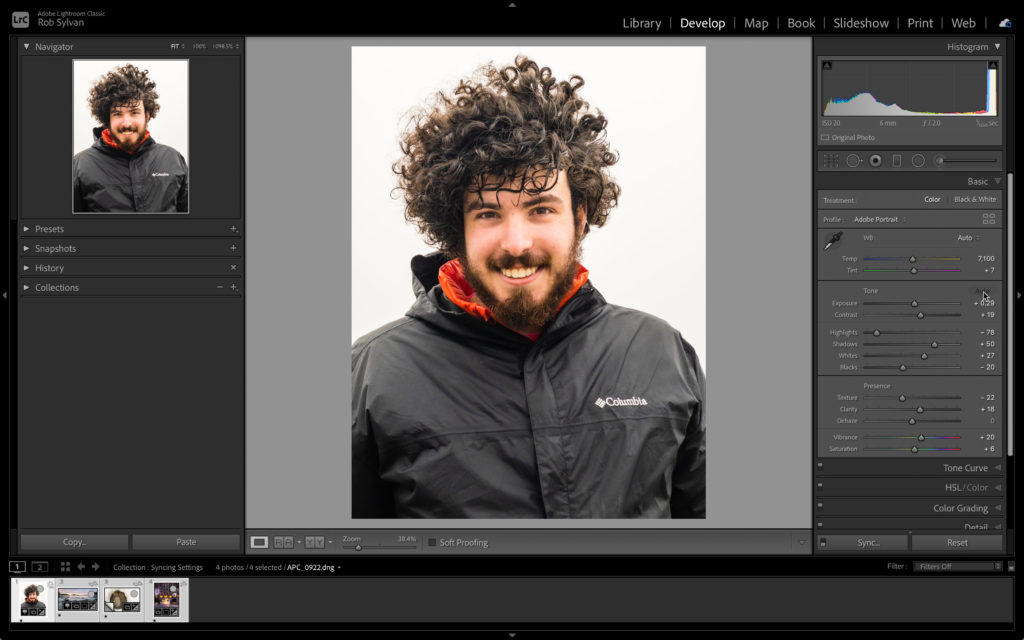
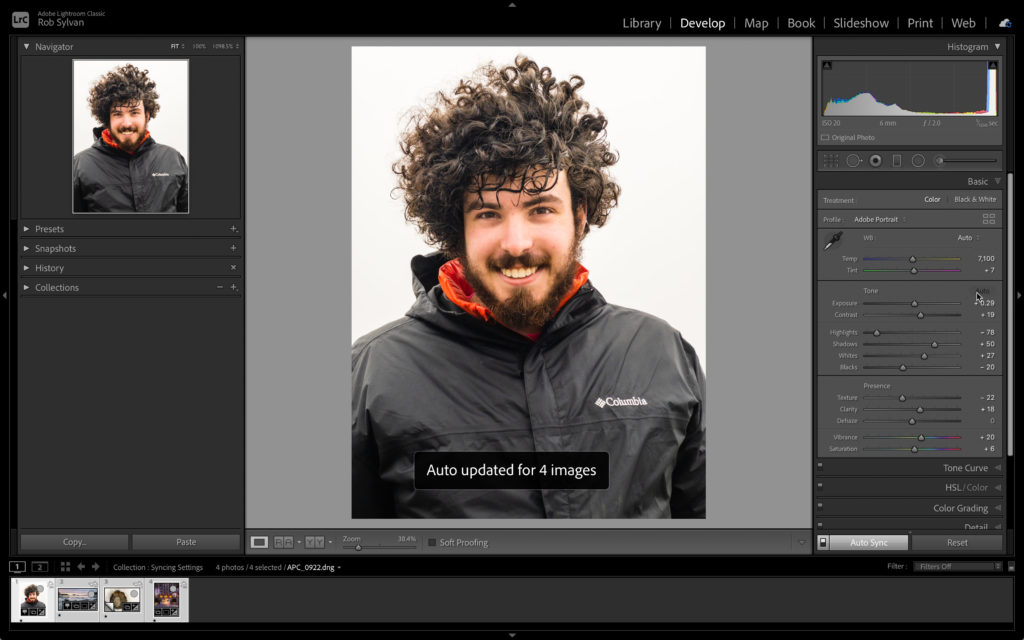
So, I reset the tonal value sliders again, and with all four photos selected, I enabled Auto Sync, and then, when I clicked the Auto button in the Basic panel all four photos got their own unique Auto (settings) applied.
Auto Upright
The last panel to investigate is Transform, where the Upright functions live. Four of the Upright buttons–Auto, Level, Vertical, and Full–perform automated transform corrections on the photo based on its contents. I’m notorious for shooting photos in need of a slight level correction, so much so that I wrote about how to create auto transform presets. So, what if we have a batch of photos selected, and we want to run one of these automated settings on the batch and have a unique analysis and correction applied to each one? For this we can use either Sync or Auto Sync, but we just have to be mindful of the boxes we check in the Sync Settings dialog.
So, only two of my four photos really needs help in the Transform department, but I have them all selected and I want to correct the two that need it, what are my options? Well, to be honest, I like to be very careful with this group of Upright settings. When they work, they are like magic, but when they fail, they can fail spectacularly. You also have to be mindful of any cropping you may have applied previously because by default, applying any of these transform modes will reset the crop (though holding down Alt/Option when applying Upright should preserve crop).
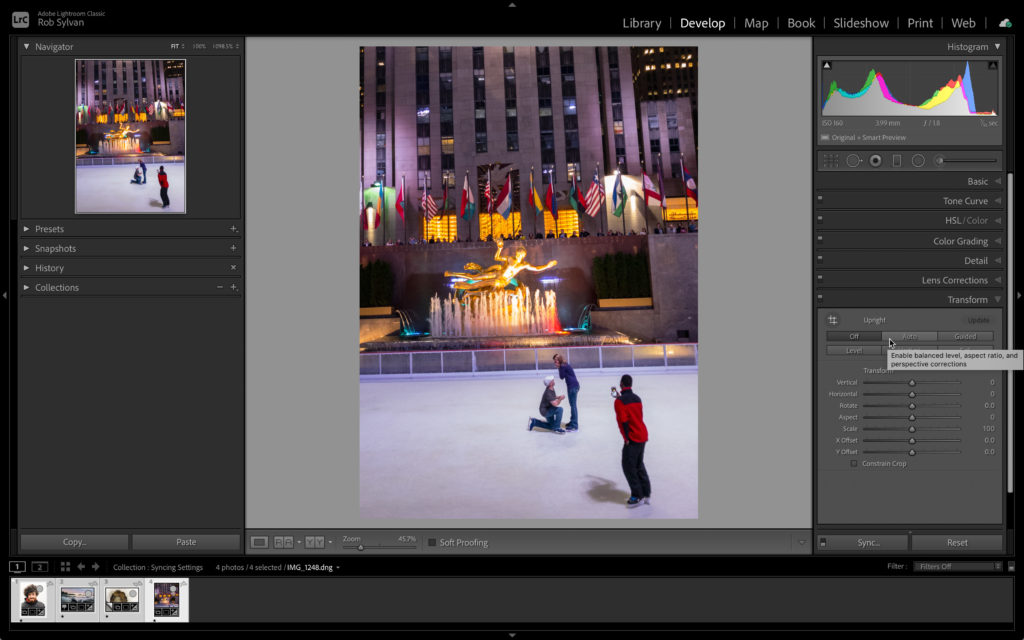
With these four very different photos in which some have been cropped, I found the best results came from using Sync instead of Auto Sync. So, with all four photos still selected, I disabled Auto Sync, then selected the photo with the biggest Upright issue, and clicked Auto to correct it.
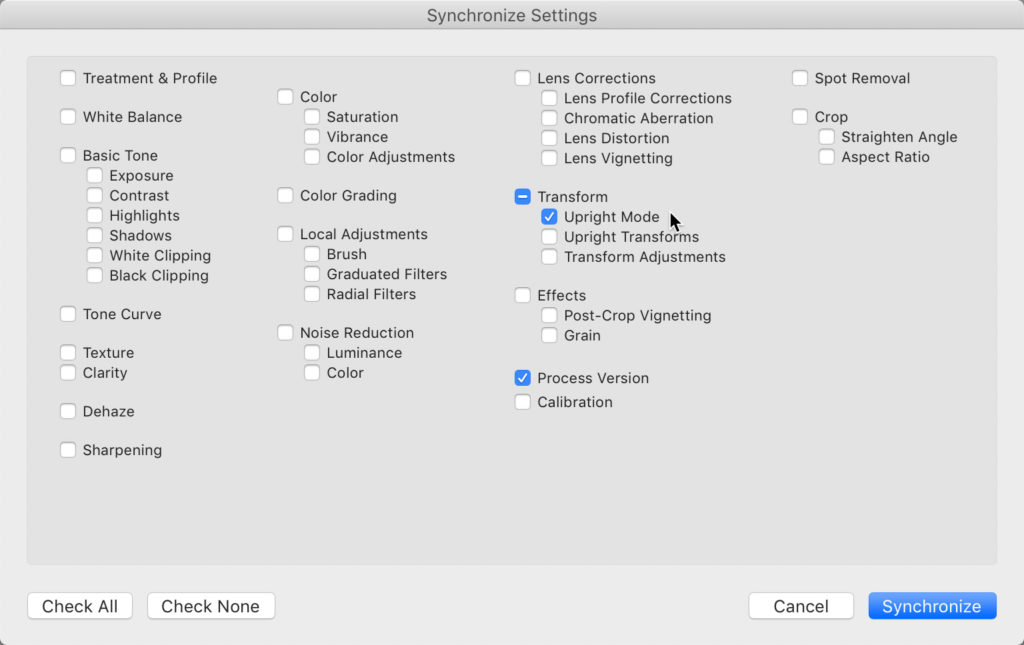
Then I clicked the Sync button and made sure to select Upright Mode, so that it synced the mode, not the absolute settings.
After clicking the Synchronize button I went through each photo to make sure it worked, and the two photos that needed the help were corrected and the two that did not were unchanged.
Conclusion
Using batch functions to speed up our workflows are wonderful and important tools. You do have to be mindful of the results along the way so that you don’t inadvertently cause self-inflicted injury. Auto Sync is a very powerful feature, and I appreciate that Adobe made its use more visible, but don’t forget to turn it off when you are done so that you don’t make more work for yourself by mistake.

