Setting Up Borderless (edge-to-edge) Printing in Lightroom
This is one of those questions that I get asked on a regular basis — how to get your image to print all the way to the edge of the page with no white border around the photo. Seems like it should be an easy one-click thing, but there’s a bit more to it than that.
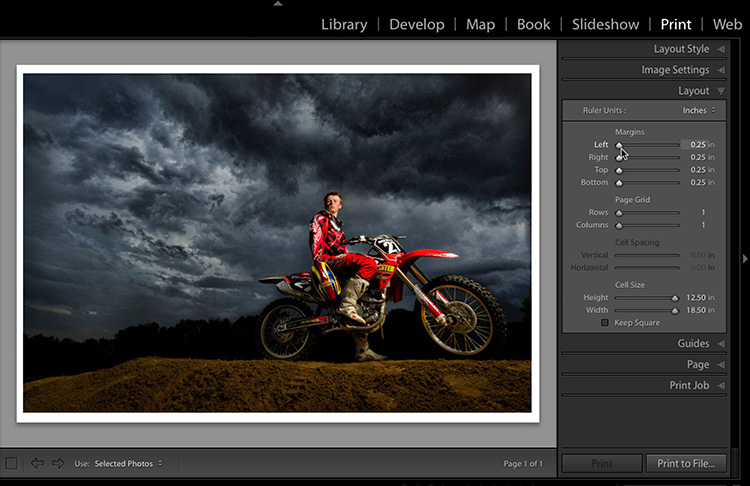
Above: Here’s the image we want to print borderless (edge-to-edge). I clicked on the “Maximum Size” Print Template but as you can see there’s still a 1/4″ white border around the entire image. If you look in the Layout panel on the right side, I’ve dragged all the margins as far to the left as they can go, but they won’t go to 0.00 inches – they stop at that .25 inch (1/4″) setting.
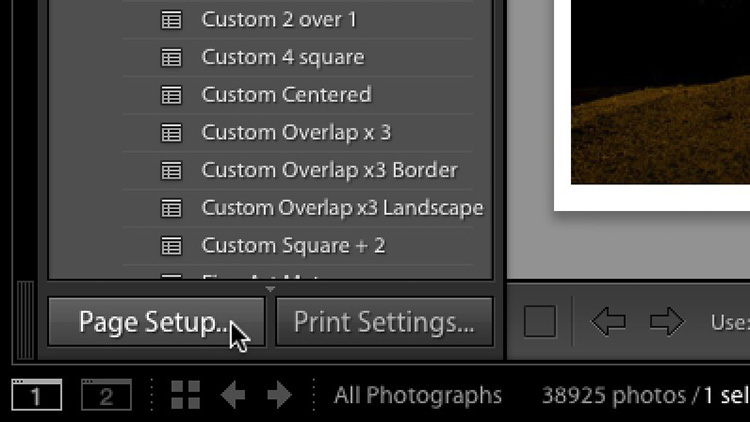
STEP TWO: The reason this is happening is that your printer page setup isn’t set to borderless, so there’s no way for Lightroom’s Layout panel to override those settings — you have to do it manually by adjusting the printer margins yourself. Go to the bottom of the Left Side Panels and click on “Page Setup…” as shown here.
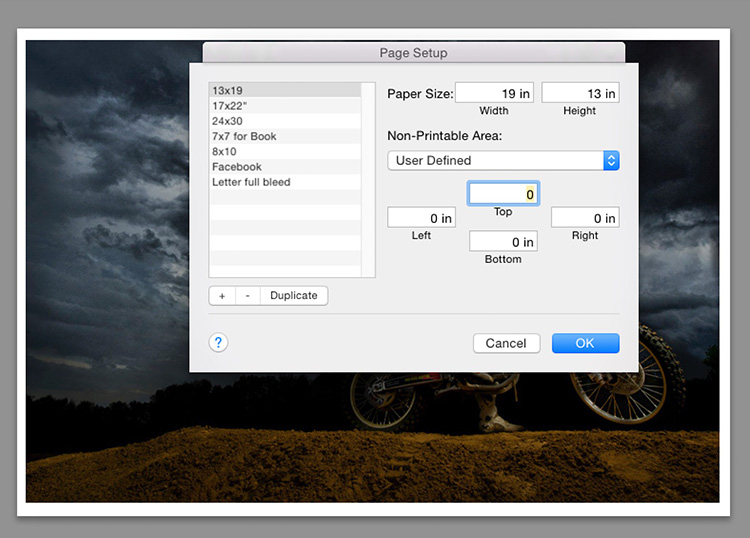
STEP THREE: This brings up the Page Setup window (shown here) and you’ll need to create a new custom page, at the size you want to print (in this case, I went with a 13×19″ paper size), and then set the printer margins to zero inches all the way around. You do this by typing 0 in the Left, Top, Right, and Bottom margin fields (as shown above).
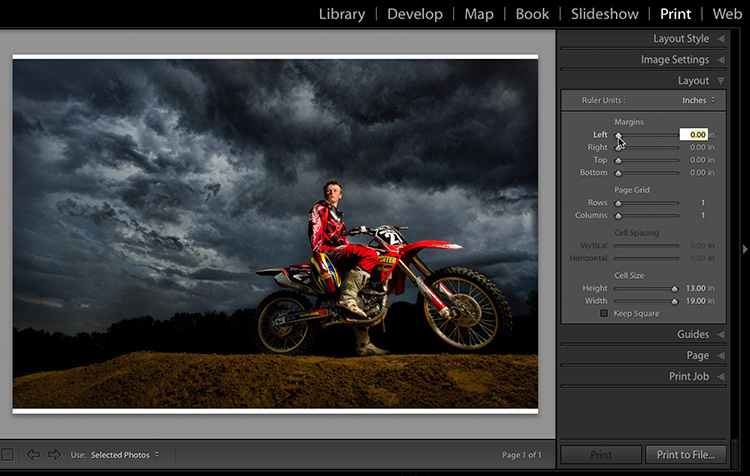
STEP FOUR: Now when you go to the Layout panel you’ll see your margin sliders can now go to 0.00″ inches (as seen here), however, you can see there’s still a small white gap at the top and bottom of the page. The reason is the aspect ratio of the image at its native size won’t fully fill the page. What you’re seeing on screen above how that image, at full size without zero margins, fits on the page. It fills the paper side to side, but not top to bottom. One more thing to do to make it fit.
NOTE: If your image still has a gap on the sides, in the Layout panel look at the Cell Size sliders and make sure they are dragged all the way to the right to the same size as your paper.
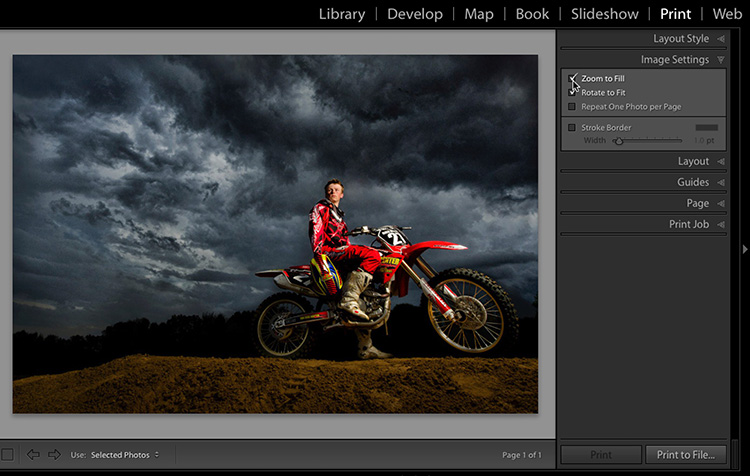
STEP FIVE: Go up to the Image Settings panel and turn on the “Zoom to Fill” check which essentially enlarges the image just enough to fill those gaps, which gives you the full-bleed edge-to-edge borderless wonderland you see above. Again, if you still see gaps for some reason, make certain the Cell Size sliders (in the Layout Panel) are dragged all the way to the right so the cell your image fits within is the same full size as the paper you’re printing on.
Hope you found that helpful. 🙂
Best,
-Scott
P.S. I’ve been sharing a lot of behind-the-scenes shots with all the lighting and camera settings over on my public Facebook page. They’ve been really popular — if you’ve got a sec, here’s the link, and if you scroll down the page you’ll run into a whole bunch of them.

