Plug-in Workflows with Lightroom Classic Part 2
Following on from last week (be sure to read that first), I want to wrap up this look at plug-in workflows with an example of what happens along the way. Obviously, depending on the plug-in there will be differences, but the general workflow tends to be the same.
Let’s look at an example workflow where I have a raw photo, taken at high ISO in poor lighting conditions, that I want to crop aggressively, and resize back to being close to the original pixel dimensions. Beyond the basic edits I’d do to all photos, I’ve identified a few problems I’d like to solve using additional software. I want to use Topaz DeNoise AI to deal with the high ISO noise issue and I want to use Super Resolution in Camera Raw to resize the cropped version closer to the native pixel dimensions. Let’s walk through the workflow steps for editing this photo of a cotton-top tamarin taken at the Boston Museum of Science at 4000 ISO.

One of the first things I suggest doing is being conscious of whether you are starting in a folder view or within a collection view, and if a collection view, make sure it is a regular collection and that collection is selected (not its parent collection set). This is so that you can find the iterative copies that will be made as you progress through your workflow. If you start with a collection selected, typically, copies sent to external editors (plug-ins) are also added to that collection as part of the process. Copies are always added to the same folder as the source photo (unless you are using a plug-in that relies on the export dialog to get the job done as opposed to the Edit in menu). I’m starting in a collection made for just this photo to more easily see any copies made as I progress.
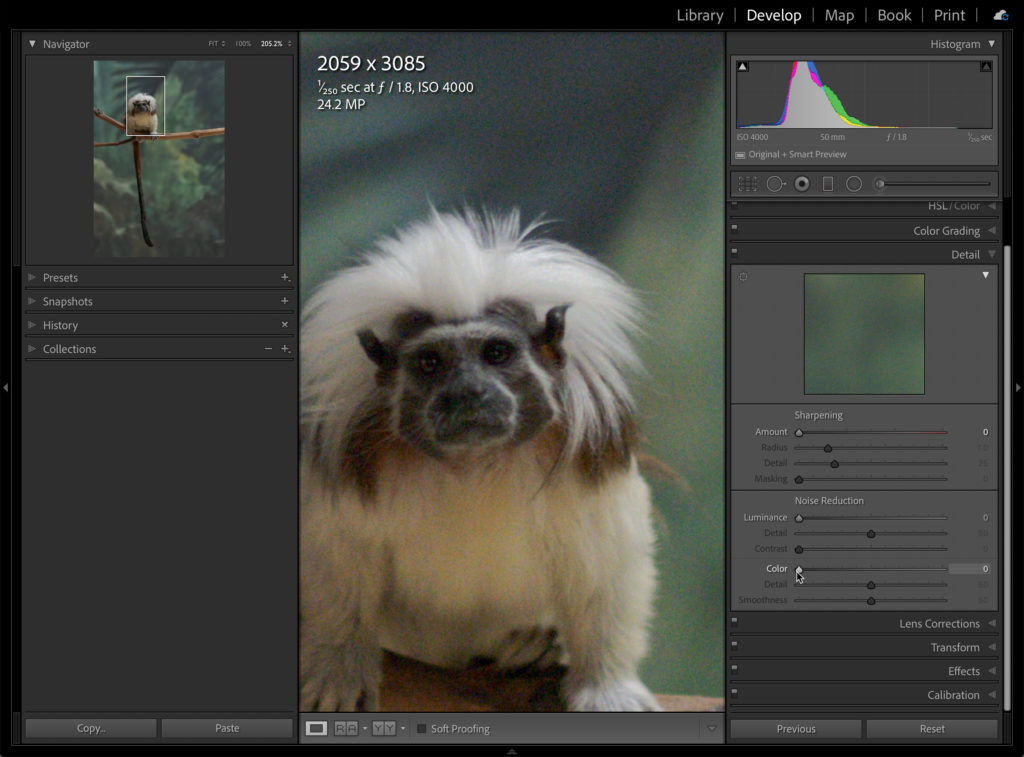
Since it is raw, I want to do all the edits that can only be done on raw data before I move the photo out of LrC for specialized edits. After choosing a profile, setting white balance, and applying lens profile corrections, I cropped the photo down to zoom in on the subject and improve the composition. Since I decided to use a specialized plug-in for removing noise, in this case Topaz DeNoise AI, I turned off all sharpening and noise reduction in the Detail panel as well.
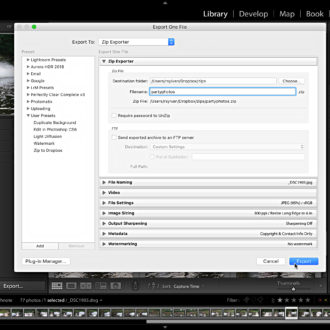
OK, there are still tonal adjustments to be made, but I feel confident that I can make those adjustments using the rendered version of the photo into a 16 bit ProPhoto RGB TIF after I’ve dealt with the noise, and after I’ve upscaled the cropped version using Super Resolution. I’m now at a decision point, do I send the photo with LrC adjustments to DeNoise or do I upscale first, then remove the noise? There is possibly more than one right answer, but I want to take advantage of the rawness of the photo as long as I can, so I opt to use workflow I outlined in the May 2021 issue of Photoshop User (Editor’s note, Super Resolution was added to Lightroom Classic after that article was written, so if I were to do this today, I would simply right-click the photo in LrC and choose Enhance to super-size it) to super-size the raw photo first.
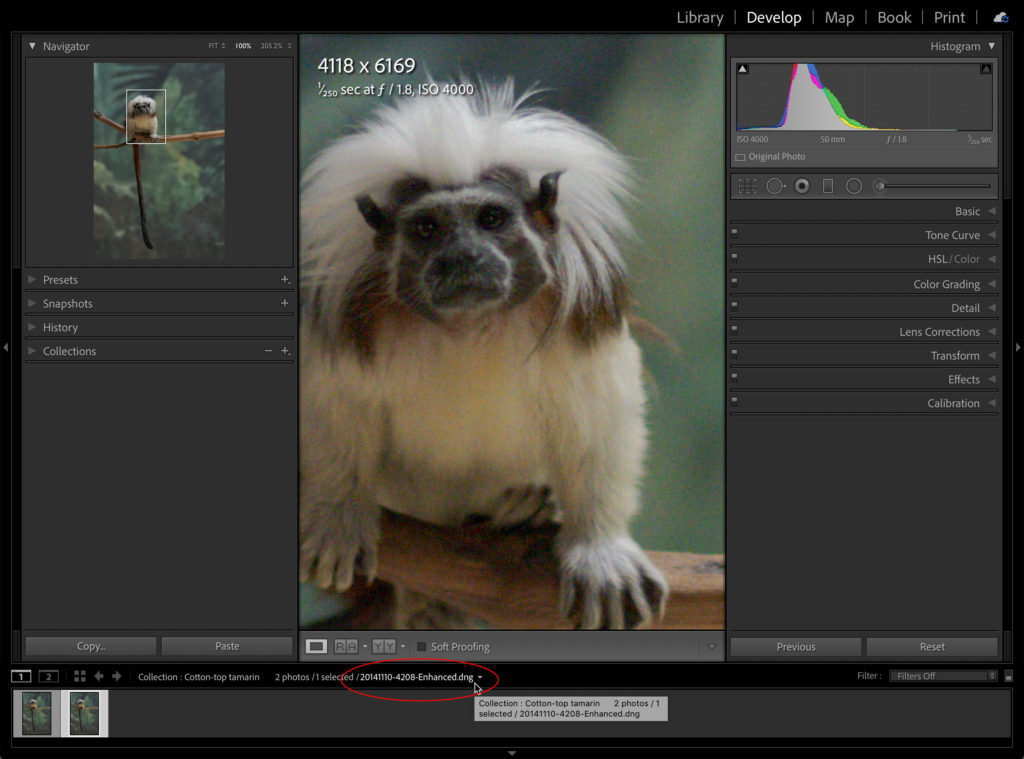
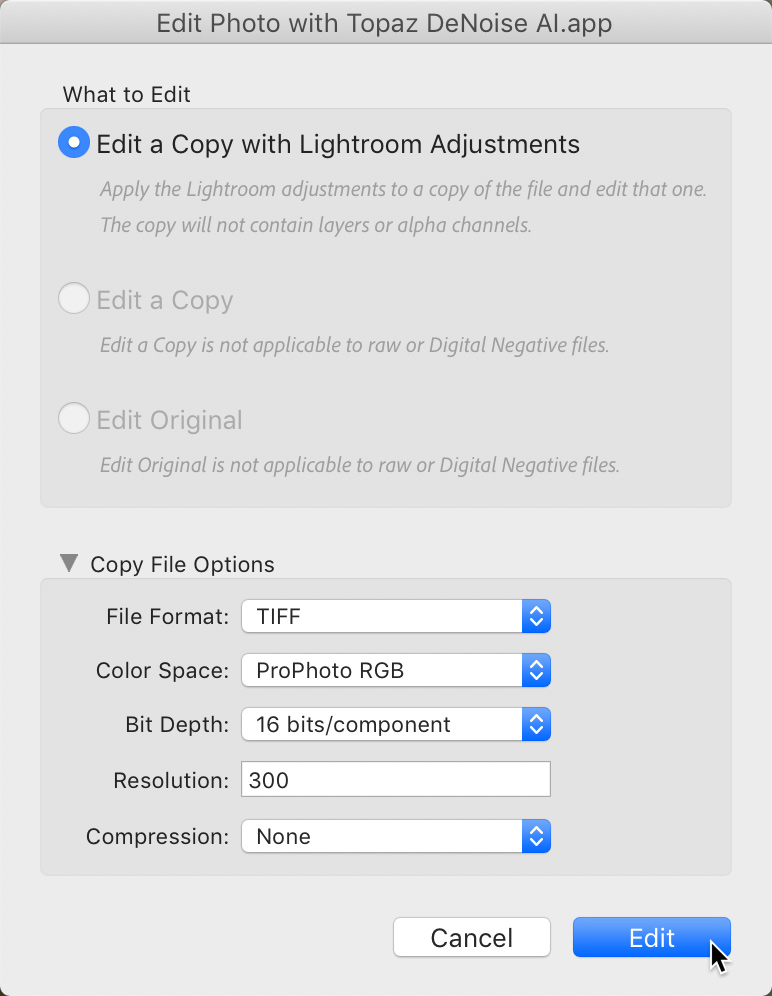
I now have my first iterative copy, which is the enhanced DNG version that is now back to roughly the same pixel dimensions as my uncropped original with all of my base edits applied. Now it is time to deal with the noise, so using the Photo > Edit in > Topaz DeNoise AI command I get presented with the (expected) Edit Photo dialog box, and I use this to confirm that a 16 bit ProPhoto RGB TIF copy (with LrC adjustments) will be created and sent to the plug-in. Clicking Edit saves the copy to the same folder as the source photo and adds that copy to the LrC catalog (and the collection I started in as well).
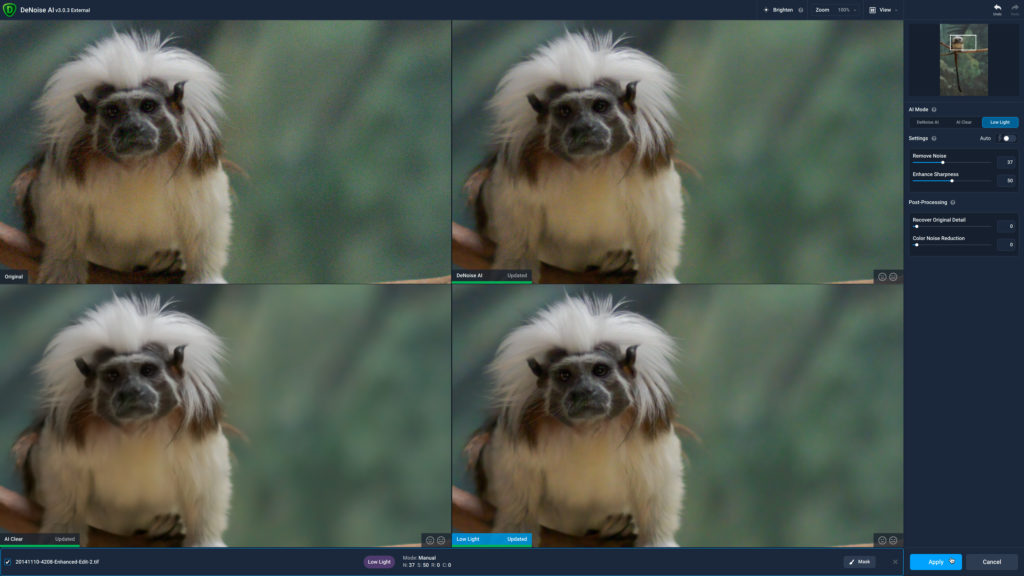
Although the copy will no longer be raw, I am sending the maximum amount of image data along for the ride, which will yield the best results. Within Topaz DeNoise, I chose my desired (subjective) option, and clicked Apply. This applies the DeNoise settings to the copy and closes out of the plug-in, returning me to LrC where I now have a second copy (third version counting the original) of the original photo. This is the TIF copy sent to DeNoise, and it is this copy that is my new master version, as it contains all of the edits I have made each step of the way.
While I am pleased with the noise reduction, I’m noticing how soft this version is after all of those edits. Because of this, I decide to send this copy through Topaz Sharpen AI to see if I can improve the sharpness around the tamarin’s face. This is another decision point. Do I run Sharpen AI on the current master TIF version or do I create a new copy to preserve the results after the noise removal process? I feel the answer to this will depend on your workflow, but the safe choice is to create a new copy just in case you want to manually composite the results of the Sharpen AI process with the results of the DeNoise AI process (to get the best of both worlds) or if you are not happy with the new results and want to go back. Using the Photo > Edit in > Topaz Sharpen AI command I choose Edit a copy with Lightroom adjustments, and now a third copy is added to my collection, and that latest copy has become my new master version.
As you can see, while I am getting pleasing results from this process, it is taking quite a few steps, iterative versions, time, and hard drive space to get here, and I’m not done yet.
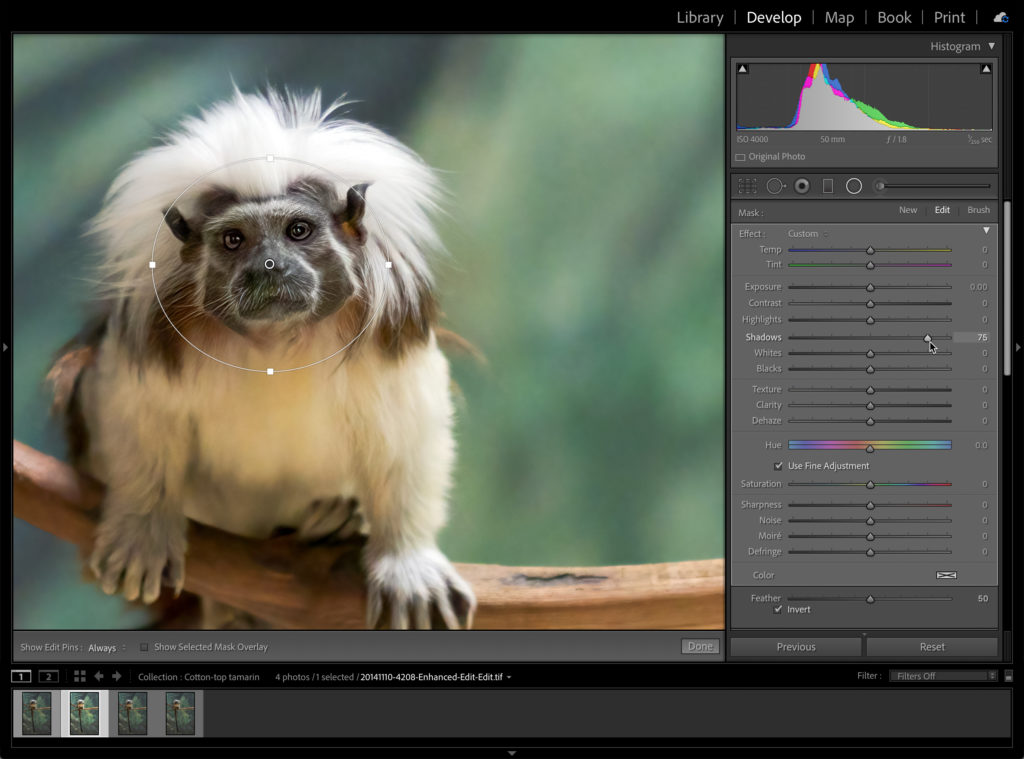
My current master version is now has “-Enhanced-Edit-Edit” appended to the original file name. The Enhanced came from running through Super Resolution in Camera Raw, the first -Edit came from the copy sent through DeNoise, and the second -Edit came when sending a copy of that to Sharpen AI. I’m pleased with the results, and will now use a few of the other tools in LrC to finish the job. Specifically using the Whites and Blacks sliders to set the white and black point respectively, and a little Radial Filter around the tamarin’s face to further open those shadows and see those eyes.
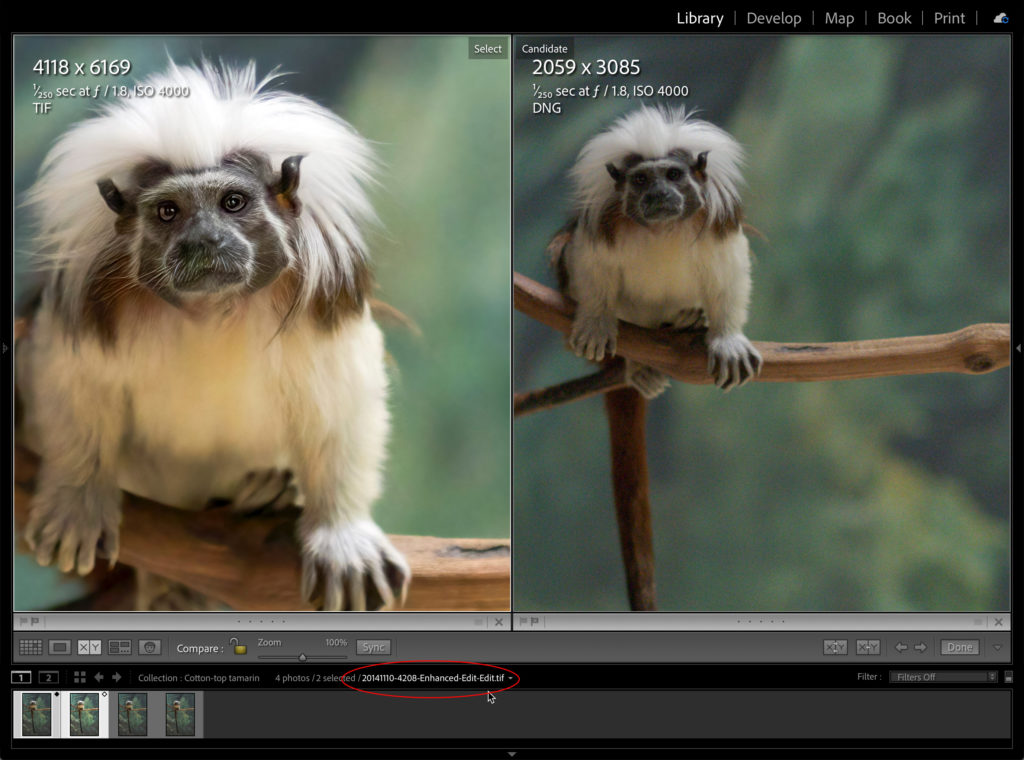
Comparing the final result of all of those edits back to the original file shows I’ve come a long way, and completed tasks that were beyond what LrC could do alone. I’m very pleased with the final result, but as you can see, I involved three other programs, and performed a lot of steps. In the end, we each have to ask, are the results worth the effort? For me, I say yes, but that is not the right answer for us all, and certainly not the right workflow for all photos.
It has been my experience that any tool that specializes in a single function will probably do a better job than a tool that is a jack of all trades (like LrC), all things being equal, when put head-to-head on that function. It’s just that all things are not equal, and this is where we each may come up with a different answer. I love the ability to extend my image editing possibilities beyond what LrC can do, and I take the choice of adding new tools into my workflow very seriously. Should you decide to add any other plug-in to your repertoire I recommend doing the following:
- Read a few reviews (such as past Photoshop User and Lightroom Magazine issues)
- Watch a few videos on YouTube to see how other photographer’s use them
- Review the resources provided by the plug-in’s creator to learn the nuances of that application and how it integrates with LrC (they are not all the same)
- Give the free trial a good run (they almost all come with some free trial)
- If you are a KelblyOne member, check your KelbyOne Perks for a discount code
- Ask questions and share your experiences so that we can all continue to learn from each other
One final point, do we need to keep all of the interstitial versions between the original and the final master version? The answer to that may also vary with our workflows, but in this case, the only versions that matter to me now are the original and the final. I will delete the two middle versions as they no longer serve any purpose and are just taking up hard drive space.