Hi, folks – got a Photoshop tutorial for you today — it’s really easy (and the last step is really the trick), but it’s a handy one for those situations where you want to apply an effect to your image, but when you’re done applying the effect either desaturated or changed the color in your photo enough that you lost the original color. Well, this will bring it back in a hurry.
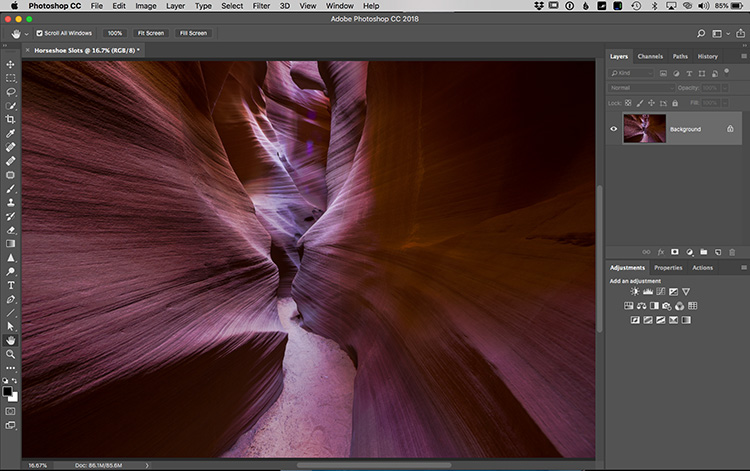
STEP ONE: Here’s the original image — I brought it over to Photoshop from Lightroom. It was taken a couple of days ago in the Horseshoe Bend Shots (not far from the Antelope Canyon slots, but instead of having 200 photographers all jammed in there, it just 10 of us total).
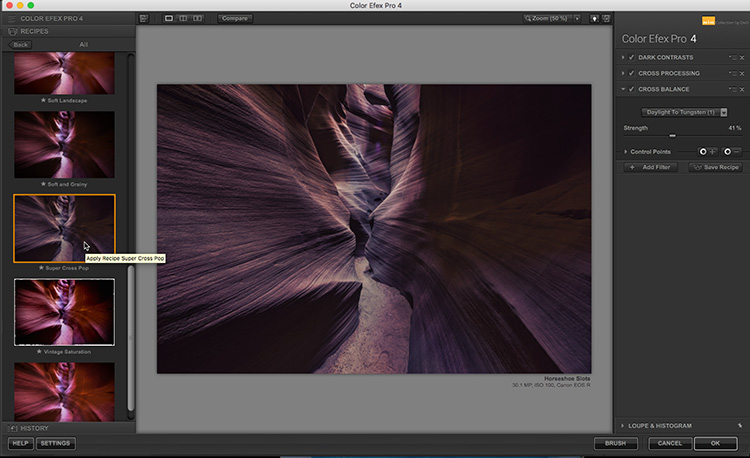
STEP TWO: The particular effect I wanted to apply is from the Nik Color Efex Pro plug-in (for Lightroom and Photoshop), and I wanted to apply one of the “Recipes” from that classic set of free recipes (you can find them online quickly with a quick Google search). I didn’t change anything — I just used the Recipe called “Super Cross Pop” (it applies a punchy cross-processing effect to your image).
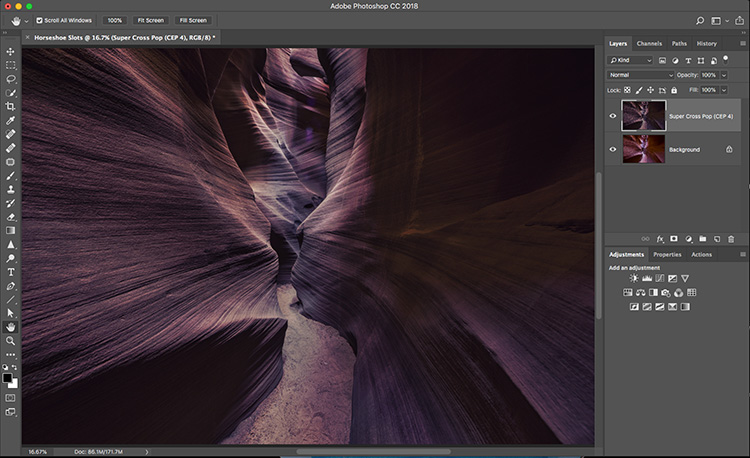
STEP THREE: Once you click OK, it creates a duplicate layer and applies that effect to your image on this new layer. While I like the extra pop and detail it gives my image, I don’t like the desaturated color as much.
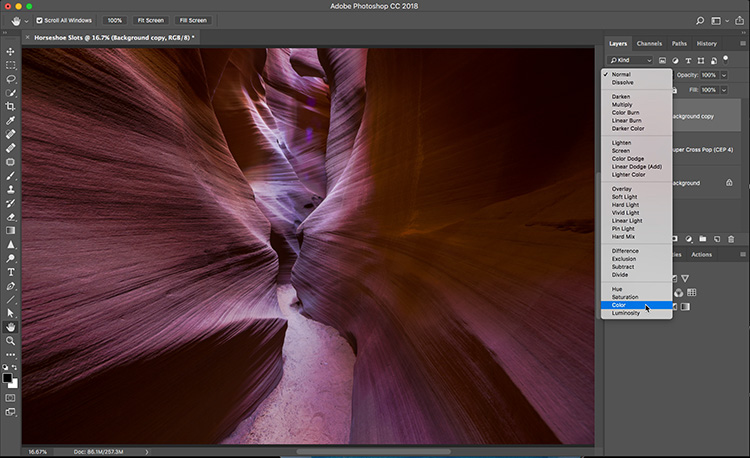
STEP FOUR: In the Layers panel; duplicate the background layer (the one with the original image you brought over from Lightroom), and drag it to the top of the Layers stack, so on the bottom you have the Background layer (your original image); in the middle your Super Cross Pop affected layer and on top a copy of your original Background layer. In the Layers panel, change the Layer blend mode of this top copy from Normal to Color. This lets the color through to the layer beneath it, without bringing back the rest of the original image.

STEP FIVE: Here’s the final image with the original colors from the Background Copy layer blended in with the color of your affected layer on the middle layer. So, that’s essentially the trick — to get back that original color look, you duplicate the background layer; drag it to the top of the Layers Stack, and change its blend mode to ‘Color.” To reduce the amount of original color, you can lower the Opacity of this top layer.
Hope you found that helpful.
I’m back from a week out West. It started in Vegas with a planning session with the folks at the Mirage Resort & Casino for our West-coast Photoshop World next August (We’ll be in Orlando in the Spring), and then out to Page, Arizona to do some shooting for a book project I’m working on.
We’re less than a month away from the Worldwide Photo Walk
There are nearly 800 walks in cities all over the world – if you haven’t signed up to join a free photo walk near you (it’s Saturday, October 6, 2018), then head over to worldwidephotowalk.com and click the “Find a Walk” button. Lots of fun, awesome prizes, and a chance to make friends and make some cool pictures.
Have a great weekend, everybody – I’ll catch ya here on Monday. 🙂
Best,
-Scott