Painting Your Photos with Information
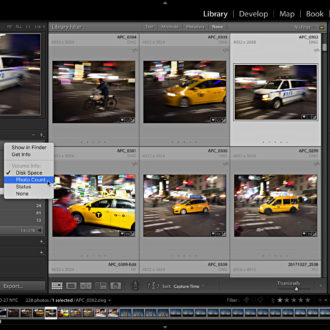
The often-overlooked Painter tool can be a real time saver when working with large groups of photos in Grid view of the Library module. I always find myself forgetting about the Painter tool, then I come up against a project where I need to scroll through hundreds of photos for some reason-such as assigning a new keyword, adding them to a collection, or applying a flag-and then I remember the Painter! Do you see that little spray paint icon in the Grid view Toolbar?

If you don’t see it make sure you are in Grid view by pressing G, and if you still don’t see it then press T to make sure the Toolbar is visible. What? Still don’t see it? OK, click the drop-down arrow on the far right end of the Toolbar and make sure Painter is checked. Got it now? Good.

After selecting the Painter from the Toolbar to enable it (or go to Metadata > Enable Painting) you can load it with keywords, color label, flag state, star rating, metadata template, develop preset, rotation setting, or even a collection. Once enabled, the Toolbar will change to reveal the Painter’s options, so if you choose Keywords then a keyword entry field will appear, choosing Label will display the color label choices, Metadata will provide a list of all your metadata templates and so on. This tool can really help speed up an otherwise tedious task and even make it a little more fun.
One of the ways I like to use this tool is when I am adding photos to an existing collection. The first thing I do is ctrl-click (PC: Right-click) the collection I want to use, and choose Set as Target Collection from the contextual menu that appears. You’ll see a little + icon appear next to that collection in the Collections panel, which identifies it as the target collection. As an aside, by default the Quick Collection is the target collection, so once you assign a new target collection the keyboard shortcut B will also add photos to the target collection. To un-assign the target collection just ctrl-click (PC: Right-click) the collection again and uncheck Set as Target Collection. With our target collection assigned let’s go through the steps to use it with the Painter tool.
One: Enable the Painter tool.
Two: Click the Painter tool drop-down menu and choose Target Collection from the list.

Three: Click and drag the Painter tool over the photos you want to add to the target collection. You’ll notice the cursor has changed to the Painter icon when you place it over a photo, and as you click and drag the can animates to appear like it is spraying.
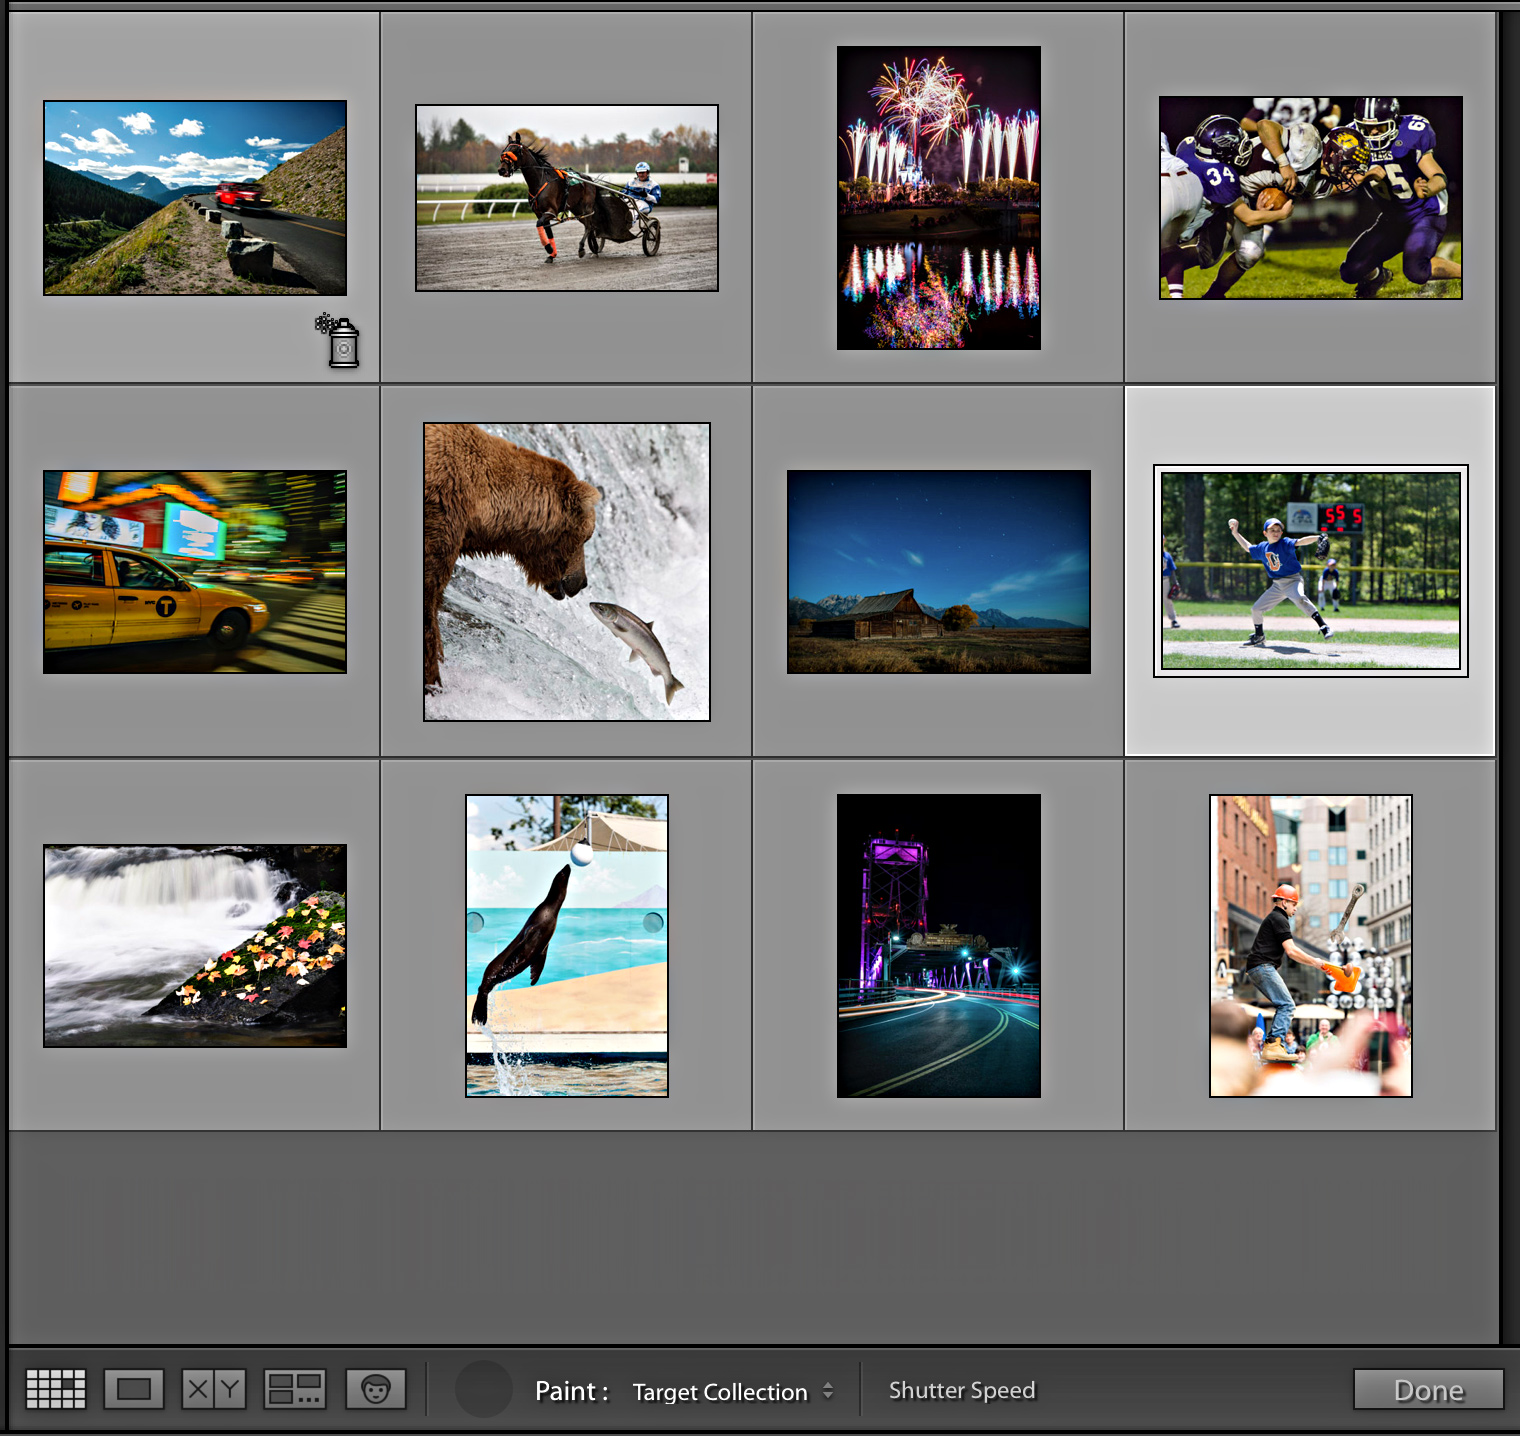
If you “overspray” and hit a photo you didn’t want to add to that collection you can hold the Option (PC: Alt) key to change the painter to an eraser, and click and drag over those photos to remove from the target collection. Note, if you are painting with a metadata preset, rotation, or a develop preset you can’t erase the overspray with the Painter tool, but CMD/Ctrl-Z does undo if you catch it right away.
Five: When you have finished with the Painter you can click the Done button in the Toolbar or press the escape key to exit the Painter tool.
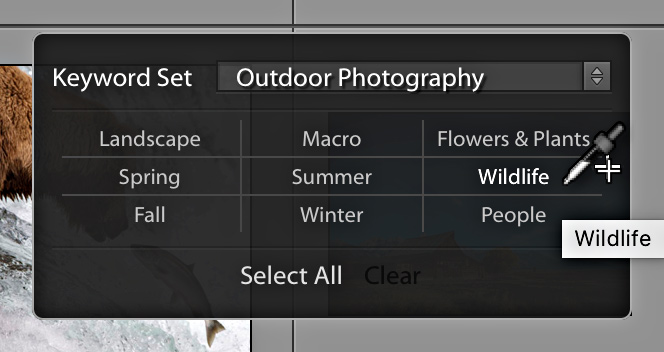
The basic process works the same with whatever item you have loaded in the Painter, but there are a couple of things I want to bring to your attention. If you are working with keywords the keyword field will access your existing keyword list as you type and display a listing of all the keywords that match the letters you have entered, which speeds up adding existing keywords. To enter multiple keywords just type a comma after the first keyword and start typing the next keyword. You can even access your keyword sets by holding the Shift key, and load keywords that way.
Happy painting!