New Features in Lightroom for Desktop
The version of Lightroom that runs on Mac and Windows (aka “Desktop”) got a small update this week to version 5.3. As usual, these updates include support for new cameras and new lenses as well as bug fixes. However, every now and then some dot updates also sneak in some new and/or improved features, and the update earlier this year saw two improvements to existing features get added. Let’s take a closer look at what you can do now.
Intersect added to Masking
If you use Lightroom Classic then you may already be familiar with the Intersect function that was added when Masking got its major overhaul last October. Intersect is a powerful function and was added to support the previous functionality for using what was called a Range Mask within a Radial Filter, Graduated Filter, or Adjustment Brush adjustment. I’ve written about Intersect Mask before when using Lightroom Classic, and in that article I demonstrated a workaround to gain that same functionality in Lightroom. With the introduction of Lightroom 5.2 (back in Feb) we gained the same Intersect function here in Lightroom to keep it on par with Lightroom Classic.
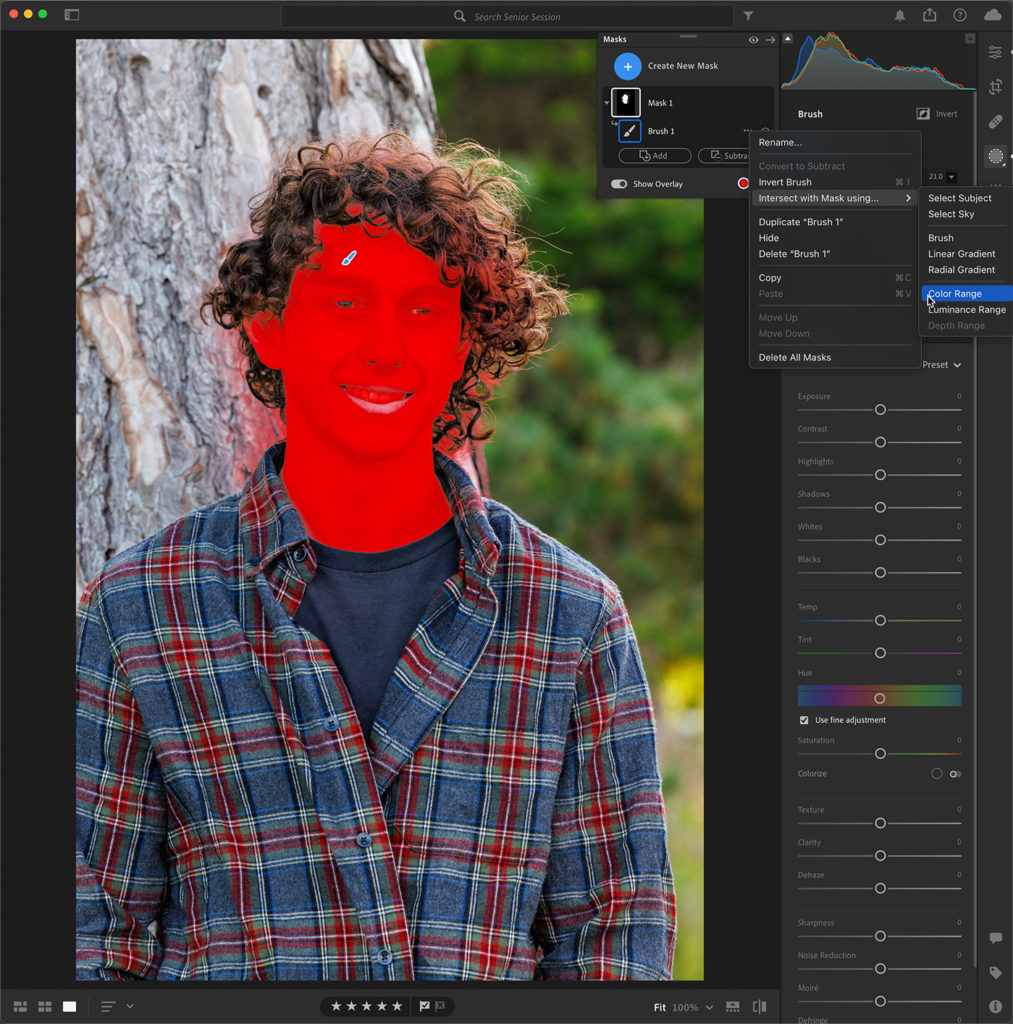
So, let’s say you have a photo you want to select just the skin tones, so you brush over the subject’s face in broad strokes first using the Brush in Masking.

Then, in the Masks panel, click the three-dot menu next to the mask you created and choose Intersect with Mask using … and choose Color Range in this case, but use what makes the most sense for your photo.
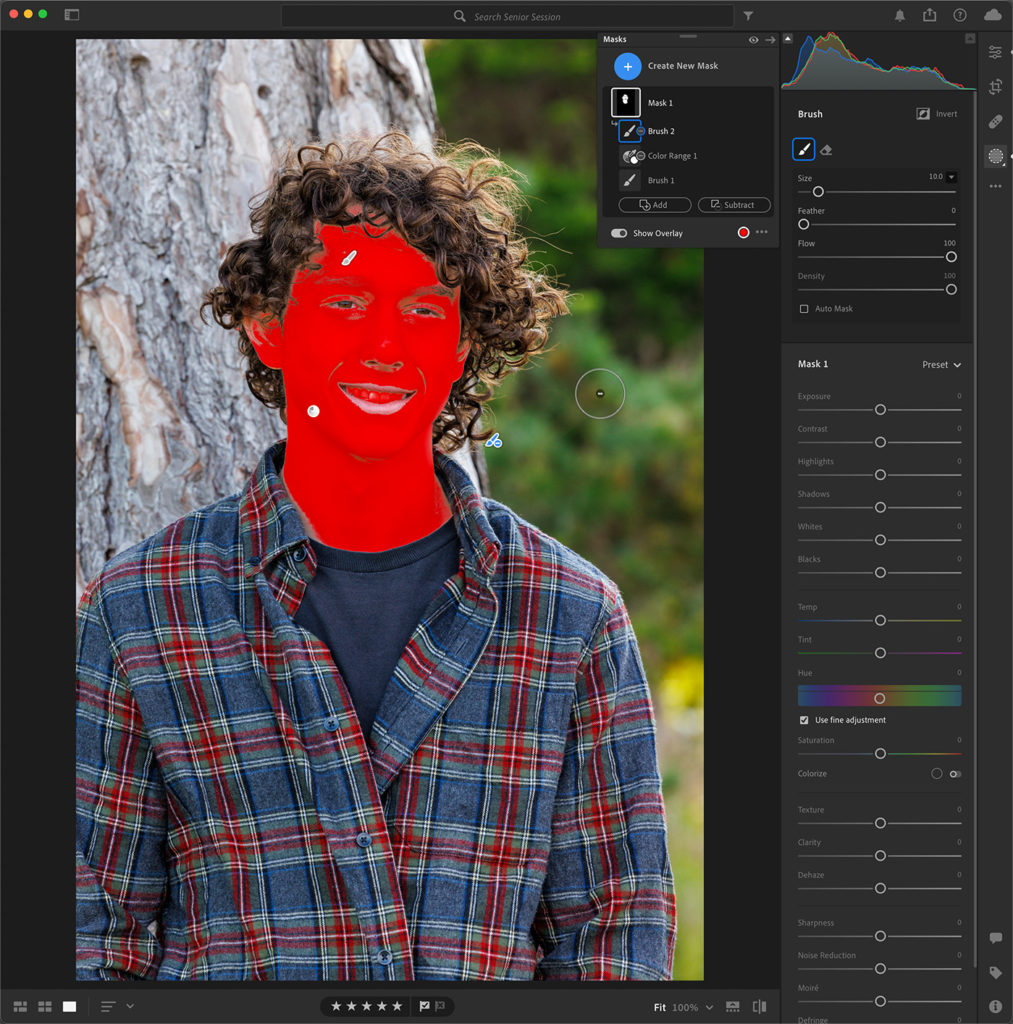
Then using the Color Range selector tool, choose the desired color range in the photo and refine to just have the areas of skin selected. Subtract with the brush as needed to clean up around the edges.
Export Versions
If you are a fan of using Versions in Lightroom you’ll be glad to learn of additional functionality for exporting copies of a given version’s state or exporting all named versions as JPGs in one move. Click the Versions button at the bottom of the Editing panel to open the Versions panel.
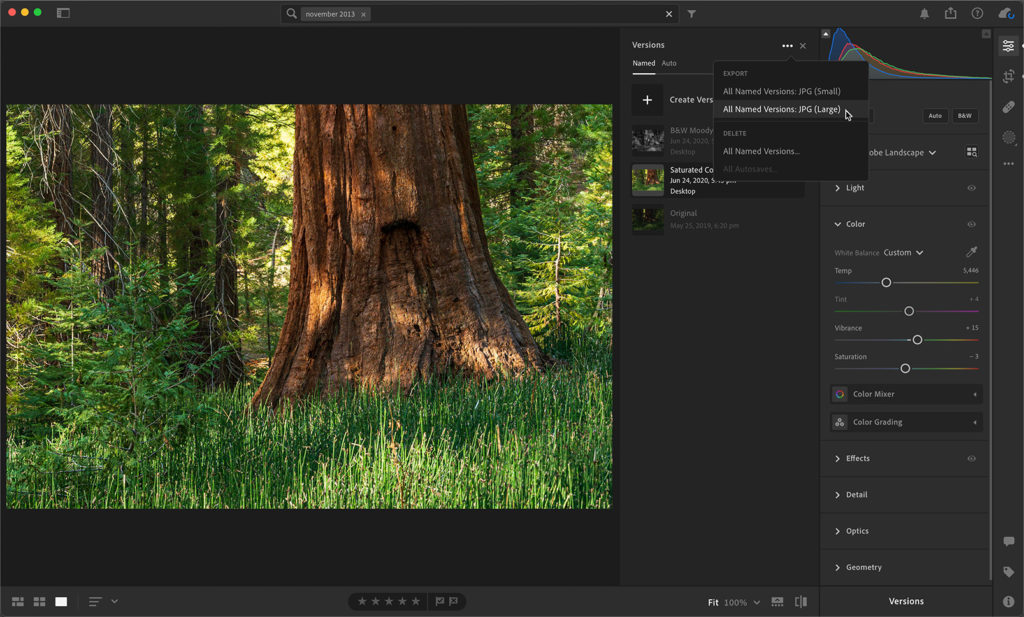
From there, if you have named versions and want to export JPG copies of them all at once, click the three-dot menu at the top of the panel and choose what size JPG you would like to export. Lightroom will then export a JPG copy using the name given to the version for the file name.
You can export a single version by clicking the three-dot menu next to the desired version and choosing Export with these settings to open it in the Export window where you can choose desired export settings (note, Short side is now an option for resizing exported copies too).
While not huge features, sometimes it is the little things that help us in our workflow and serve as a good reminder to keep our applications up to date.