
Mastering Collections in Lightroom Classic: Part 2
While those pre-built collections in the Catalog panel (from last week) are all very useful in their own way there is another level of user-driven collections that you can leverage to fit your organizational needs. This is where the Collections panel comes into play.
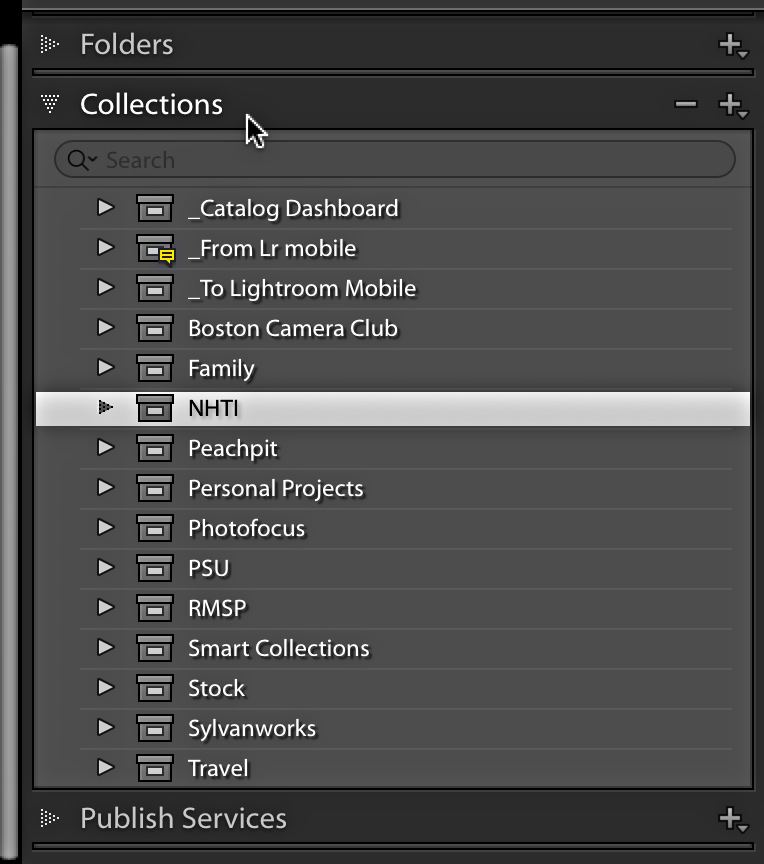
The Collections Panel
There are three types of collection tools found here:
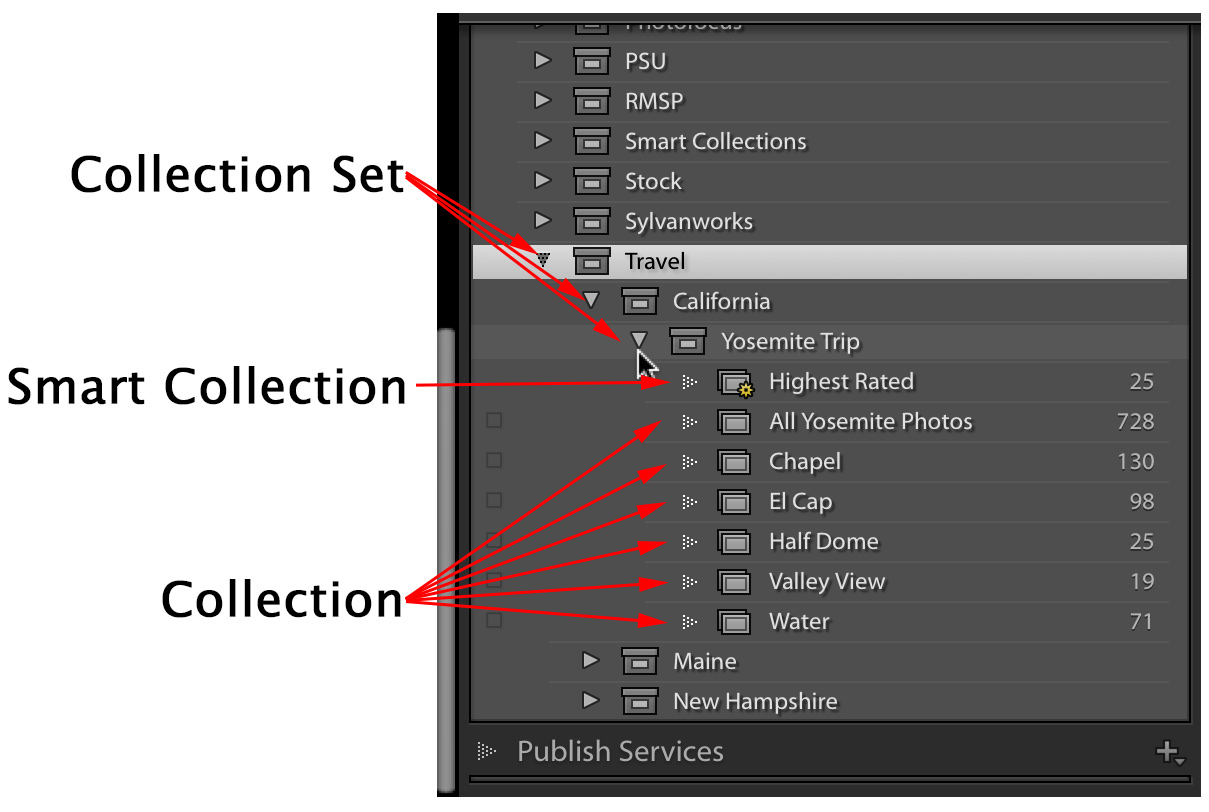
• Collection Sets – used for providing organizational structure
• Collections – used for manually gathering up photos in various groupings
• Smart Collections – a type of saved search that automatically finds photos matching specific criteria
Collection sets can only contain collections, smart collections, or other collection sets, which is why they are good for creating structure within the Collections panel. For example, you might have a collection set called Travel, and then within that collection set you could create a collection set for each location you’ve traveled to, and then within each location’s collection set you’d create collections and/or smart collections to gather up the relevant photos for each location.
Because Lr Classic is always referencing the photos, you can continue to add photos to existing collections without worrying about where those photos are stored on your system. This also gives you the ability to add photos to as many collections as you need to without worry of duplicating photos on your drive. So, I can have photos in my All Yosemite Photos collection (and keep adding more each time I visit) as well as those same photos in each respective collection based on a location within the park. In the future, if I need to find a photo from Yosemite, I can just go to this collection set and find them without needing to remember what folder those photos happen to be stored within on my system. I can then use the Library Filter bar to refine the view of any given collection to show photos by date, rating, flag, camera, lens, and so on. This is truly leveraging the power of that catalog (database) for my needs.
There are a few different ways to create these collection tools, with the most obvious being the + sign at the top of the Collections panel.
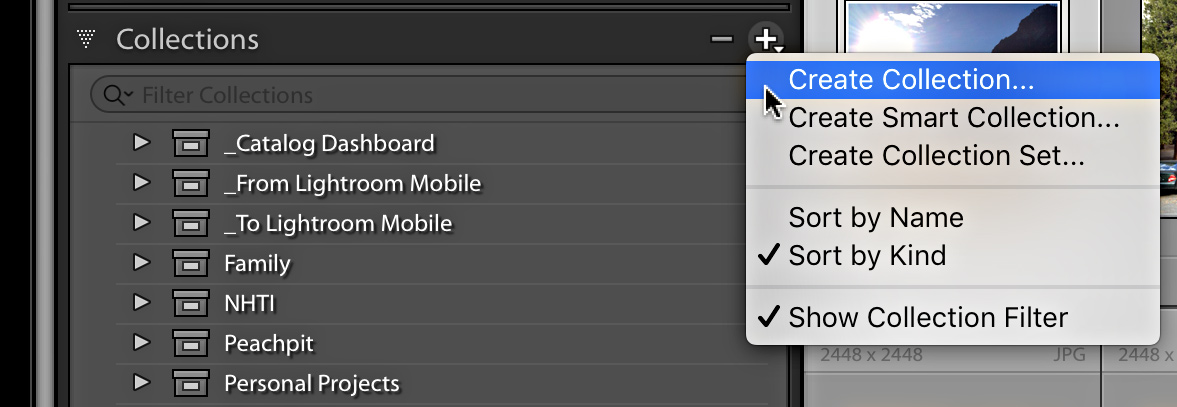
From this menu you can choose which tool you need, and then you’ll be presented with the dialog box for completing the process. Each tool has different options, so let’s look at each one in turn. I’ll create a collection set for a trip to Montana, and then create a collection to hold all of the photos from the trip, and then a smart collection to automatically gather up my highest rated photos from that collection. This process can be applied to any combination of collection sets, collections, and smart collections.
STEP ONE: Click the + sign at the top of the Collections panel and choose Collection Set.
STEP TWO: Give the collection set a name, and choose if you want it to be placed within an existing collection set. In my case, I want it to go into my Travel collection set, so that is checked.
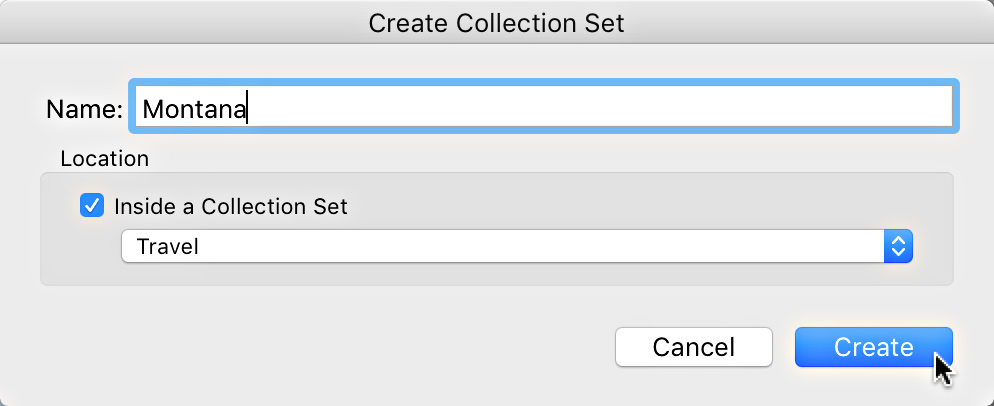
Click Create to add it to the Collections panel.
Now that I have my parent collection set I can begin to add collections and smart collections to organize my photos. First I’ll add a collection for all photos from the trip to Glacier National Park.
STEP ONE: An alternative to the + sign at the top of the panel is to right-click the parent collection set and choose Create Collection from the contextual menu that appears.
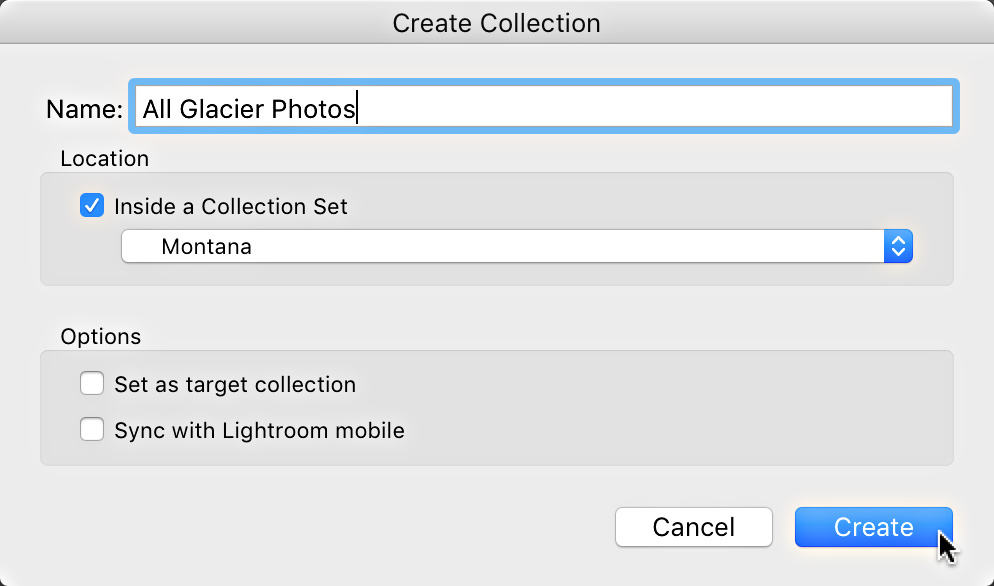
STEP TWO: When the Create Collection dialog appears the Location will already be configured for inside the Montana collection set. I can now give this collection a name and click Create to add it to the panel.
Adding Photos
Now I’m ready to add photos to that collection, and this can be done simply by dragging and dropping the photos from Grid view to the collection. As an alternative, if you want to create a collection from an entire folder of photos you can drag and drop the folder from the Folders panel to the Collections panel.
Either option gives the same result, but when you drag the folder down the resulting collection will have the same name as the folder. To rename a collection, just right-click and choose Rename from the contextual menu that appears.
Now that I have a collection set, and my first collection, I can create a smart collection with a few simple rules to automatically find all of the photos I give a high star rating.
STEP ONE: Right-click the Montana collection set and choose Create Smart Collection from the contextual menu.
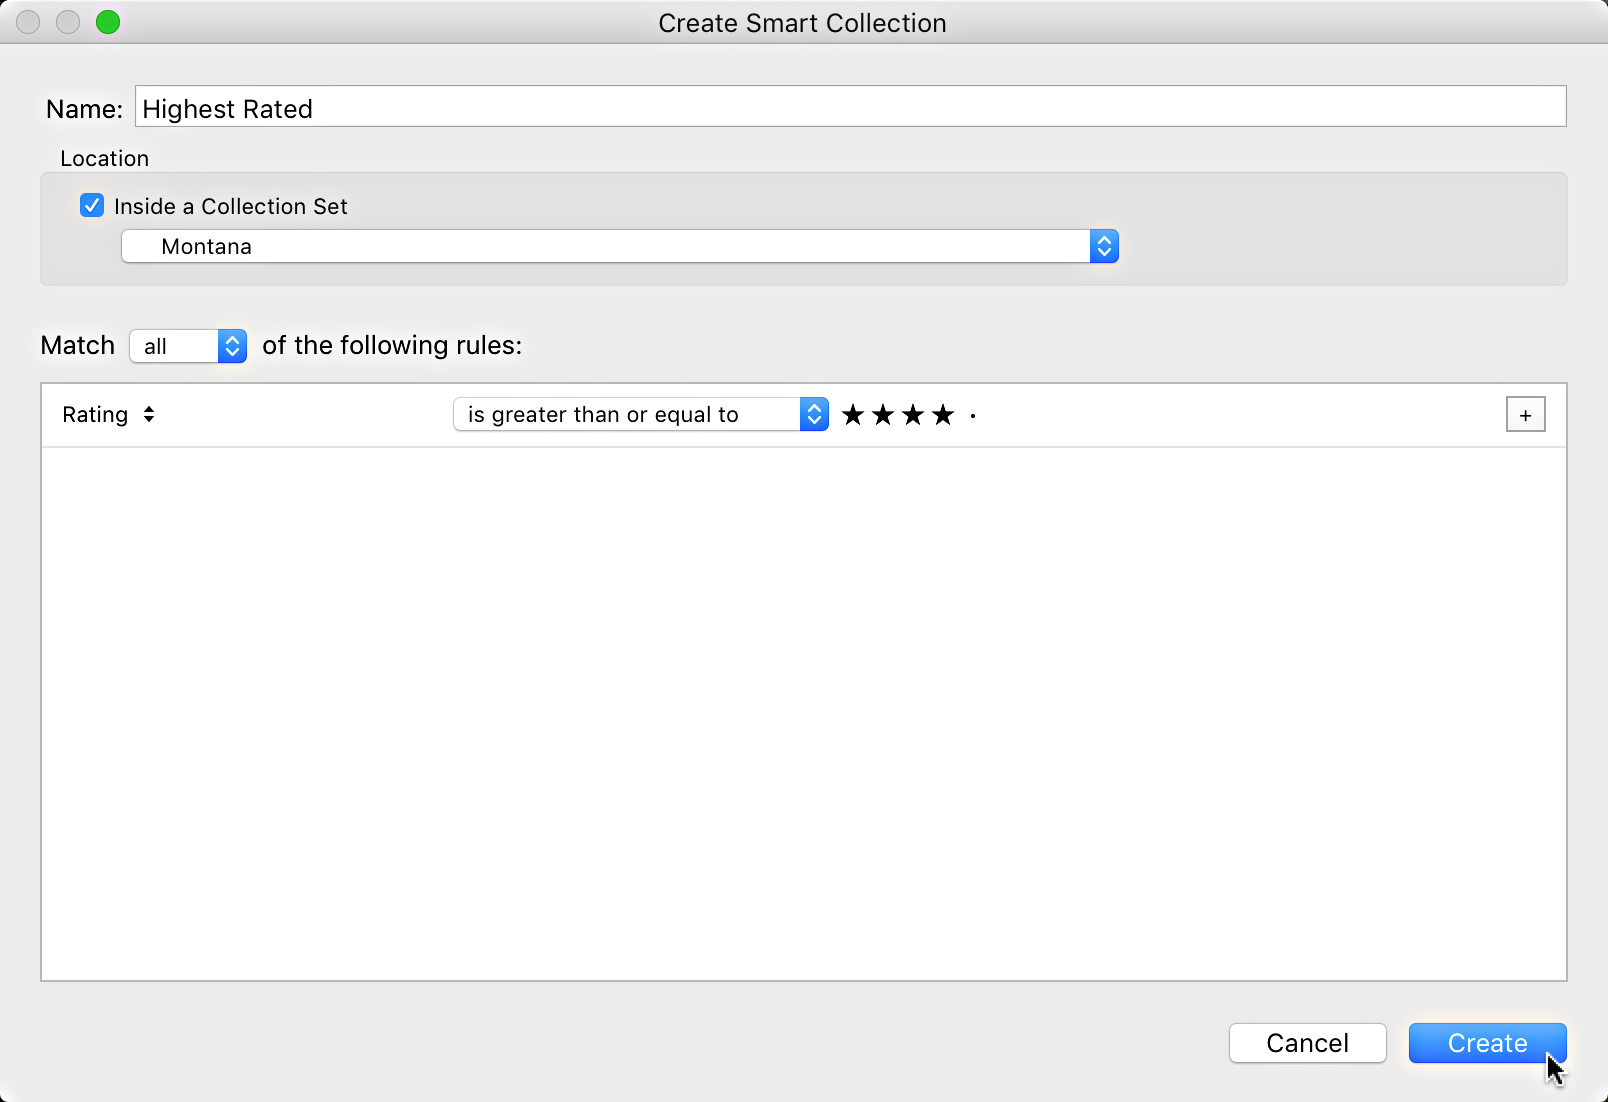
STEP TWO: In the resulting Create Smart Collection dialog box, give the smart collection a name and note that it is already configured to be created within the parent collection set.
STEP THREE: Define your first rule. For this smart collection I want a rule based on the star rating. By default, the Rating criteria came up as my first rule, so I just need to define the criteria and the number of stars. I chose greater than or equal to 4 stars.
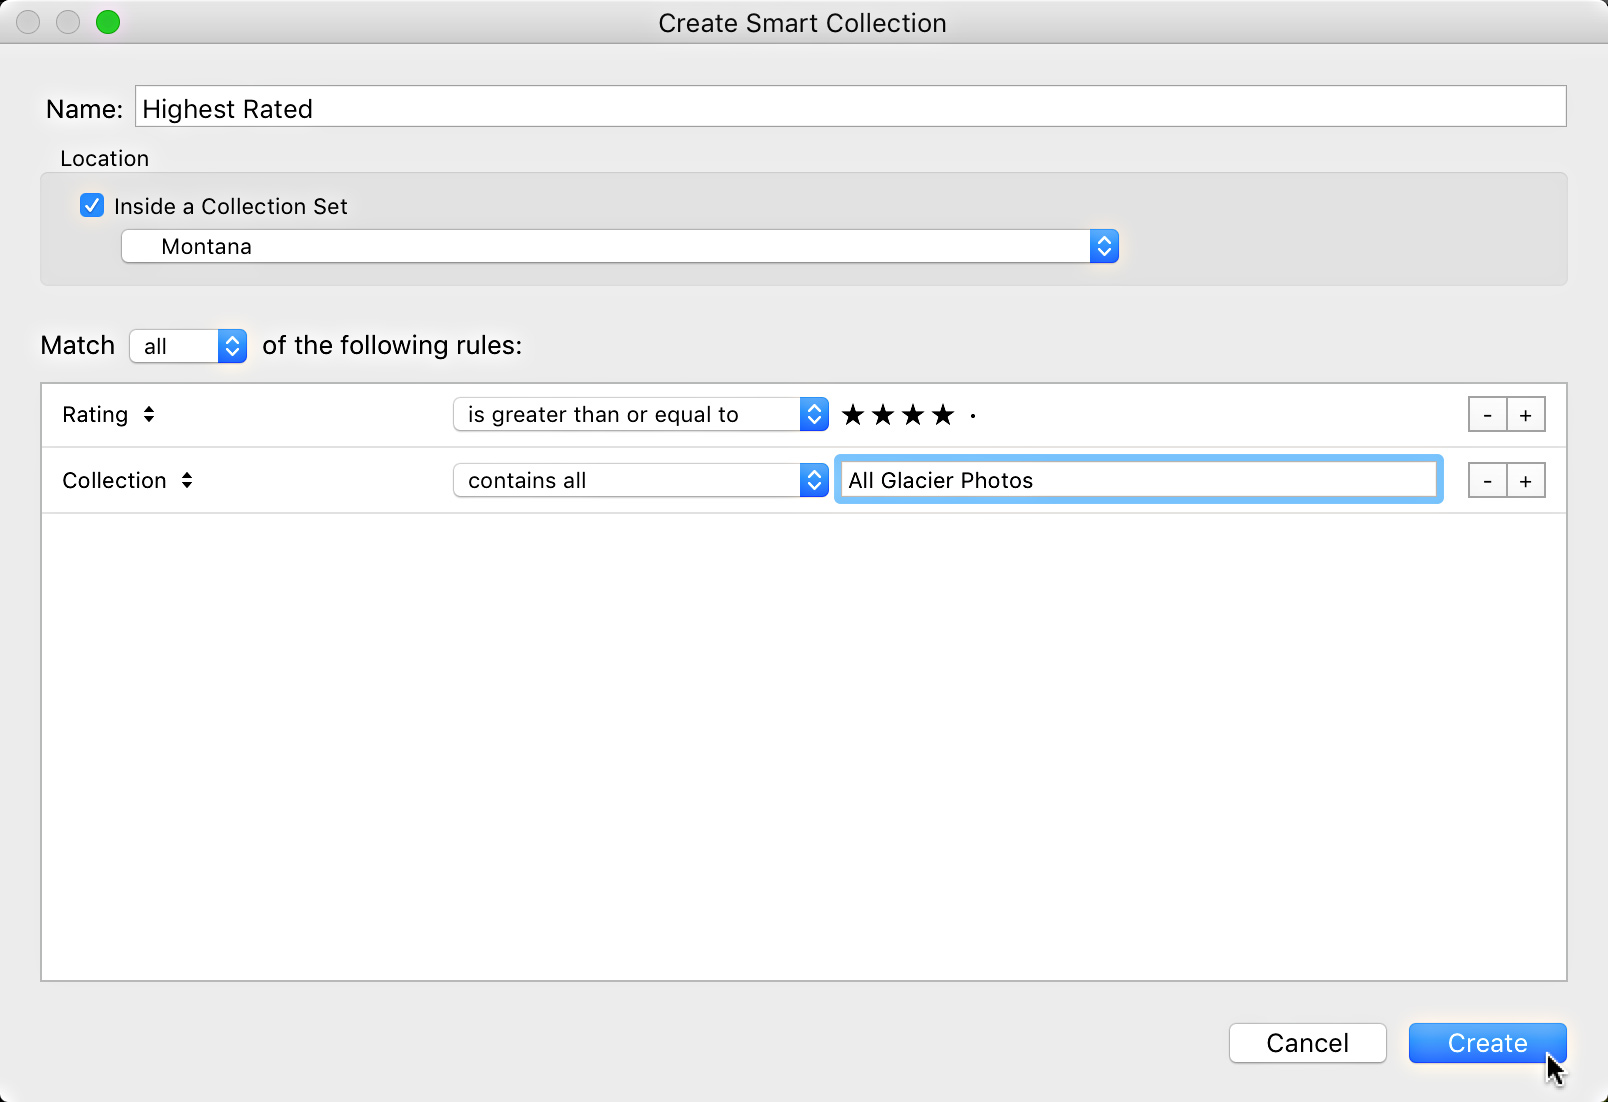
STEP FOUR: Add additional rules as needed. I also want a rule that defines the source of the photos being searched or else the default behavior is to apply the rules to all photos in the catalog. Click the + sign at the end of the first rule to add a second. Then click the rule drop-down menu to choose from the available options. Under Source, I chose Collection, and then entered the name of the collection I had just created. Click Create to put it into action.
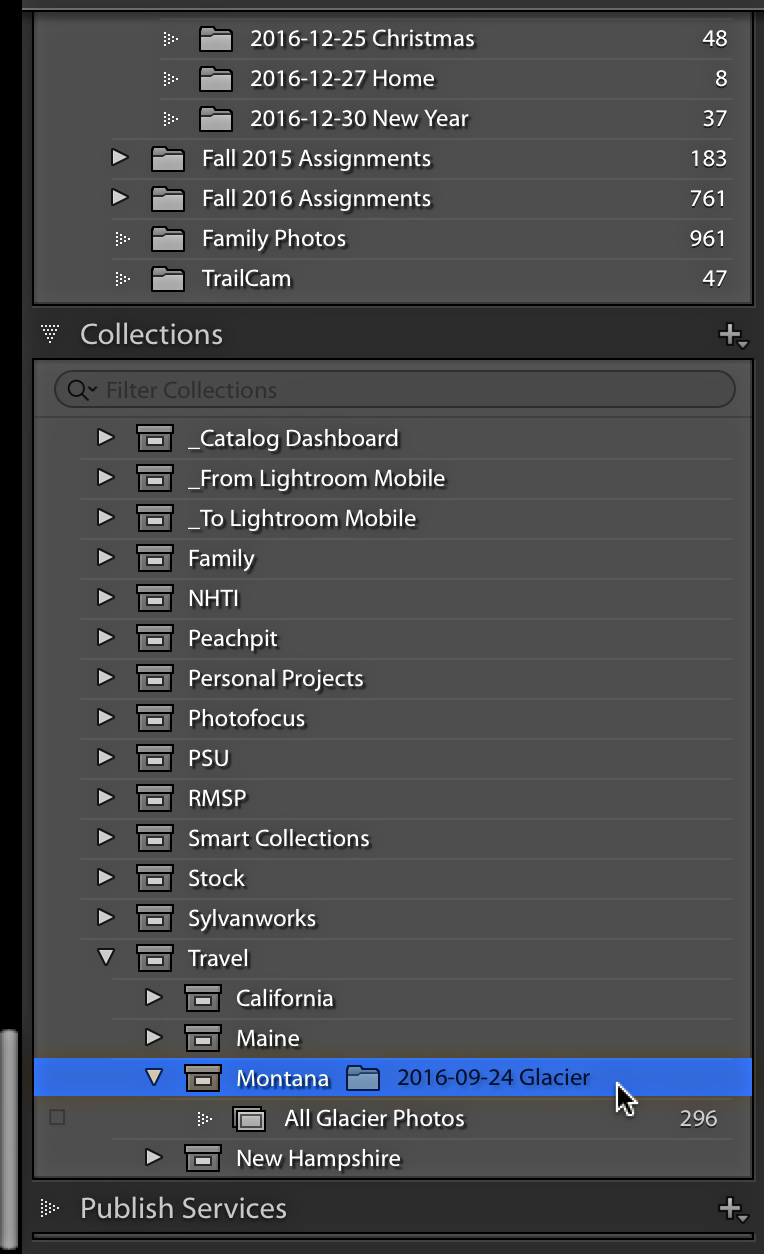
With my greater than or equal to 4 stars and All Glacier Photos collection set as the source, as I apply a 4 or 5 star rating to any photos in that collection they will automatically be gathered into my new smart collection.
This is a basic example of how each type of collection tool can be used, but one that I use frequently. In closing, I want to point out that aside from the benefits I’ve shown so far, the Collections panel appears in all other modules, while the Folders panel is only found in Library, which makes using collections a very handy way to access your photos no matter where you are working in Lightroom at the time.

