
Jumping Over To Photoshop Just Got Way Better For Lightroom Users
It used to be that when we jumped over to Photoshop, and wound up having to use Photoshop’s Camera Raw for any reason, it was like visiting a parallel universe. It’s the same…only different. Tools are different places; panels don’t work the same; features are different. I mean, it’s all there, kinda, but it was like learning a new program.
Luckily that changed (for the better) in a big way in the latest release of Photoshop last week. They “Lightroomified” Camera Raw, and now it looks and feels much more like Lightroom, and now you’ll feel much more comfortable over there, and work faster and more efficiently, because you won’t spend so much time searching for stuff.
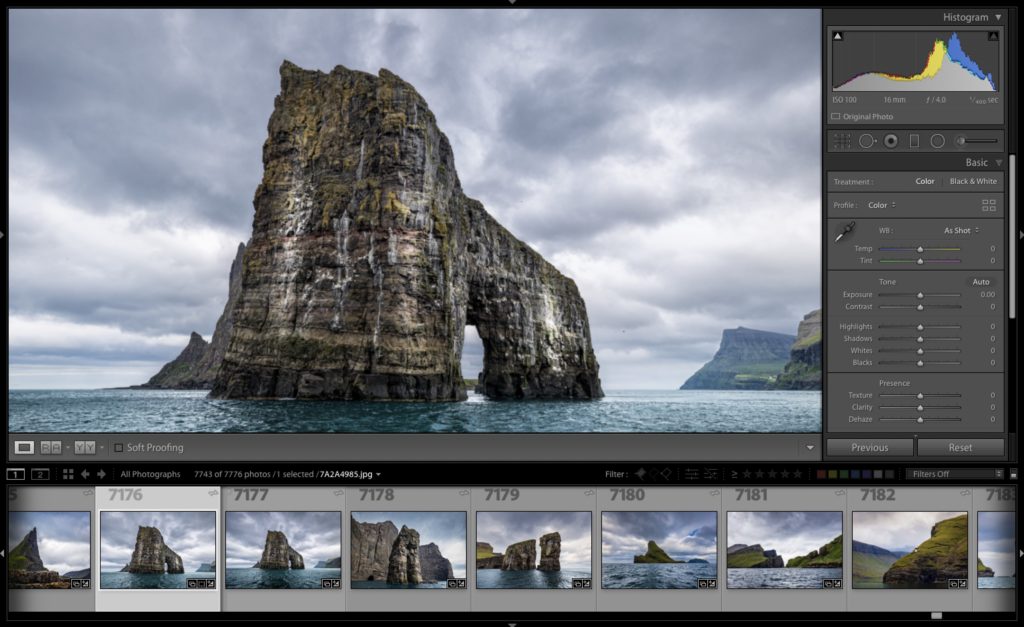
Let’s look at the two and you’ll see what I mean. Below, here’s Lightroom Classic’s Develop Module.
How here’s Camera Raw’s new User Interface (below):
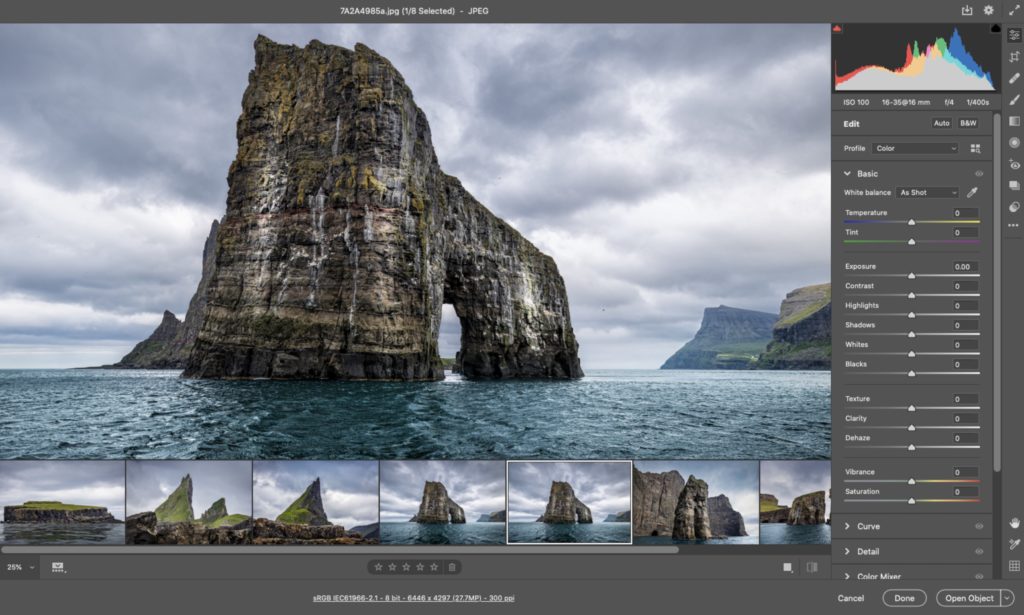
Here’s a brief list of what they changed interface wise:
- You now (finally) have the option of having the filmstrip of images across the bottom (just along the left side only).
- The panels are now stacked in a scroll list, just like Lightroom’s panels, instead of tabbed.
- The tools have moved to the right side (Lightroom’s tools are the top of the right side panls), instead of being at the top left corner.
- The sliders themselves look and respond more like Lightrooms’
The whole experience is more familiar, and more modern, and now you’ll feel much more comfortable if you take an image over to Photoshop and need to use Camera Raw while you’re there. A big improvement all around.
Hope you found that helpful. 🙂
If you’re in to Photoshop, this is for you
We just announced it last week and already hundreds of photographers have already signed up the KelbyOne Photoshop Conference, coming July 14-15, 2020. Two full days, all live-streamed with a who-s who of the best Photoshop instructors, and all at a price that anyone can afford. Don’t miss out — sign up now and save $150 with the early-bird special. Tickets and more info at https://kelbyonelive.com/photoshop-conference
Here’s wishing you a great week, a safe and sane one, too! 🙂
-Scott


Hi Scott and Rob,
Personnaly, I would have preferred to have ACR look inside LR, perhaps with toolbar on right, however.
I don’t know why but in LR, on my 27″ display, i always need to scroll to have the end of the panel to see before/after, to change density of brush… it is really tedious. Even if we close the histogram.
Moreover when basic panel is open, we need to scroll again to access next panel before solo mode makes its job.
If we had removed this stack of titles blocks and use tabs like old ACR, we would had fixed the problem.
Too late now.
About scrolling, I remind the tedious scrolling of brush presets when we have Seim, Matt, Serge ramelli… sets of brushes. 1 minute to scroll slowly unti we find “renforce iris”,…
groups and solo mode would help here.
marc
Hi Scott
I used to use have multiple images in camera raw and I would crop them one by one so I would get all my recomposition done at once.
I would crop an image hit the Right Arrow for next image and crop and hit Right Arrow. It was fast and effortless. Now they removed the option to use Right Arrow to go to next image.
They also changed how cropping works. Before you would select an area and when you moved the selection box only the box would move. Now when you select an area the image moves instead to reposition it. How can I go back to the old way of cropping?
This one update alone has crippled my efficiency and workflow. Thank you!
Now, if they could only make it so Photoshop doesn’t create a tiff file 10X larger than the original when round tripping we’ll be in business! I don’t round trip for this very reason.
That is due to your External Editing settings in Lightroom Classic. By default it creates a 16 bit ProPhoto RGB copy with the idea that it will retain as much of the data from the raw original as possible, which in turn creates a very large TIF or PSD file. If file size is a problem, you can always use Photoshop to convert the final edited copy to an 8 bit Adobe RGB TIF or PSD and the file size will shrink dramatically. If you don’t want/need all of that data for editing, change your External Editing preference setting to 8 bit Adobe RGB from the start. If you regularly create and want to preserve edited files with multiple layers, then change the file type to PSD, as a layered PSD file will generally be smaller than a layered TIF file. If you always flatten the edited results then the PSD and TIF will end up being the same size.
Rob for the win. 🙂
Quite perfect answer but your last sentence is wrong : LZW compressed TIFF is much smaller than PSD
Thanks, but only ZIP compressed TIF is an option in Lightroom’s external editing preferences. Just for giggles, went back and did a few tests, and using LZW compression always gave me the largest file size compared to PSD with flattened files.
16 bits: only ZIp
8 bits: Zip or LZW
A flat 8 bits LZW file is always smaller
Ah, I see. Thanks!