The ubiquitous and often underrated JPG (or JPEG as it is sometimes written) is an incredibly versatile file format in your Lightroom output arsenal. Knowing all the ways that Lightroom can create JPG versions of your photos is useful for keeping your workflow efficient and flexible.
JPGs, as a file format, often gets a bad rap when compared to raw photos, and even when put up against file formats like TIF and PSD. I once overheard a customer in a camera store asking an employee if he should shoot raw to get better images, to which the clerk replied that he should stick to shooting JPG unless he knew how to process the raw data better than the engineers who created his camera. I thought that was a fair point. Raw alone doesn’t make a photo better, it just gives you more data to work with and let’s you work with that data at a less baked-in phase of the image processing pipeline. Clearly this is no small thing, and once you become proficient with any of the raw processing software available you can potentially achieve better results than the in-camera JPG. However, the relatively smaller file size and out-of-the-camera finished results of a JPG can sometimes beat the potential benefits of raw capture, and there may be times when that matters most to your capture workflow.
When it comes to output it is a whole different story, and this is where that wonderfully compressible and universally supported JPG file stands head and shoulders above the rest in many applications. JPG is the perfect file format for sharing photos online, via our mobile devices, and even when sending out to get prints. Every image viewer worth its salt can display a JPG image and every printer can print one. For this reason Lightroom provides a JPG output option in each of the output-focused modules, and of course the Export dialog too.
Export
Creating JPGs via export is probably the most common situation we encounter. If you need a high quality image, with a relatively small file size that can be displayed in anything from a web browser to an image-editing program then JPG is your go-to choice. Maybe you need to email photos to someone, upload a gallery to a photo sharing site, share it on social media, or countless other purposes, JPG usually just gets the job done efficiently and with ease.
The key to choosing JPG on export is the File Settings panel of the Export dialog. It is here that you choose JPEG via the Image Format drop-down menu, then set the Quality slider to your desired amount of compression. It is this compression that is the JPG’s greatest strength and greatest weakness. The higher the quality setting the lower the amount of compression applied to the exported copies, which results in a larger file size (in bytes) with little or no compression artifacts. The lower the quality setting the higher the amount of compression applied to the exported copies, which results in a smaller file size with greater potential for visible compression artifacts. Your job is to find the sweet spot on the Quality slider that matches the purpose for your export in the first place.
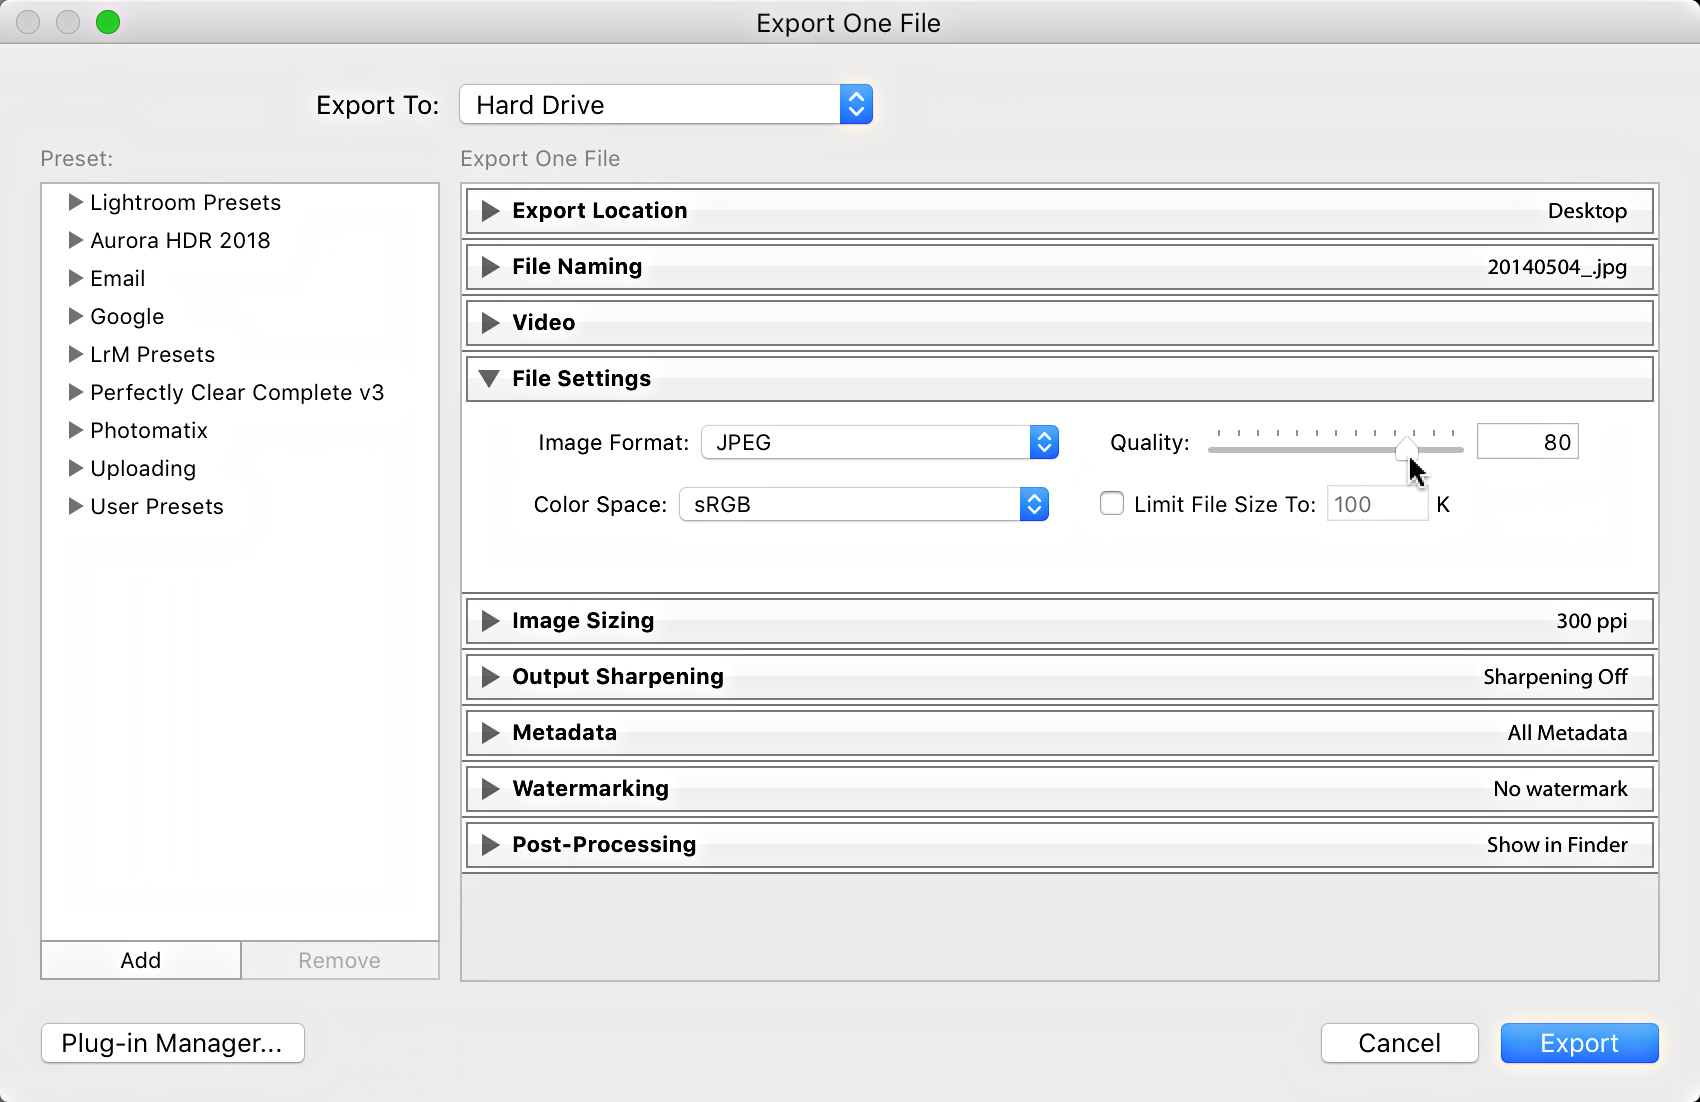
As a rule of thumb, the Quality slider set in the neighborhood of 80 – 90 will produce a reasonable amount of file compression (smaller file size) with little or no visible compression artifacts, and is good choice when image appearance matters more than file size. If file size matters more than image appearance you can try the Quality slider in the 60 – 80 range and check your results in a program like Photoshop to decide if you can live with the results for your given purpose for exporting.
If file size in bytes really matters and you still want really high quality, then the other factor to consider is a photo’s pixel dimensions. The larger the pixel dimensions of an image, the more pixels it contains, and hence the more data there is in the photo. For example, if during export (using the Image Sizing panel) I resize a photo that is 6000 pixels x 4000 pixels to 3000 pixels x 2000 pixels, I can keep the Quality slider at 80 and create a JPG copy with a smaller file size in bytes than if I didn’t resize and just set the Quality slider to 60. Using the Quality slider in conjunction with resizing the photo to the exact pixel dimensions you need (and no larger) is the most powerful way to reduce file size in bytes. Modern DSLRs produce photos with such large pixel dimensions you can usually get away with resizing exported copies smaller for most purposes. In the end, your reasons for exporting will drive the settings you make.
Note, the Limit File Size To option in the File Settings panel only uses increasing amounts of compression to attain the configured file size in kilobytes, and as a result may be unable to achieve the desired file size unless you also resize the pixel dimensions smaller too. This option is probably best reserved only for instances where you are already resizing photos to very small pixel dimensions and you don’t really care about the amount of JPG compression being applied.
Creating JPGs from the print module generally has one specific purpose, which is when you want to save out a finished print layout as a single JPG image to upload to an online print service. I stress the phrase print layout because if you just want to output a bunch borderless of 5x7s (or any other print size) then it is a lot faster to simply use the Export dialog (after cropping the selected photos to the proper aspect ratio) to save out the JPGs at the proper size for printing. A print layout is when you have multiple photos on one canvas or a single photo with a border, or anything that goes beyond the simple borderless single image print.
To create a JPG from the Print module you need to set the Print To drop-down menu in the Print Job panel to JPEG File. You can then check the Custom File Dimensions box and enter the size of the print you want to make (this way you are no longer limited to only sizes supported by your printer driver).
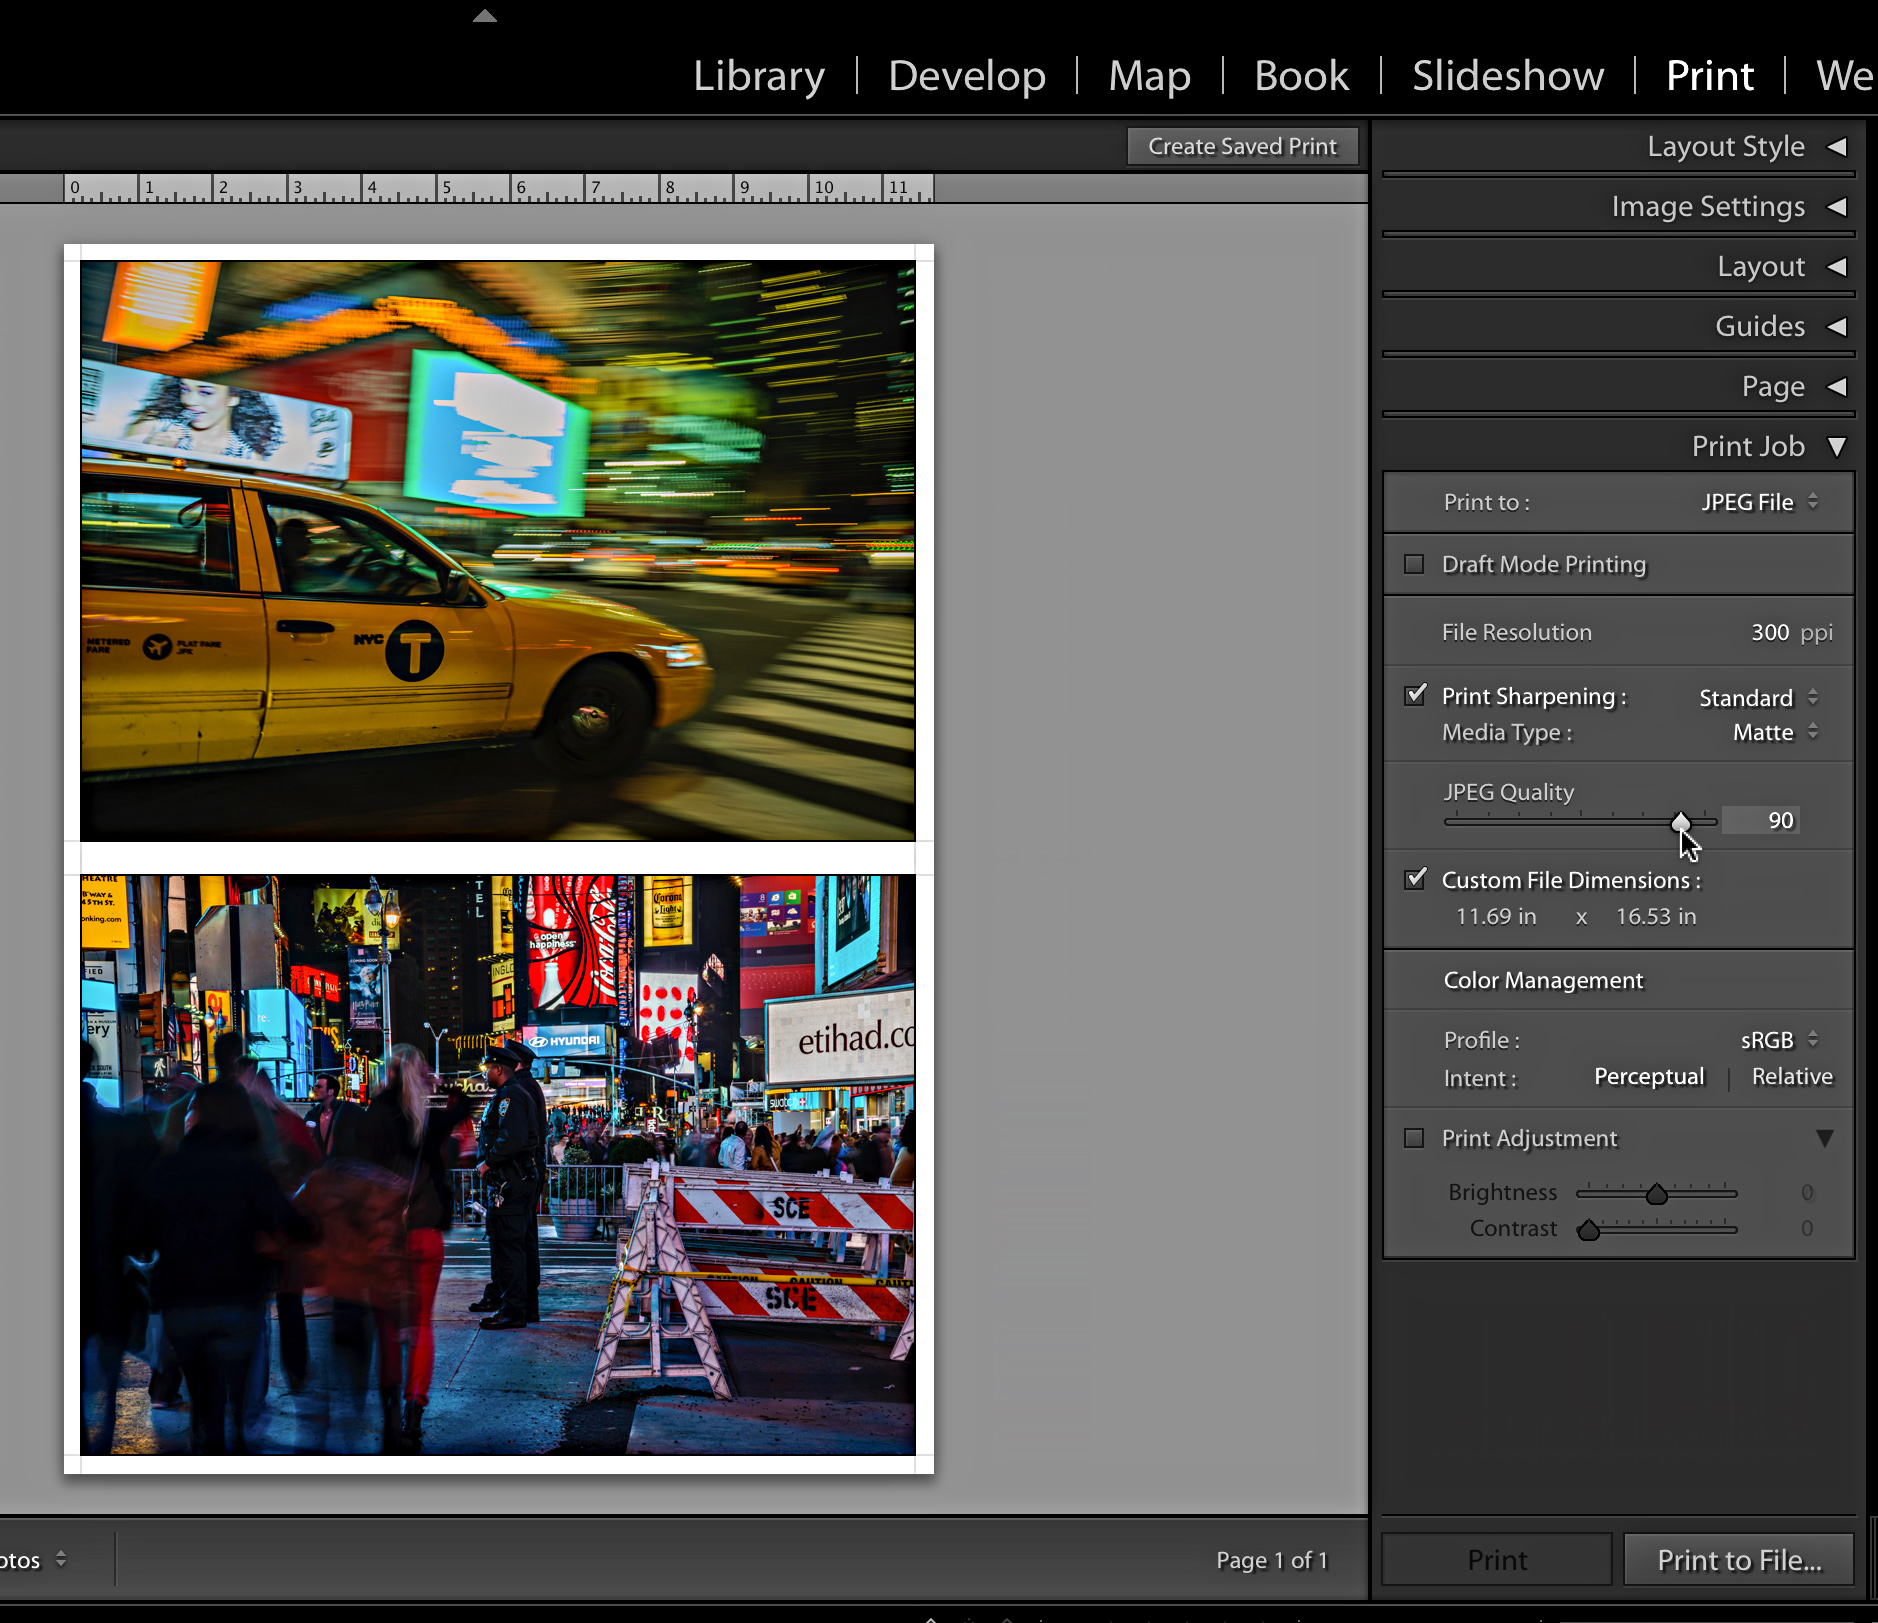
With your canvas set to the desired size you can create your print layout to suit your needs, and when you’re ready for output you’ll find the same key settings as are available on the Export dialog, namely the Quality slider, Print Sharpening, and Color Management. The same rule of thumb applies for the Quality slider here as on the Export dialog. Print Sharpening is entirely optional, but if you do use it, make sure you choose the correct Media Type for the paper you are printing on. If you are unsure of the correct color profile for where you are sending your photos for printing then be sure to ask the people making the prints. sRGB is usually the safest option, but asking is better. Click the Print to File button at the bottom to save out each page of the layout as a separate JPG file.
Slideshow
The Slideshow module is not sophisticated, but to its credit it is very easy to use for creating layouts of your photos for presentations. If you need slideshow features that Lightroom lacks (different fade options, per slide timing, etc.) then you might consider simply creating the layouts in Lightroom, and then exporting the slides as individual JPG images that can be imported into a more robust slideshow program.
Once you’ve created your slide layouts go to Slideshow > Export JPEG Slideshow to open the Export Slideshow as JPEGs dialog box.
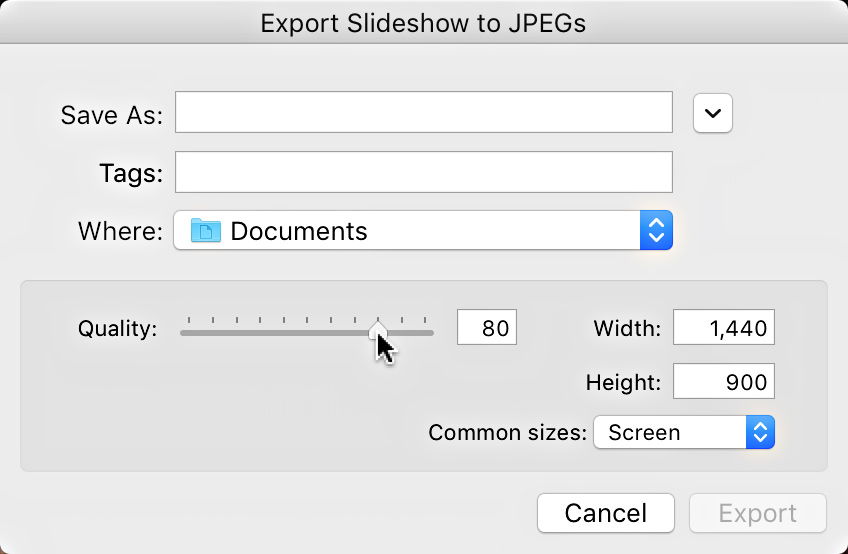
It is here that you can choose the pixel dimensions of the individual slides and set the Quality slider to determine how much JPG compression is applied to each image. Typically in this scenario you are less worried about file size and more worried about how the image looks. Click the Export button to complete the process.
Book
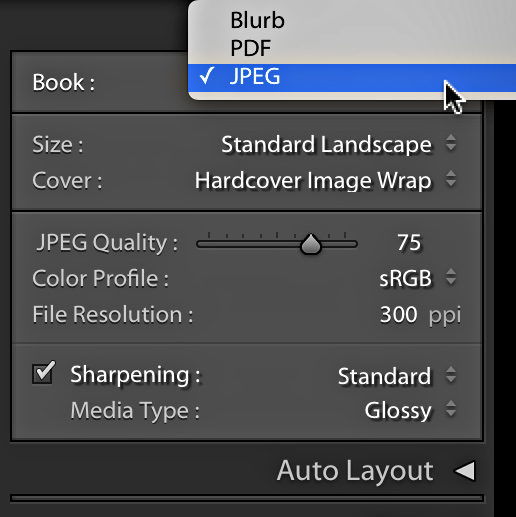
The most common output of the book module is the uploading of the finished book to Blurb to have it printed, but if needed you can also export out the pages of your book as individual JPG files too. After you’ve created your Blurb book and clicked Create Saved Book to preserve your settings in a special collection, click the Book drop-down menu in the Book Settings panel and choose JPEG. You’ll see that the Book Settings panel has all of those same JPG related output controls for quality, color profile, output sharpening, and resolution that we’ve seen before. Just like with exporting JPGs from the Print module, the settings you choose will be determined by your purpose for creating the JPGs.
Click the Export Book to JPEG button at the bottom of the right panel group to open the Save dialog box. Click the Save button to start the process of saving out the JPG files. The front and back cover will be saved as a single image, as will each individual page layout. Two-page spreads will be saved as a single image.