How To Apply a Preset on Import in Lightroom ‘cloud’ (and the hidden trick to undo it)
For you folks using LR Classic, this is going to sound weird from the start, but the ability to apply a Preset to images on Import in LR ‘cloud’ does exist, but you won’t find it in the Import window – it’s actually found in Lightroom’s Preferences (but that’s not what’s weird – that’s coming next). First, here’s how to apply them:
STEP ONE: BEFORE you import your image, go to Lightroom ‘cloud’s’ preferences, click on ‘Import’ in the list of preferences on the left side (seen beow), and under Raw Defaults choose Preset and then a pop-up list of your installed presets will appear (as shown below).
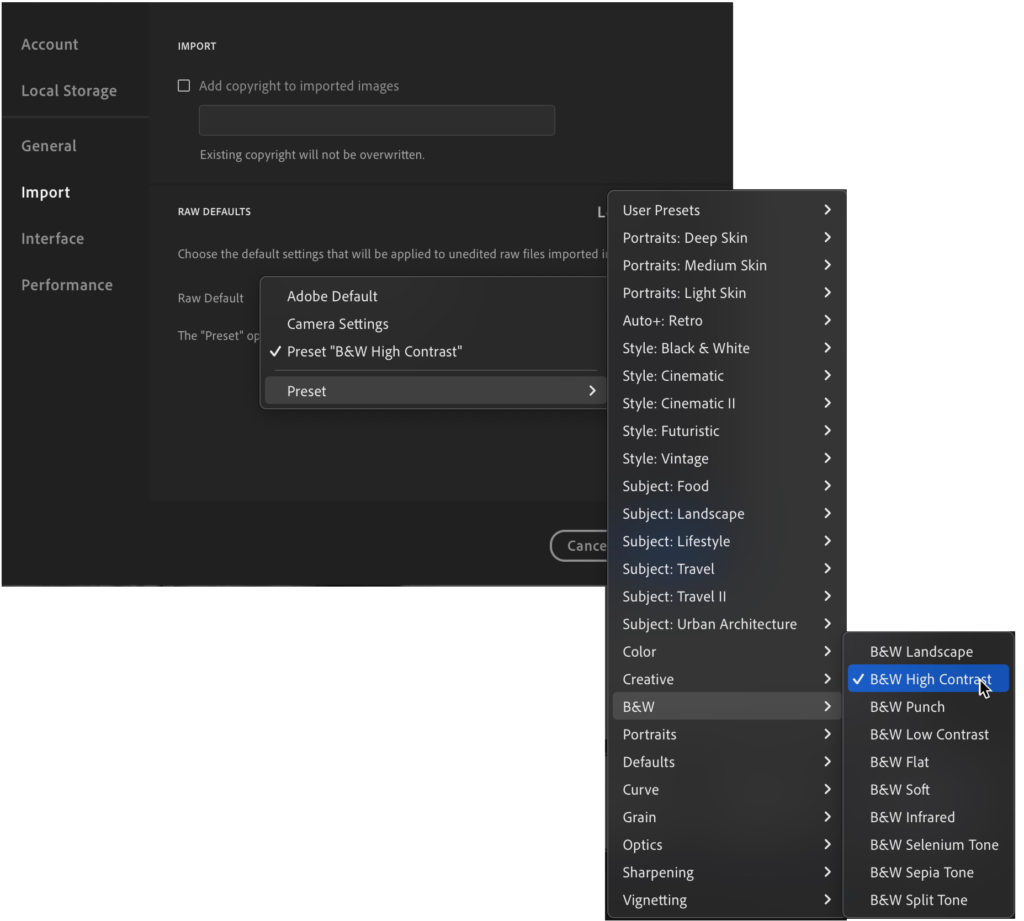
Choose whichever preset you’d like and then click the ‘Done’ button. In this case, I chose a B&W High Contrast preset (as seen above).
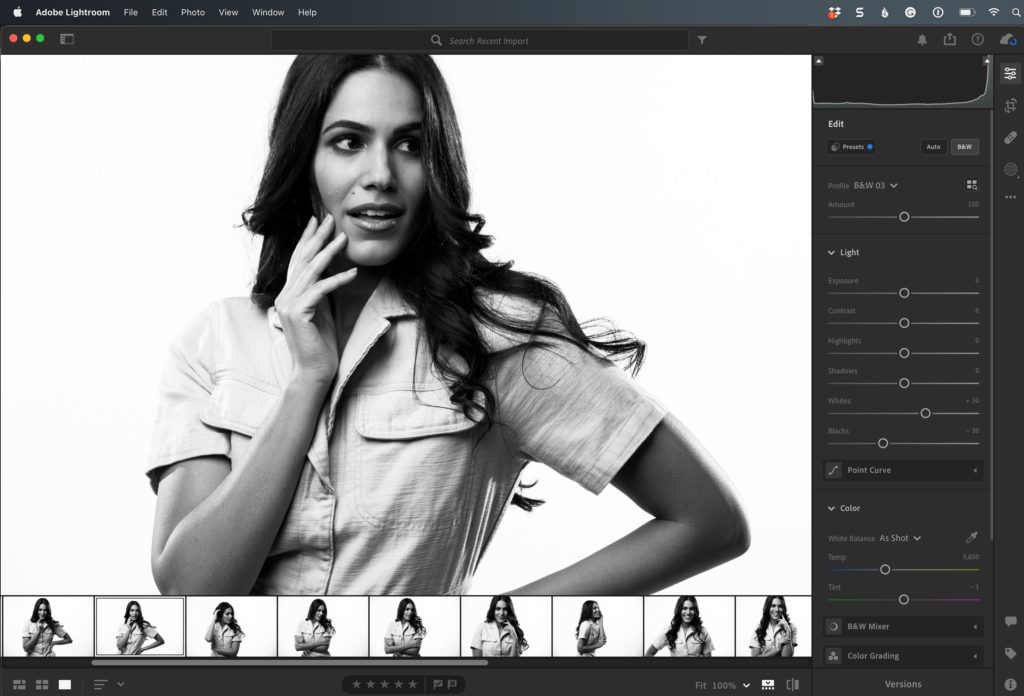
STEP TWO: Now click the “Add Photos” button in the top left and choose the images you want to import, and when they are imported they appear with the preset you choose already applied (as seen here, where all the images have already been converted to B&W. Now, here comes the part that is very different than what happens in LR Classic, and might well freak you out. Let’s say you change your mind, and you want to undo the black and white preset you applied (after all, this shot doesn’t look awesome with that preset applied), so you press Command-R (PC: Ctrl-R) which is the shortcut for “Reset Edits” and guess what? Nothing happens. It doesn’t reset the image to the original image. You can see that sliders have been moved (you can see them right there in the right side panels), but it doesn’t reset them. If you move a slider, any slider, and then press Command-R to reset, it just resets that slider you just moved – it’s still got that B&W preset applied. It’s like it’s stuck there permanently (it’s not, but it sure feels like it.
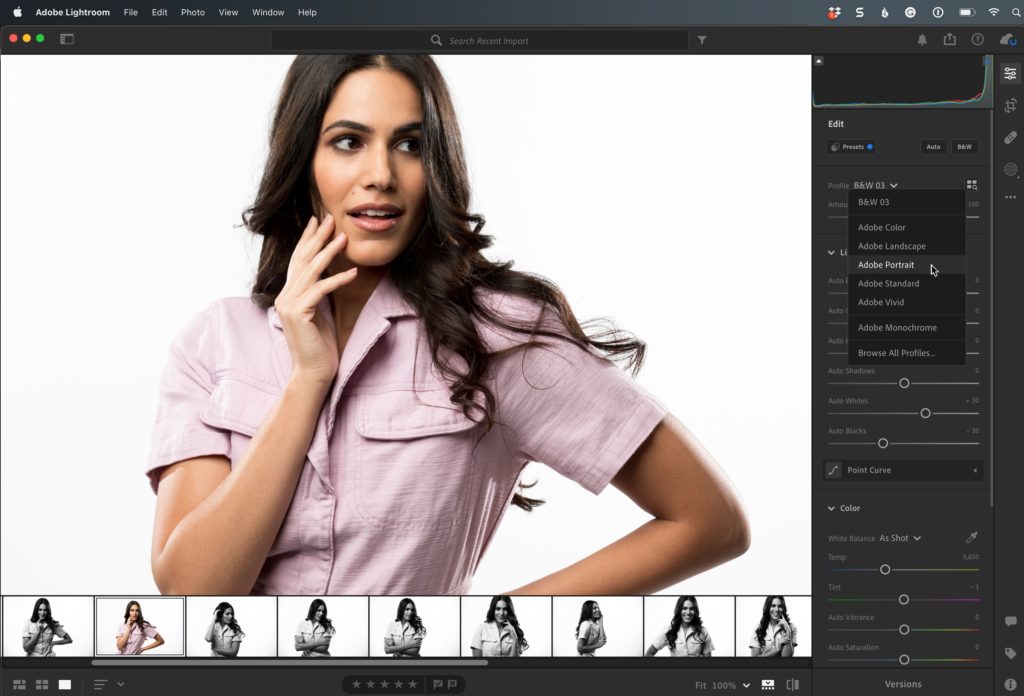
STEP THREE: One way to get around this is to simply go the Profile menu at the top left of the Edit panel and choose a color profile from the pop-up menu (Here I chose “Adobe Portrait” which is a color profile and now the image has returned to the original color I shot it in). The downside of this method is that leaves us still with two problems: (1) While that did bring the color back, the other sliders that were moved when I applied that import preset have still been moved, and (2) How to I get the other imported images set back to color, because copying and pasting from that color image to a bunch of selected image only change the first selected image – not all the selected ones. We’ll tackle #2 first:
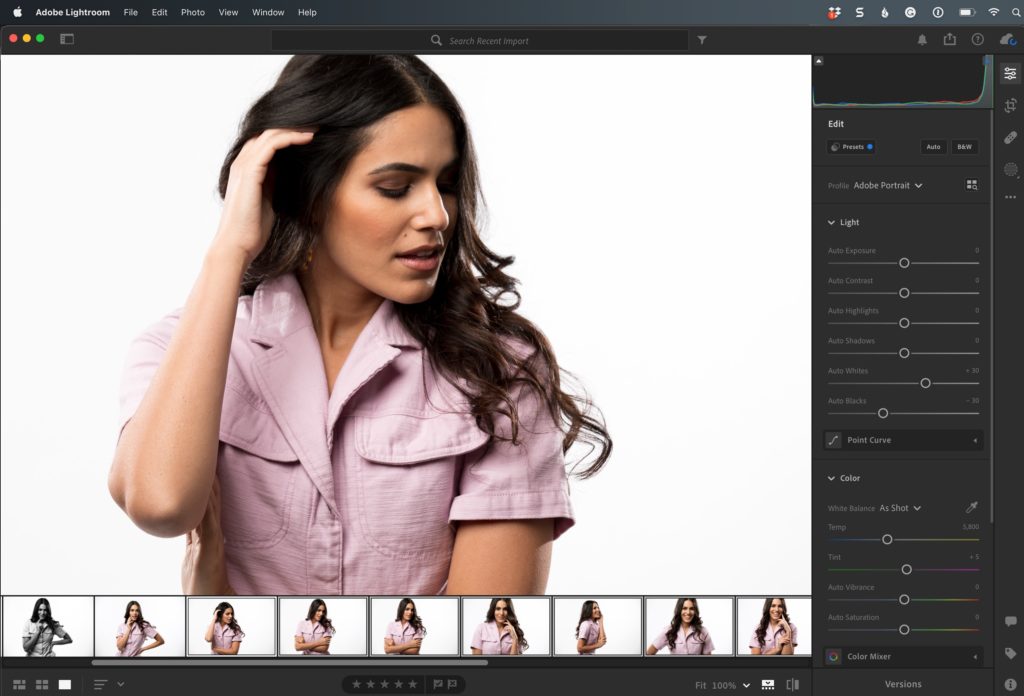
STEP FOUR: After you Command-C (PC: Ctrl-C) copy the settings from the color image; select all the other images you want to be color, then instead of just pressing the standard ol’ ‘Command-V’ (PC: Ctrl-V) to paste those settings, you have to press SHIFT-Command-V (PC: SHIFT-Ctrl-V), and then it will apply the color profile to all the selected photo.
OK, what about all the sliders? Well, before you do that whole copy and paste routine I just outlined, to reset all the other sliders, and even return the image to its original color all in one swoop, you can do this:
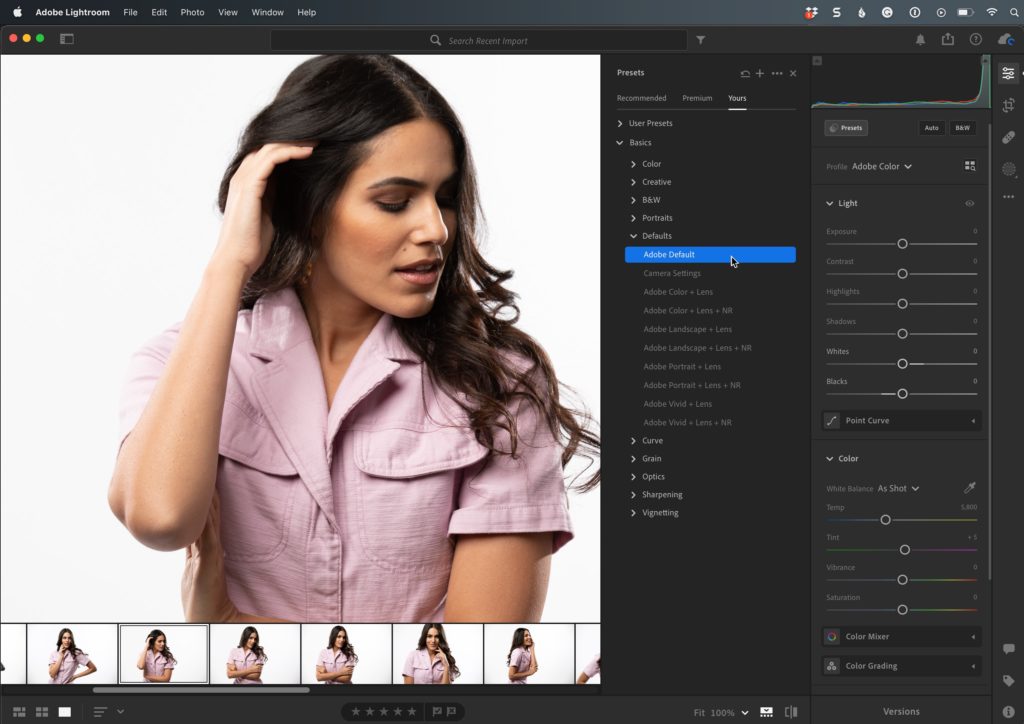
STEP FIVE: Click the Presets button (top left of the Light panel), and when the presets appear, click on “yours” and then look inside the Basic set, and then under Defaults click on “Adobe Default.” That sets everything back to its original unedited stage – color, sliders, the whole nine yards.
Now, is there an easier way to do all this? Probably. Do I know it? I do not, so that’s how I do it.
OK, want some super handy travel photography tips?
Last night to celebrate the launch of my latest book, ‘The Travel Photography Book’ I did a live Webcast packed with travel photography tips, along with a deal from my publisher that is truly mind-blowing – 50% off on the print edition of the book (that makes it only $15 for a brand new book, which is just crazy – and they are honoring that deal until Midnight tonight Pacific time. Here’s the link to order your copy).
Anyway, the live Webcast was a ton of fun, and I shared lots of travel photography tips; you can watch it right here (below).
Hope you find those tips helpful (and I would love it if you would spread the word about this incredible 1-day only deal from Rockynook (my book’s publisher). Here’s that link again, ya know…just in case. 🙂
Have a great weekend, everybody! 🙂
-Scott