
How I Organize & Sort My Images in Lightroom
Hi, Gang. I’m back from my photography workshop China (what an incredible time we had), and while I was there, one thing I was asked about a lot by the student was basic organization. So, today I thought I’d go through the basics of how I organize my images in Lightroom when I’m traveling on the road.
This simple organization scheme works for either Lightroom Classic or Lightroom (cloud version); it just that some of the names for the same things are different (don’t get me started), but I’ll tell you when they differ and what they’re called in each. Here we go:
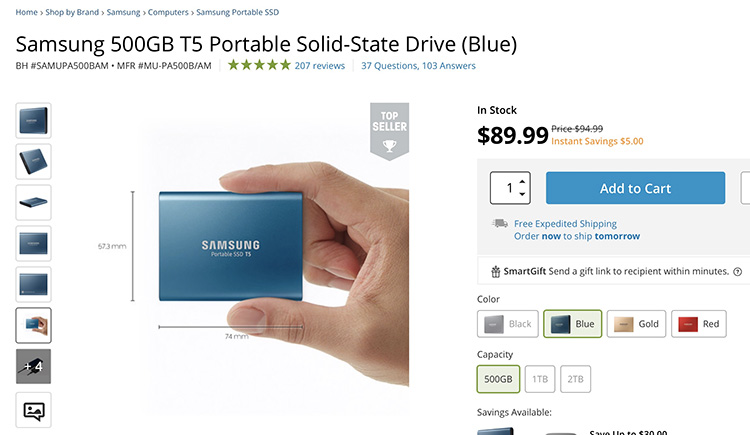
STEP ONE: My first step is to import the images from my SD card to my external hard drive (I don’t store my images on my laptop — it’ll run out of space before you know it, so I carry a very small 500-GB Samsung Portable SSD drive with me on the road – that’s it above). It’s super lightweight and super fast. I love it! $89.99 at B&H Photo.
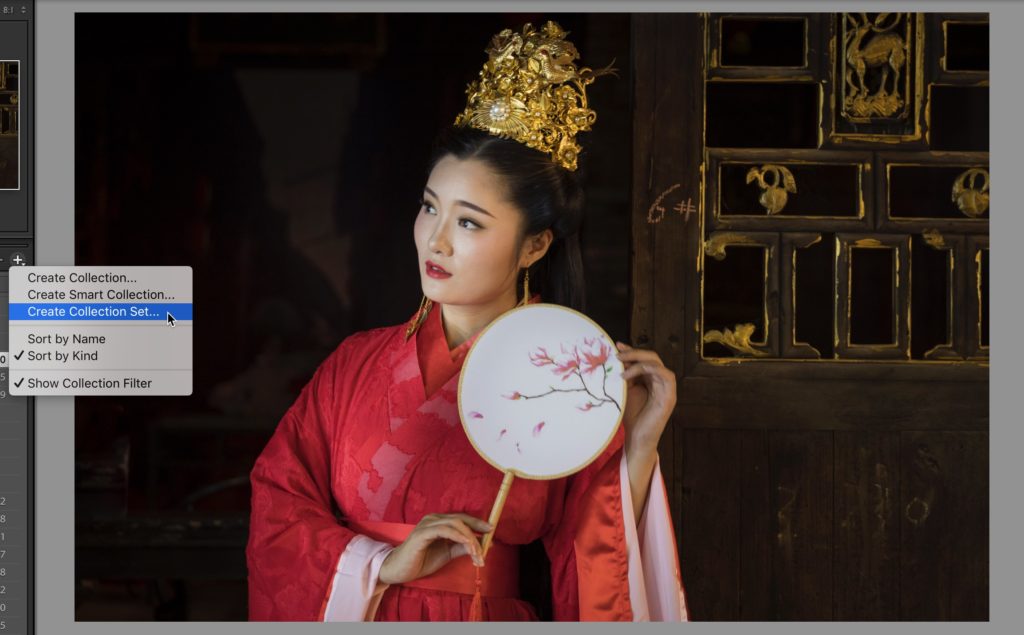
STEP TWO: Once the images are imported into Lightroom, I go to the Collection Panel and from the pop-up menu in the top right corner of the panel, I choose “Create Collection Set” as seen above. [Note: in the Lightroom cloud version you would choose “New Folder” instead, but they are the same thing].
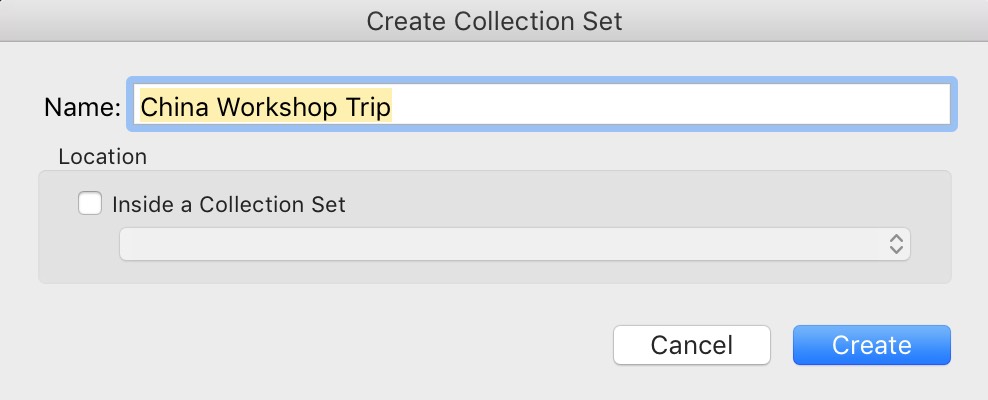
When the dialog appears, I give this new Collection Set a very descriptive name (in this case “China Workshop Trip” and click OK. At this point, you’ve kind of just created an empty holder — there’s nothing in it yet.
STEP THREE: You’ll see the images that you just imported in the thumbnail grid of the Library. Select all of these images by pressing Command-A (PC: Ctrl-A), then go back to the Collection panel; click the little plus-sign icon on the top right, but this time choose ‘New Collection’ from the pop-out menu (in Lightroom for cloud, you would choose “New Album” instead).
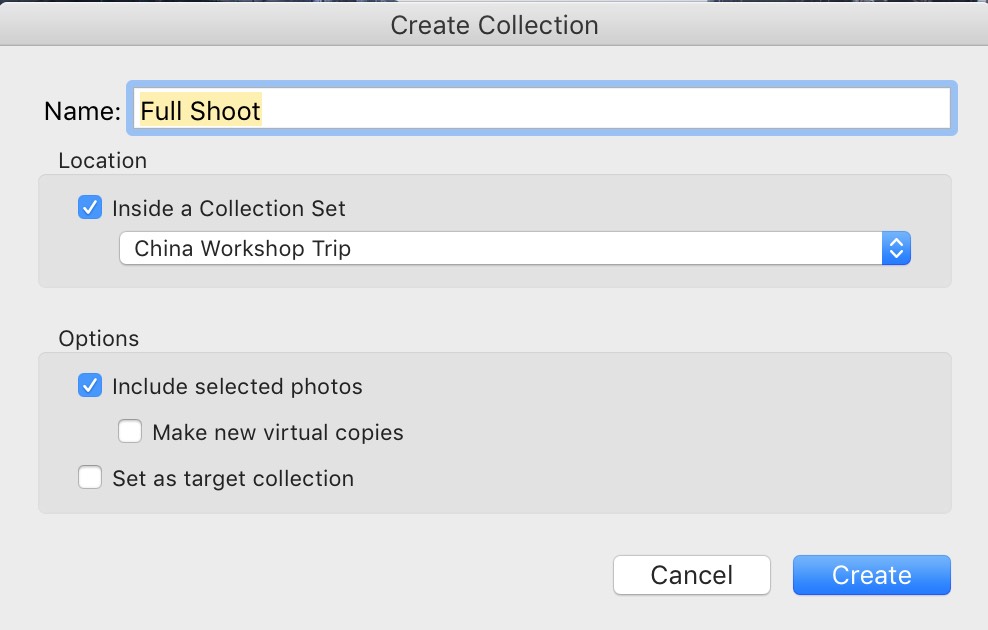
When the New Collection dialog appears, name this new collection “Full Shoot” (as seen here). Make sure the “Include Selected Photos” checkbox is checked (so all the images you just selected will be included in this new collection), and where it says ‘Location,’ turn on the Checkbox for ‘Inside a Collection Set’ then choose the Collection Set you created in the previous step (in my case, it would be “China Workshop Trip.” Click OK, and this Full Shoot collection will now appear inside your “China Workshop Trip” Collection Set (so, it’s a nested collection inside your main Collection Set).
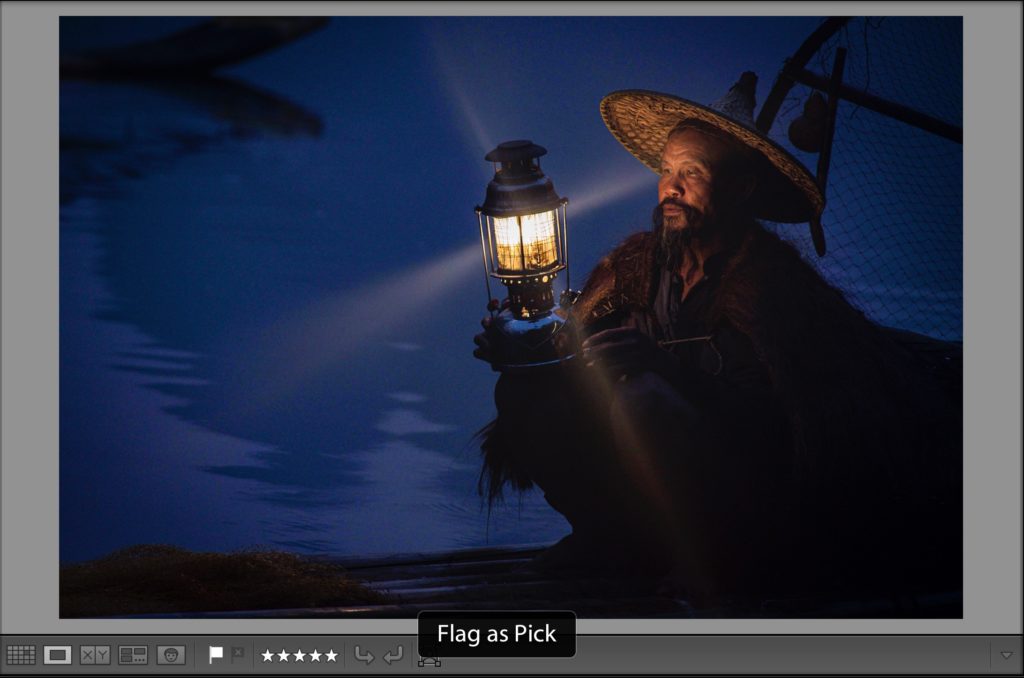
STEP FOUR: Now I go through and mark any images that are keepers (ones that are decent enough that I might want to edit them, work on them, etc., but at this point, I’m just quickly going through and looking for one that I think have a chance). I double-click on the first thumbnail so I can see it larger, then I press Shift-Tab to hide all the panel so my image is large on-screen, and there’s nothing else on-screen to distract me during my selection process. If I see a “keeper” I press the letter ‘P’ on my keyboard to mark it as a ‘Pick.’ If it’s not a keeper (a Pick), then I don’t do anything; I just press the
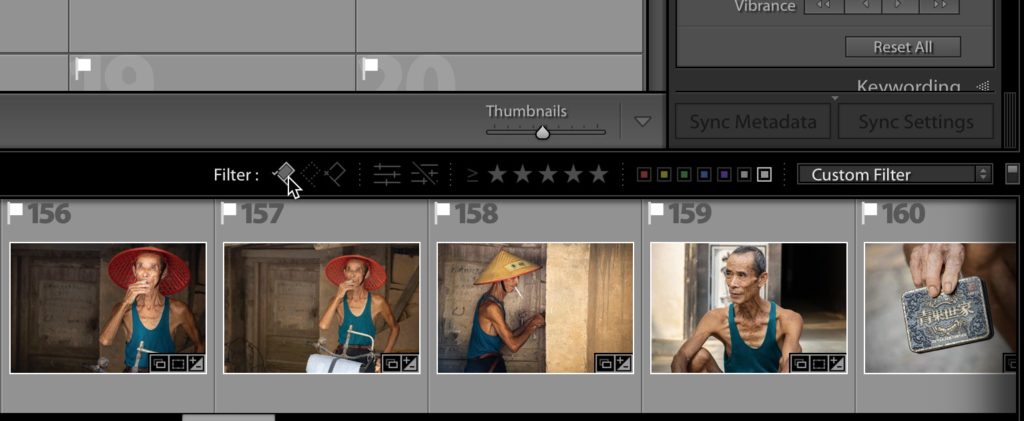
STEP FIVE: Once I’ve quickly gone through the entire shoot, I press Shift-Tab again to bring back all the panels. Next, I go to the Filter menu that appears above the top right of the Filmstrip at the bottom and I click TWICE on the first tiny flag that appears there (the Pick flag filter). NOTE: if you don’t see three flags, and some stars, and color labels; they filters are hidden, so on the far right side of the Filmstrip, click directly on the word “Filter:” the those icons will pop out into place. When you click the leftmost flat (the white pick flag) it turns on the filter so only images you ‘Picked’ (your keepers) are now visible.
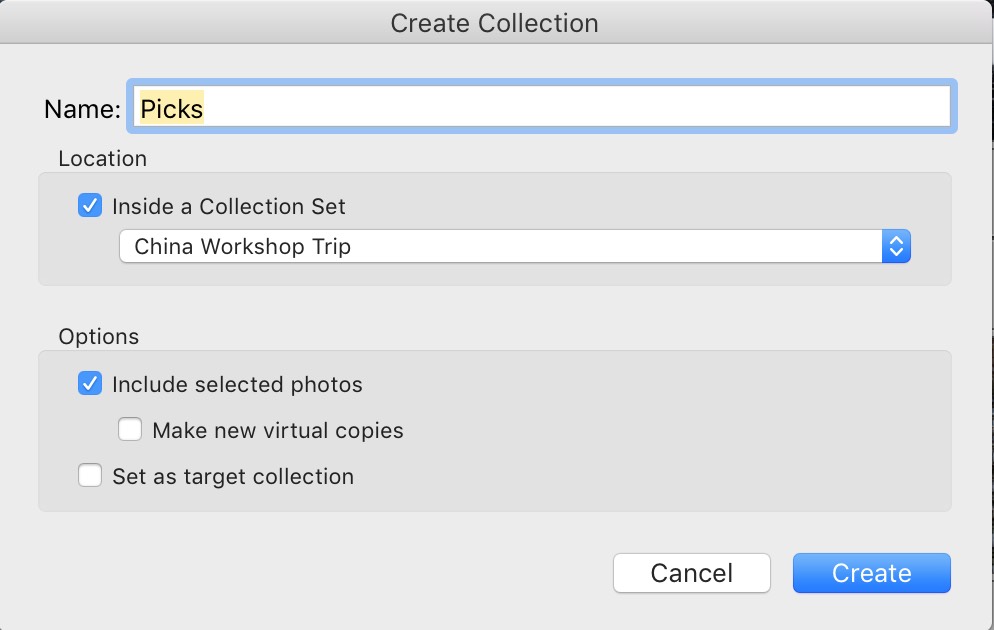
STEP SIX: Press Command-A (PC: Ctrl-A) to select all your Picks, and then press Command-N on Mac (Ctrl-N on a Windows PC) as this is the keyboard shortcut for creating a New Collection (or New Album on the cloud version). When the New Collection dialog appears, name this new Collection ‘Picks’ and by default, it will save this new collection into your China Workshop Trip Collection set (pretty handy, eh?). So, now you have a Collection Set and inside are two Collections: ‘Full Shoot,’ and ‘Picks.’
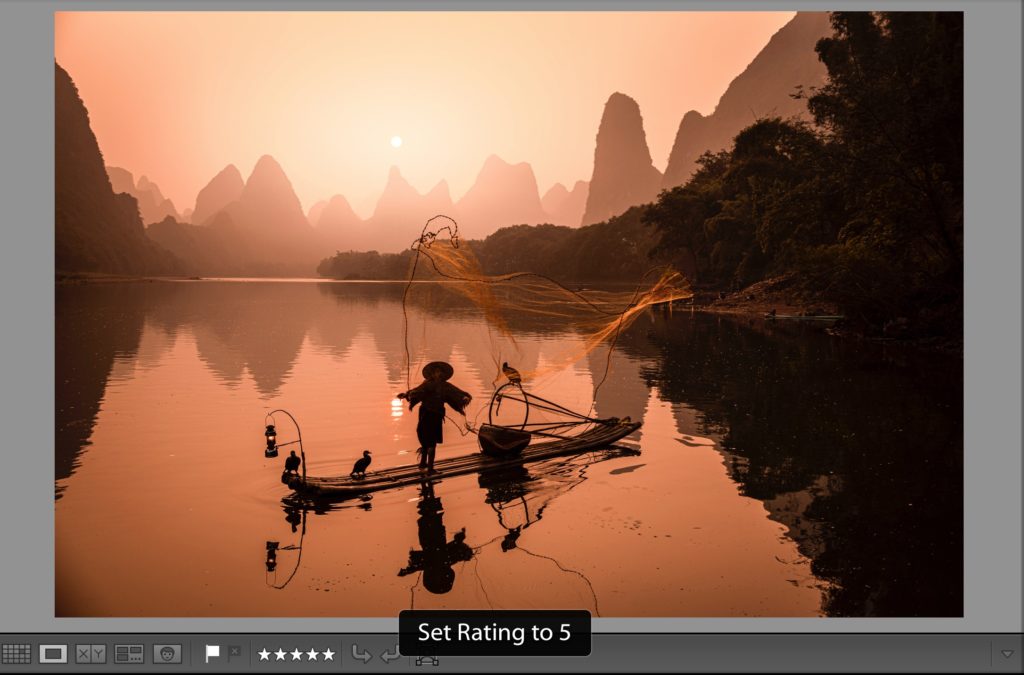
STEP SEVEN: Now carefully go through these images (do the technique from earlier where you hide all the panels to see them larger) and when you come across a really good shot — one you think is worth cropping and editing and all that stuff; press the number 5 on your keyboard to mark it as a 5-star image. You’ll see it say “Set rating to 5” right on

STEP EIGHT: When you’re done picking your “best of the best” shots from your shoot; go back to the top right of the Filmstrip down bottom and turn on the 5-star filter (highlight all five stars) and now in your Picks Collection, all that you will see are your Picks that marked as 5-stars. These are images you’re going to edit and work on to create final images. Press Command-A (PC: Ctrl-A) to select all your 5-star photos, and then press Command-N on Mac (Ctrl-N on a Windows PC) to create a New Collection of nothing but these 5-star images.
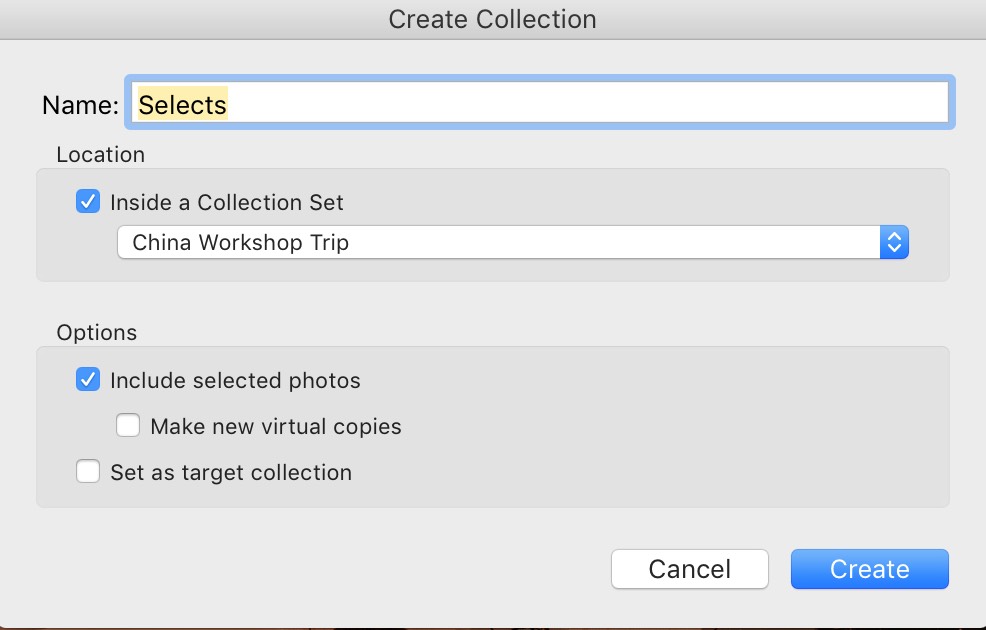
When the dialog appears, name this collection ‘Selects’ (as seen here), and it will automatically be saved into your China Workshop Trip’ Collection Set.
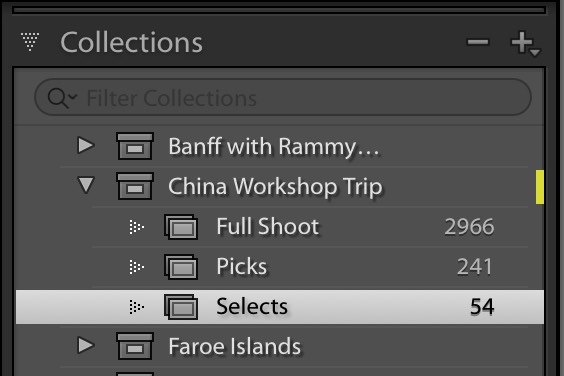
You should now have three Collections (Albums in the cloud version) inside your Collection Set: (1) Full Shoot (2) Picks (3) Selects, as seen above. In the future, when you get quick to your very best, already edited, final images from your China Workshop Trip, you’ll just go to the China Workshop Trip Collection Set and click on the Selects Collection.
TIP: Just for easy visual identification; while I’m working on these images from China, I right-click on the Collection Set and add a Yellow Color Label to this set (you can choose any color you’d like). It appears as a vertical line along the edge to the right of it (see
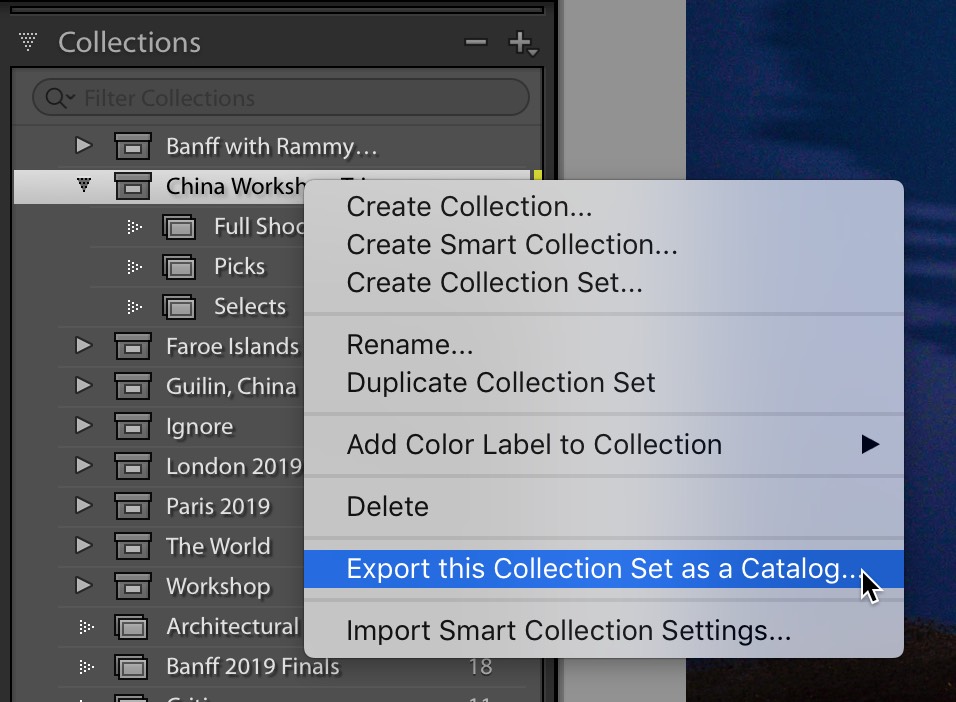
That’s the workflow. Of course, when I return home, I export this Collection Set as a Catalog’ (as seen here, where I right-clicked on the Collection Set to bring up that menu) and then import it into my main catalog on my iMac where the I drag and drop the China Workshop Trip Collection Set inside my main Travel Collection Set. There ya have it!
That’s the basics of my workflow, but if you want to dig in even deeper (including backing up your photos, and your
Here’s a direct link to the course.
Hope you found all that helpful, and that it at least gets you going in the right direction.
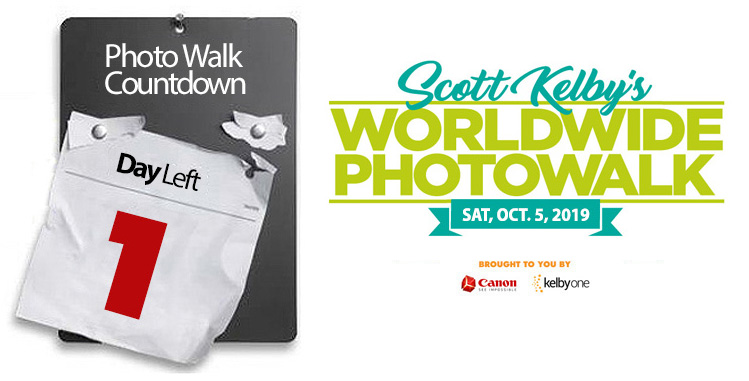
Important Info for Tomorrow’s Worldwide Photo Walk
It’s here!!! Tomorrow, in nearly a thousand cities around the world my 12th Annual World Wide Photo Walk kicks off, and by tomorrow night collectively we will have taken literally millions of photos. How cool is that!!!! I’m up in Chicago today and I’m psyched to be leading a local photo walk here tomorrow.
If you haven’t signed up for a walk yet: go here right now – find a walk near you and sign up free! (you can be walking with us tomorrow!). Incredible prizes up for grabs this year for folks who join the optional Photo Contest, including a Canon EOS RP full-frame Mirrorless camera with a 24-105mm lens, and much more. The full list at http://worldwidephotowalk.com/prizes
Have a great weekend, everybody! Have a safe, fun, and creative Photo Walk!
-Scott

