Hey, before we get to today’s tip, I just wanted to mention that today I announced my ’10th Annual Worldwide Photo Walk™” – the full details are at this link – hope you can join us this year (the official date is Saturday, October 7th).
OK, on to our tip: At my Lightroom seminar, I sometimes have someone ask, “Do you ever use the ‘Auto Tone’ button in the Develop module?” My answer is today’s post.
First, yes I do, but here’s why I don’t do it very often, and only use it in certain situations:
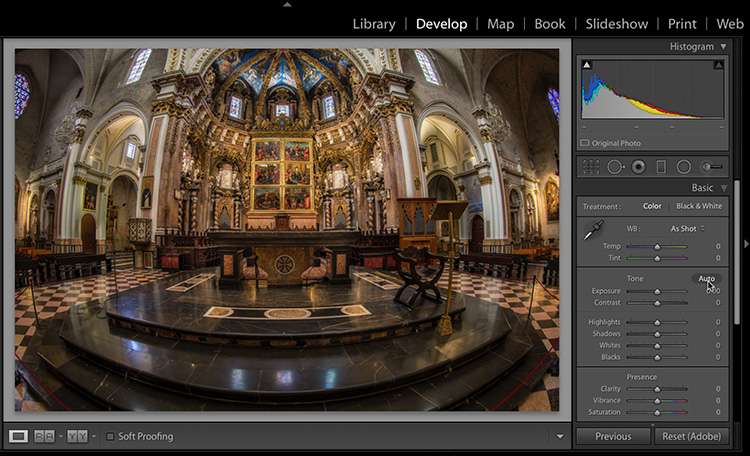
Above: Here’s the original image taken inside the main Cathedral in Valencia, Spain with a 15mm fish-eye lens.
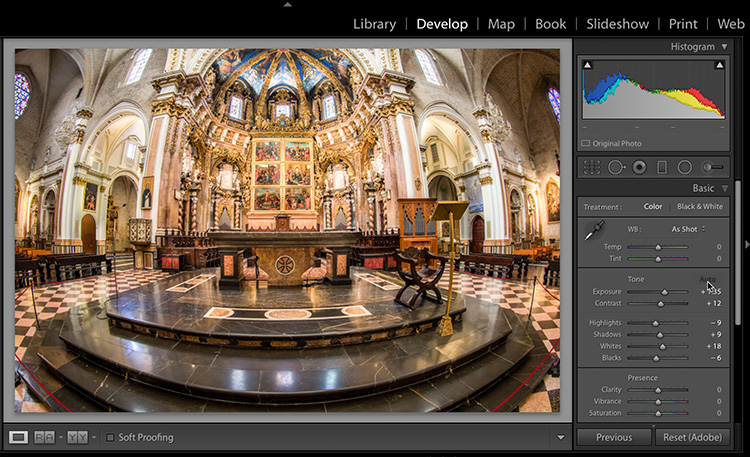
Above: Hitting the Auto button usually tends to make the image too bright. That’s why I joking refer to the Auto button as “The Over-exposure Button” You can see here, not only did it over-expose the image, it did it to the extent that it clipped the highlights (note the highlight warning triangle lit in white in the top right corner of the Histogram).
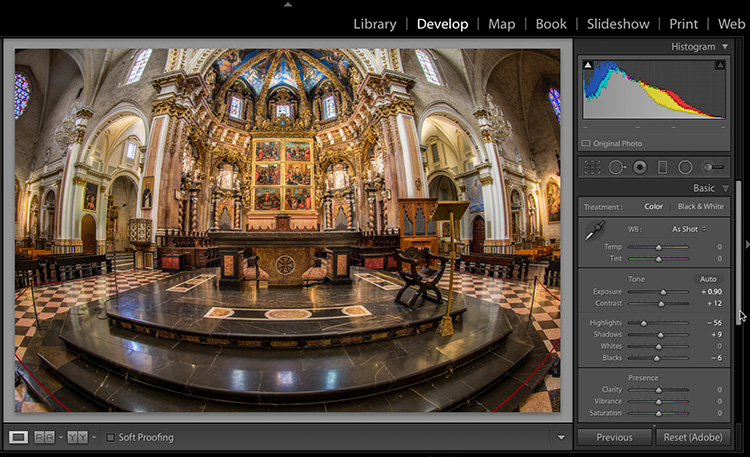
Above: After hitting the Auto button, I get things looking good usually by just pulling back the Exposure slider a bit (dragging it back toward the left a bit), and resetting the Whites slider back to zero. The rest usually looks OK, but those are two things I usually have to do to get things looking balanced. Here I had to go a little further and pull back the Highlights to bring back those clipped highlights.
But when would you use the Auto (overexposure) button in the first place? I use it in two instances:
(1) Anytime I’m doing an HDR image (I actually turn the Auto button on in the HDR Preview window itself). That’s the one time where I consistently turn it on, and when because of the combining of the multiple images it needs it.
(2) Anytime I have an image that’s messed up enough (exposure-wise) that I want to give Lightroom a crack at it first. If it does a decent job, I can use that as my starting place. I click the Auto button and see what happens. If I don’t like the results, I can also just Undo it (Command-Z on Mac – Ctrl-Z on Windows).
About 9 times out of 10, it overexposes the image or just does a pretty bad job all the way around and I undo it. But that 10th time, for whatever reason, it works and it looks good (or at least it gets you close enough to where a minor tweak gets you on your way).
Hope you found that helpful.
Los Angeles, I’m coming your way next week! San Francisco and Seattle, too!
One week from today – I’m teaching my full-day Lightroom seminar at the LA Convention Center, and if you’re out that way, it’s not too late to get your ticket. A week from Wednesday I’m in San Francisco and then I wrap up my West Coast tour in Seattle that Friday (ain’t no party like a West Coast party, ’cause a West Coast party don’t stop!). Ticket info here (come on out, you’ll jump way ahead in your Lightroom life in just one day).
Hope you all have an awesome Monday!
Best,
-Scott