
Great Trick For Balancing Lighting Using Lightroom’s New Masking Feature
PROGRAMMING NOTE: Today is pre-conference day for our all online Landscape Photography Conference, and besides our orientation class, I’m doing a class on “What makes a great landscape photo?” and it’s not too late to sign up and start watching. Here’s a link with details and ticket info. Hope I see you there.
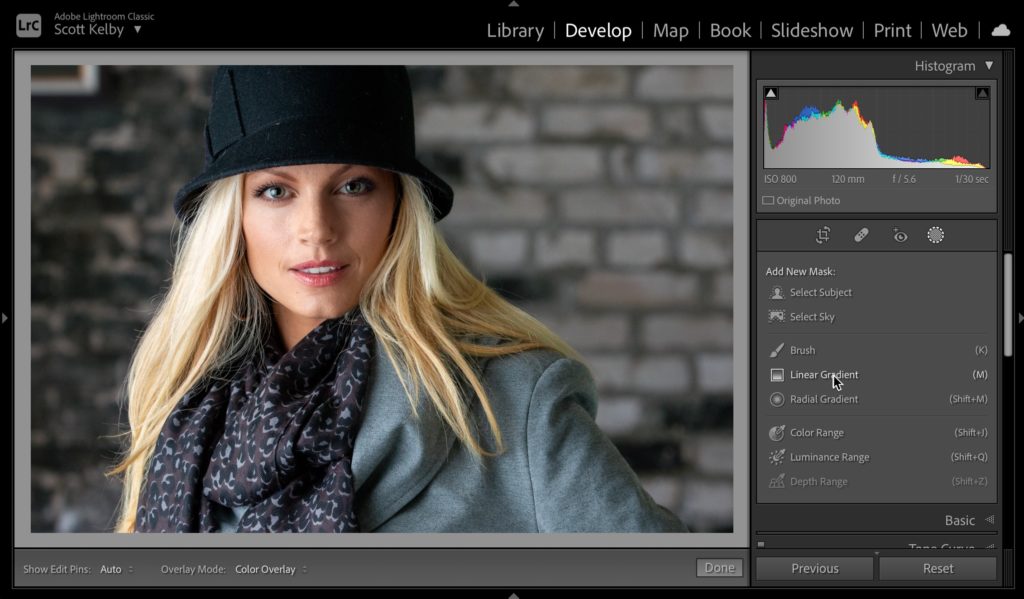
Happy Monday, everybody. Here’s a handy quick fix for situations where part of your image is brighter than you’d like it to be (like you see in the image above). The wall behind her on the right is too bright, especially since it’s on the side of her that’s more in the shadows (a large window is to the left). So, the balance of the light in the image is off. Here’s a trick that will fix it fast.
NOTE: You can download this same image and follow along by clicking the Download link below, then right-click on the large image that appears and choose “Save as” to save it to your computer, then import it into Lightroom. The image is for practice purposes only.
STEP ONE: Start by clicking on the Masking icon and then click on the Linear Gradient tool (as shown above).

STEP TWO: The reason I love this tool for jobs like this is that the transitions between the dark areas, and where it becomes transparent is so smooth. Drag the Linear Gradient from the top right corner down until it reaches her scarf (as seen here), then lower the Exposure amount (dragging it to the left), and lower either the Highlights or Whites (like I did here) to darken that area (as shown here).
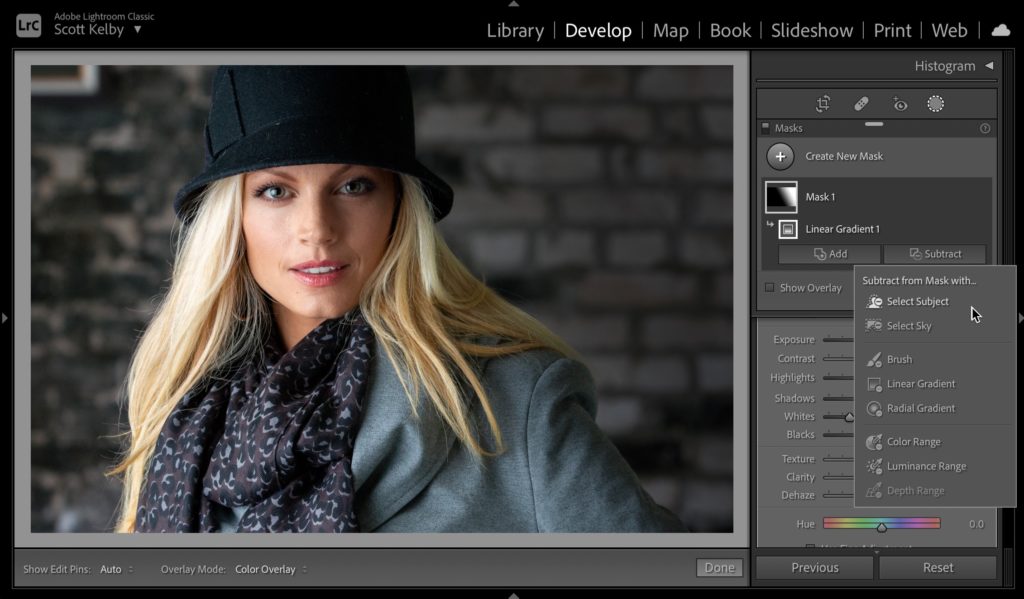
STEP THREE: If you compare the image at this stage with the one back in Step One, you’ll see that while that background area is darker, it also darkened her jacket and hair a bit in the process, which is something we don’t want, and here comes the trick: In the Masking panel, click on Mask 1 to reveal two buttons: Add and Subtract (these allow you to use all of your tools to add to your existing mask, or subtract from it). In this case, click on “Subtract” and from the pop-up menu that appears, click on ‘Select Subject’ (as shown above). Once you click that, it uses AI to determine what the subject is in your photo, and it removes her from the gradient, so now there’s no darkening at all in her hair or jacket, as seen in the after image BELOW right.
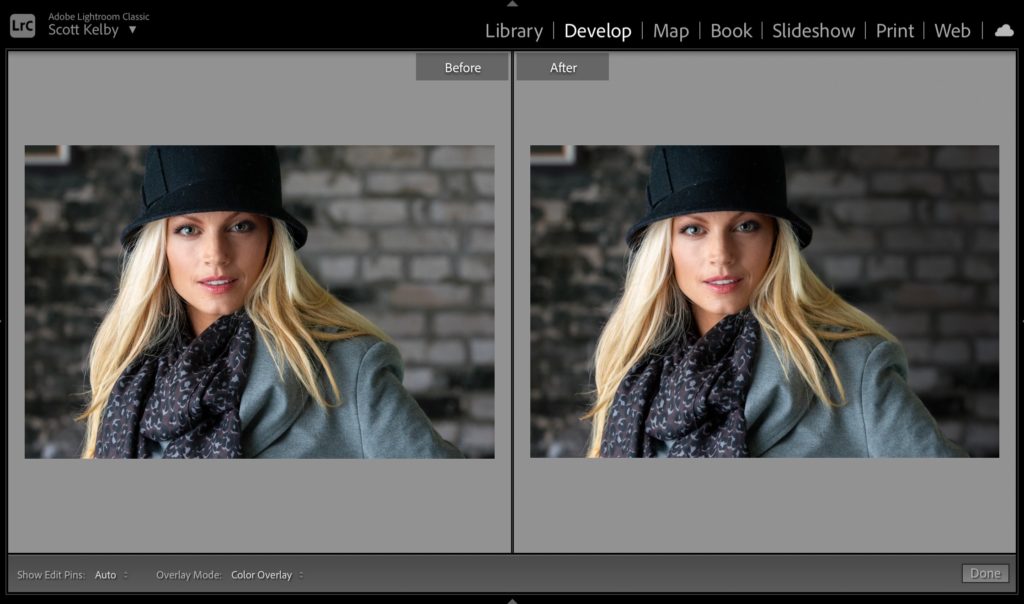
FINAL: I’m showing an overall before/after above so you can see the image before we darkened the wall on the right at left, and after the darkening on the right, with none of that gradient affecting her at all, so now our light is better balanced. I do moves like this a lot to balance the light, whether it’s portraits or landscapes or travel – it works the same way (as long as there’s a recognizable subject in the image).
Hope you found that helpful. Here’s wishing you a kick-butt day! 🙂
-Scott

