Five Speed Boosting Tips for Lightroom Classic
Import Multiple Memory Cards at Once
One of the biggest places to maximize your gains is in the import process. If you are someone who often returns from a session with multiple memory cards of photos and a card reader with slots for multiple memory cards you may not be aware that you can import from multiple cards at once from the Lightroom Import dialog box. I don’t blame you if you missed this fact because it is not particularly intuitive to discover. Memory cards are first listed under Devices in the Source panel and you can only select one device at a time. However, if you look further down in the Source panel, along with all your hard drives, you will see those same memory cards listed as unique drives, and this is where the trick lies.
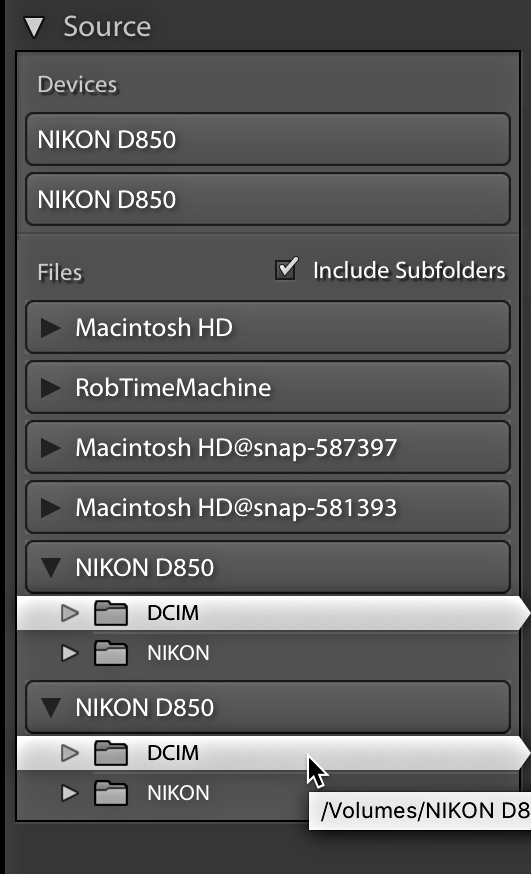
To import photos from multiple cards at once you need to expand the contents of each memory card and select the folder containing the photos on the card, then hold the CMD key (PC: Ctrl) and select the folder containing the photos on the second card (and so on if you have more than two slots on your card reader) so that now all photos on both cards are selected for import. Make sure Include Subfolders is checked to ensure all photos on the card are included. You can confirm the number of photos selected for import in the lower left corner of the Import dialog box. Now it is as if you are importing from multiple drives (which you are) instead of from separate devices and it saves you from having to import each card one at a time.
Use Embedded and Sidecar
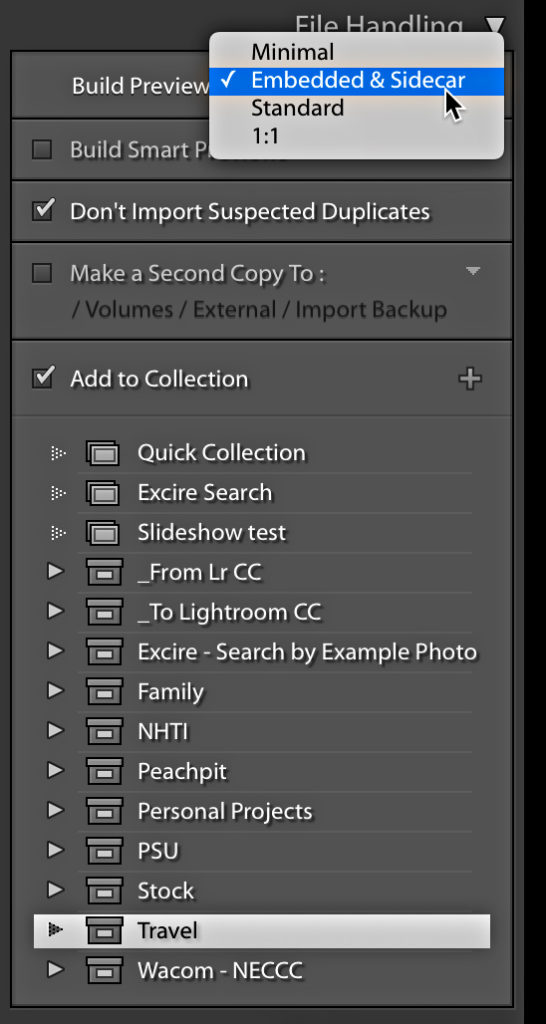
The next big efficiency gain is the setting that you choose in the File Handling panel. This was an addition that slipped into Lightroom Classic awhile ago, but I’ve been using it ever since and I love how much faster it makes the import process. Expand the File Handling panel and choose Embedded & Sidecar from the Build Previews drop-down menu. This tells Lightroom to import the embedded JPG from the raw photo to display as the preview you see in Library. This makes going through and making your initial selects (see PUXZ tip later in this post) much faster because you don’t have to wait for Lightroom to render all new previews. Lightroom will quietly update the previews during idle time or when you switch to Develop.
Create an Import Preset
Once you’ve configured the Import dialog with your new settings, click the Import Preset drop-down menu (bottom-center of the Import dialog) and choose Save current settings as new preset. Give the preset a meaningful name and use that every import from now on.
PUXZ!
One of the best-kept secrets for improving speed in the process of separating the wheat from the chaff is the Auto Advance option under the Photo menu in the Library module. Give this a try, go to the Photo menu and check Auto Advance, press the G key to jump to Grid view (if you are not there already), select a photo and apply a rating, a flag, or a color label to that photo. As soon as any one of those is applied (whether by keyboard shortcut or button click) Lightroom automatically advances focus to the next photo. This is a huge time saver! The most efficient way to utilize this is with keyboard shortcuts, and my favorites are P for pick, X for reject, and U for unflag. With Auto Advance enabled and those three keys I can very quickly move through a large volume of photos and end up identifying the ones I want to keep and the ones that will be deleted. If I come to a photo that I am on the fence about I use the U key, which doesn’t apply a flag but it will trigger Auto Advance to move me on to the next photo (think of it as a skip key). If you need to zoom in to check focus, just press and hold Z to zoom into 1:1 and then release the Z key to return to grid view and continue flagging away.
Include Your Favorite Profile in Your Custom Default Settings
There are a number of excellent tools and functions to improve your efficiency in the process of developing your photos, but I think the most important thing you can do is customize your default Develop settings to match the settings you reach for with every single photo. Lightroom comes with default settings for your camera, but if you find you are always changing things like the camera profile, detail settings, lens correction, and so on, then you are a good candidate for customizing your default settings and saving yourself from ever having to apply those settings individually ever again. Here’s how:
STEP ONE: Select a new unprocessed raw photo and press D to switch to Develop.
STEP TWO: Apply your preferred camera profile and any other settings that you want Lightroom to automatically apply to every raw photo from that camera from now on.
STEP THREE: Go to Develop > Set Default Settings to open the dialog box.
STEP FOUR: Click Update to Current Settings.
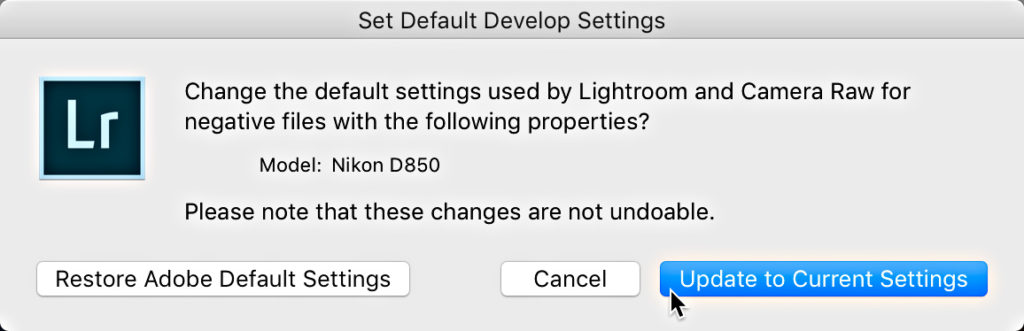
From this point on, newly imported raw photos from that camera model will have those settings applied automatically. This will not change the settings on any previously imported photos, but if you click the Reset button it will now reset back to your new custom default settings. You can always update these defaults in the future by following the same steps, or go back to the original default settings by clicking the Restore Adobe Default Settings button.
Do you have any speed tips you want to share?