Custom Text Templates
Following up to my post last week on custom filename templates, I wanted to share a tip on how to customize the display of text in slide shows, web galleries, and books. The answer is the same for all.
The process is very straightforward, although not necessarily intuitive at first glance. The key to understanding the technique is that the unique text for each slide in a slide show or page is stored in the metadata of each photo.
This seems to most commonly come up with slide shows. I’ve heard from many people who go to the Slideshow module, start creating a layout, and then when they want to add text to the slide, they click the ABC button in the Toolbar, which by default, makes a Custom Text field appear next to the ABC button. It’s easy to understand how a person would start to enter text in that field and think they were on the right track when that text appears on the slide. After having that text positioned where they want it, they advance to the next slide and are confused to see that same bit of text they just entered showing on the next slide as well. What’s going on here?
When you click the ABC button, you’re on the right track, but if you want unique text to appear on each slide, what you need to do next is click the drop-down menu that appears next to Custom Text and explore the other options.
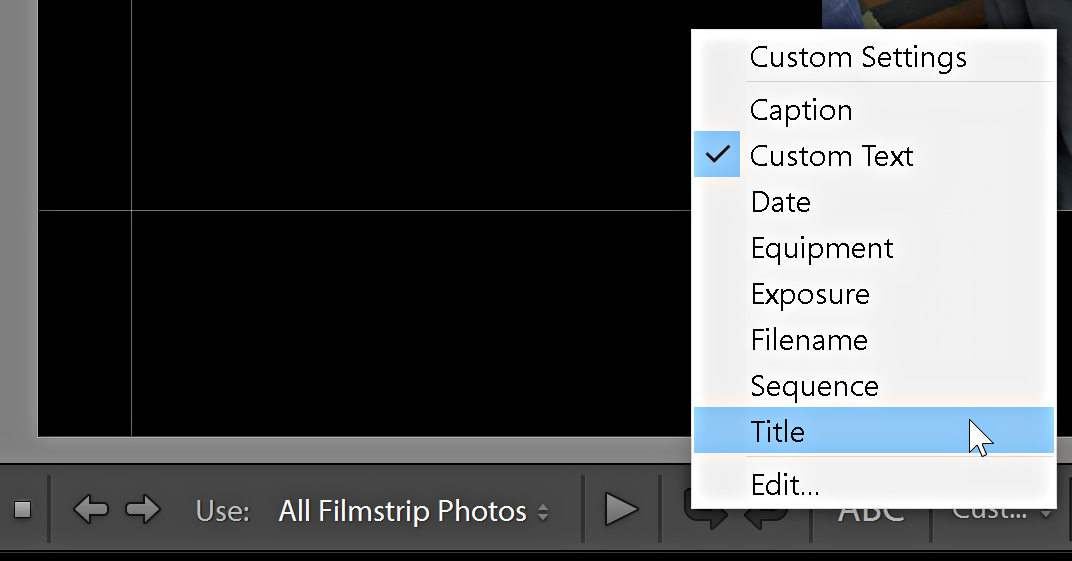
Here you’ll find a set of pre-installed text templates (Caption, Custom Text, Date, Equipment, Exposure, Filename, Sequence, and Title) that can be used to display different types of data on a slide show, a book project, a web gallery, or along the bottom of a Single Image/Contact Sheet print in each of the respective modules. Note: If you don’t see those pre-installed templates, go to Lightroom (PC: Edit) Preferences, click on the Presets tab, and click the Restore Text Templates button. The Custom Text template is applied by default, but you can change it by selecting a more suitable template for your needs. The template you choose displays data based on the tokens it contains and the photo being shown.
Text templates are similar to filename templates in that they are comprised of one or more tokens that can pull information embedded in a file’s metadata. For example, the Caption text template contains a single token for pulling the information contained in the Caption field of a photo’s IPTC metadata. So the simple answer for having unique text appear on each slide in a slide show (or under the photo in a web gallery) is to first enter the unique text into the photo’s Caption field via the Metadata panel in the Library module, and second, to add the Caption text template to the slide show or web gallery.
You also have the option to create a custom text template. At the bottom of the list of text templates is the word Edit. Choose Edit to open the Text Template Editor.
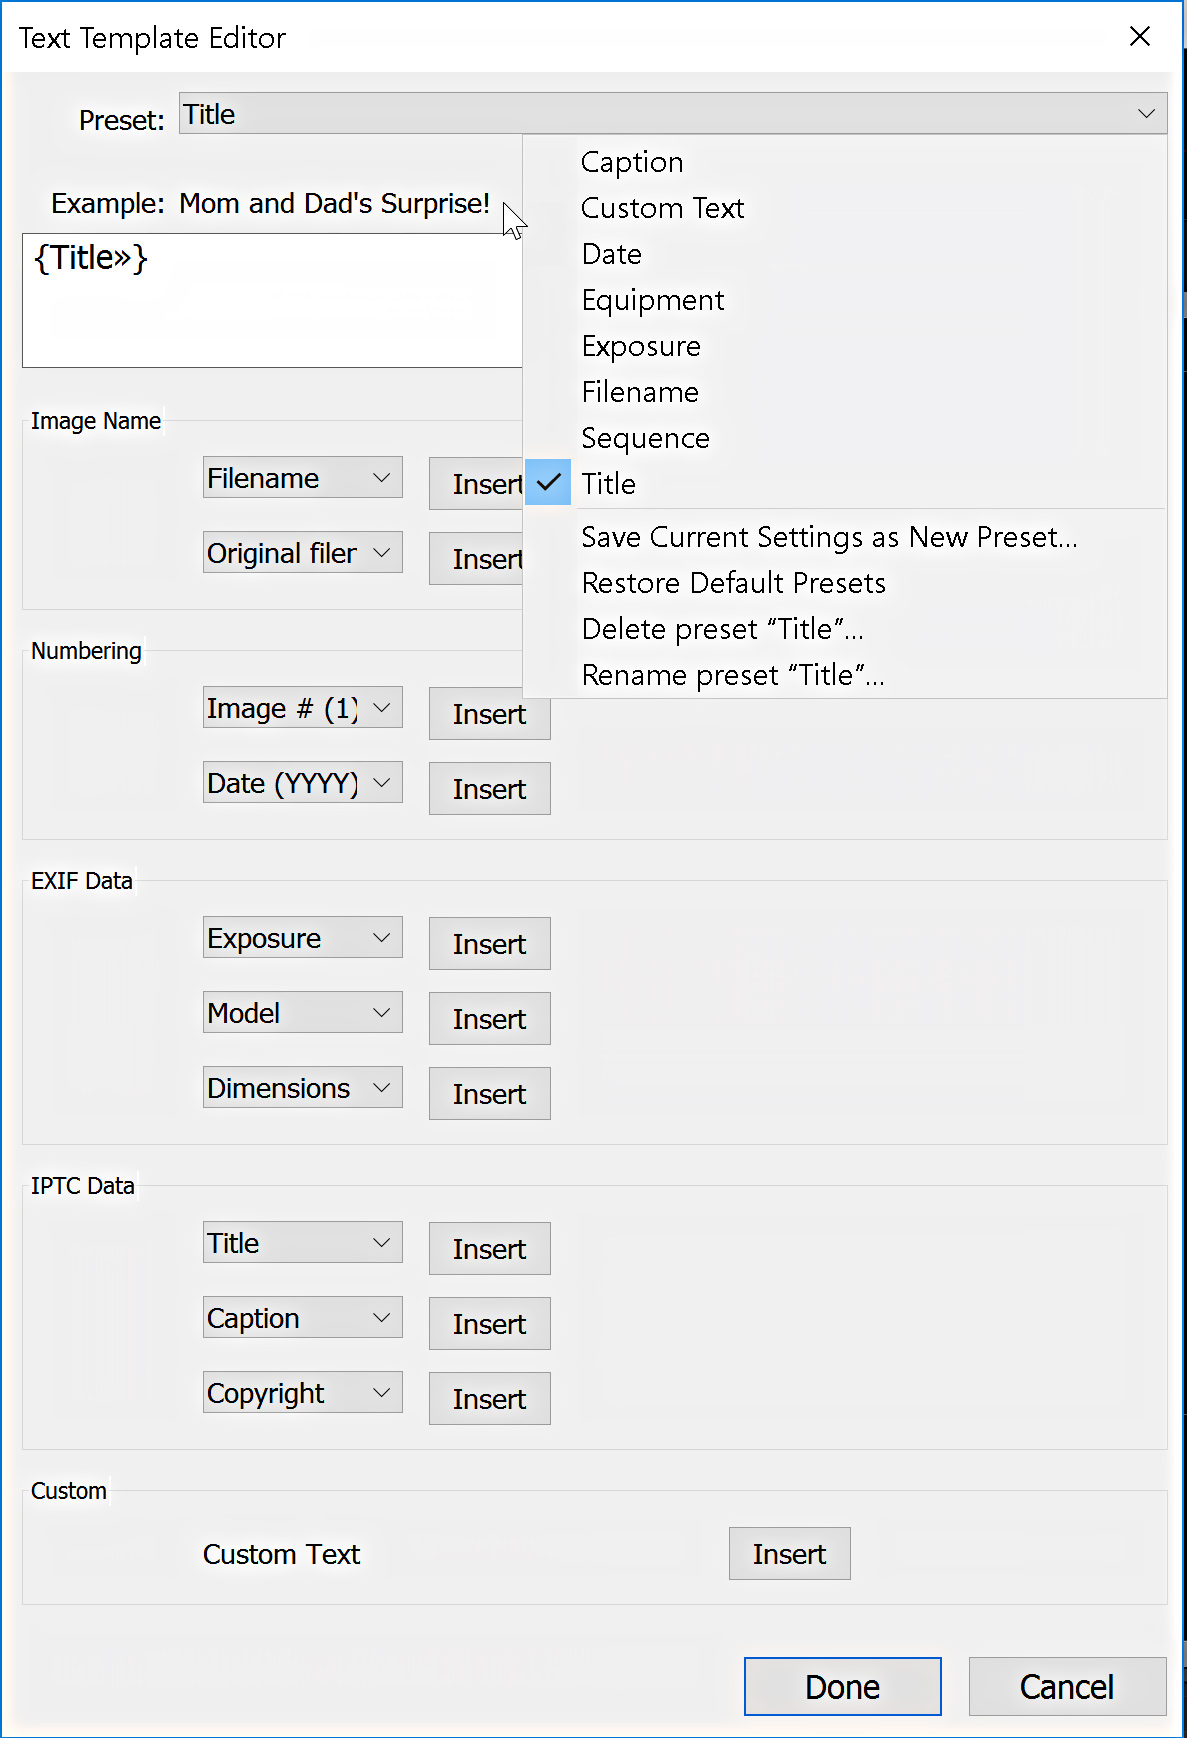
The Text Template Editor allows you to mix and match various text tokens in any combination to fit your needs. You can even type text directly into the template if you wish to hard code in a bit of text into a template. After creating a custom template, click the Preset drop-down menu at the top of the editor and choose Save Current Settings as a New Preset to preserve that template for re-use. Any custom text templates, as well as the Template Editor itself, will be accessible from the ABC button of the Slideshow module, the Image Info panel of most web galleries, the Photo Text in the Text panel of the Book module, and the Photo Info menu of the Page panel in a Single Image/Contact Sheet print layout. Have fun creating different templates.