Create This Cool Multi-Photo Layout In Lightroom in Two Minutes
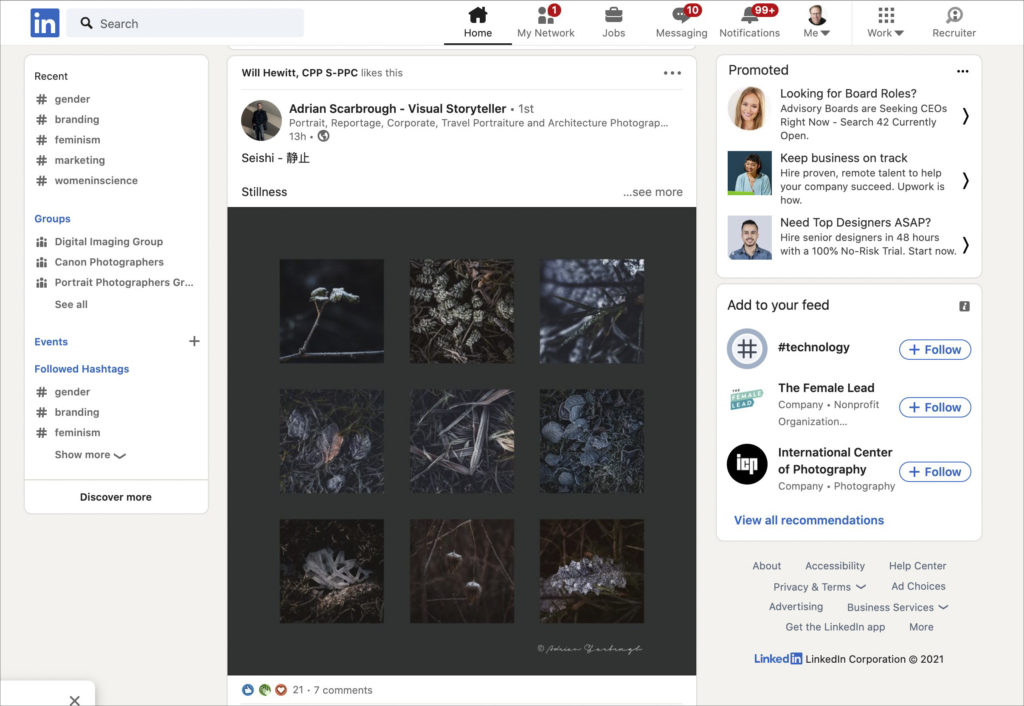
I saw this layout (and the wonderful photos within it from photographer Adrian Scarbrough), in my LinkedIn feed (seen above), so I thought it might be helpful to show how to make a similar layout for your own images in Lightroom Classic (Lightroom cloud doesn’t have a printing feature). Anyway, it’s like I said: two minutes start to finish. Three minutes, tops.
Here we go:
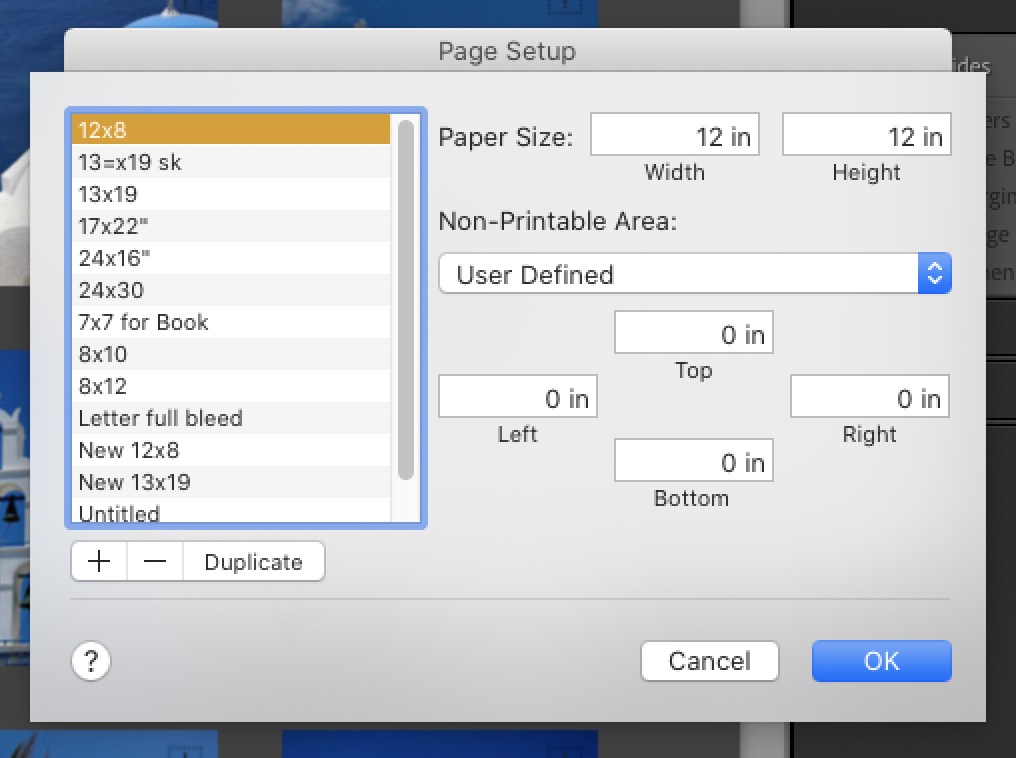
STEP ONE: In the example we saw above, it was a square page size, so if you want that, you’ll need to create a custom page size, so click on the Page Setup button, and in the Page Setup window, from the Paper Size pop-up menu, choose ‘Manage Custom Sizes’ and then type in your desired size (in my case 12″ x 12″ and I set the borders to 0-inches all the way around, as seen above).
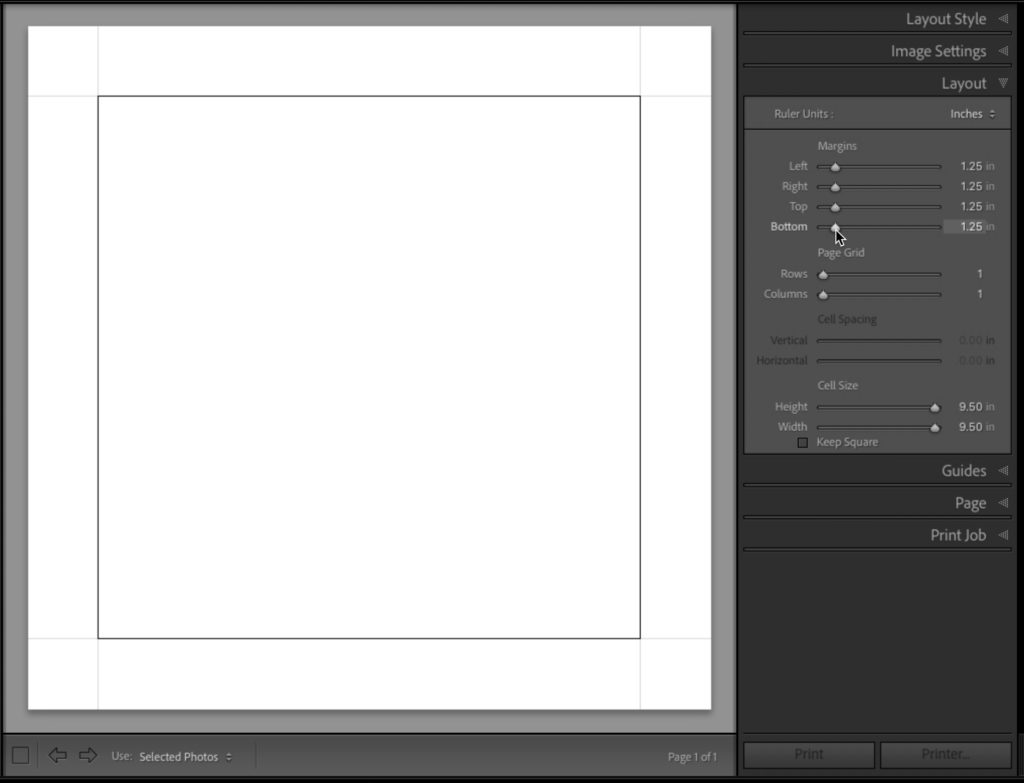
STEP TWO: In this layout, there was around a 1.25″ margin on all sides, so go to the Layout panel and drag your Margin sliders to 1.25″ (as seen above).
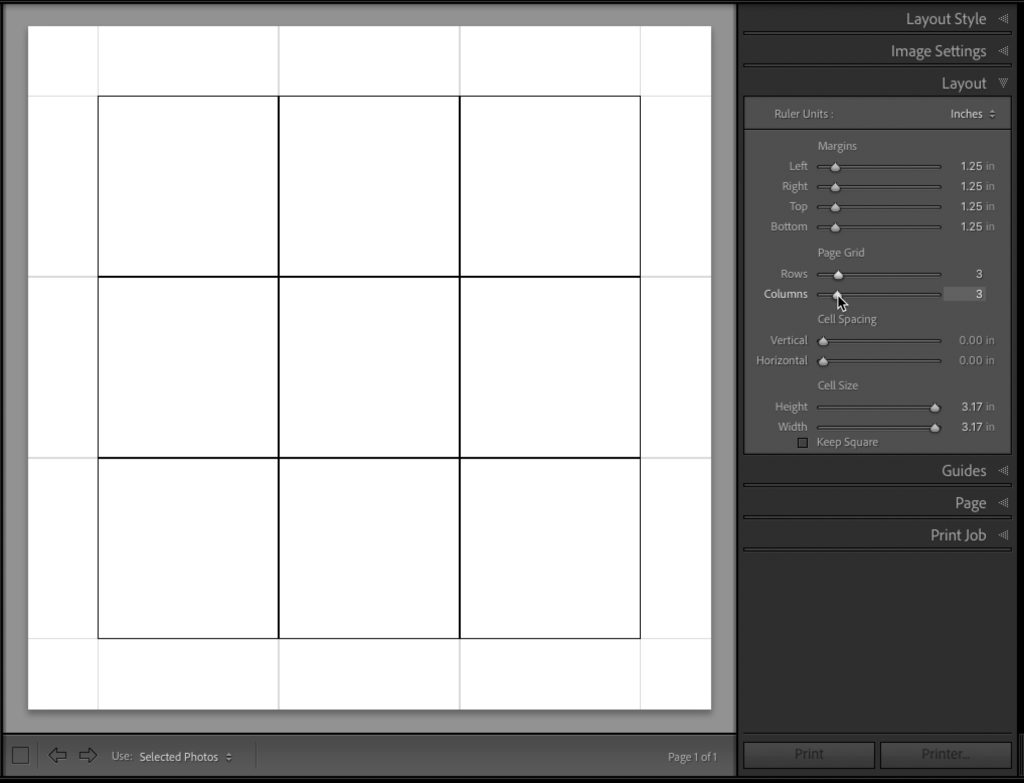
STEP THREE: Now, to create the nine cells for the images, in that panel go to the Page Grid sliders and drag them to 3 Rows and 3 Columns (as seen above) and it adds 9 cells like you see here.

STEP FOUR: To add some space between the images, use the Cell Spacing sliders (as I did here, dragging them both to 0.57 to leave a nice gap between them as seen above).
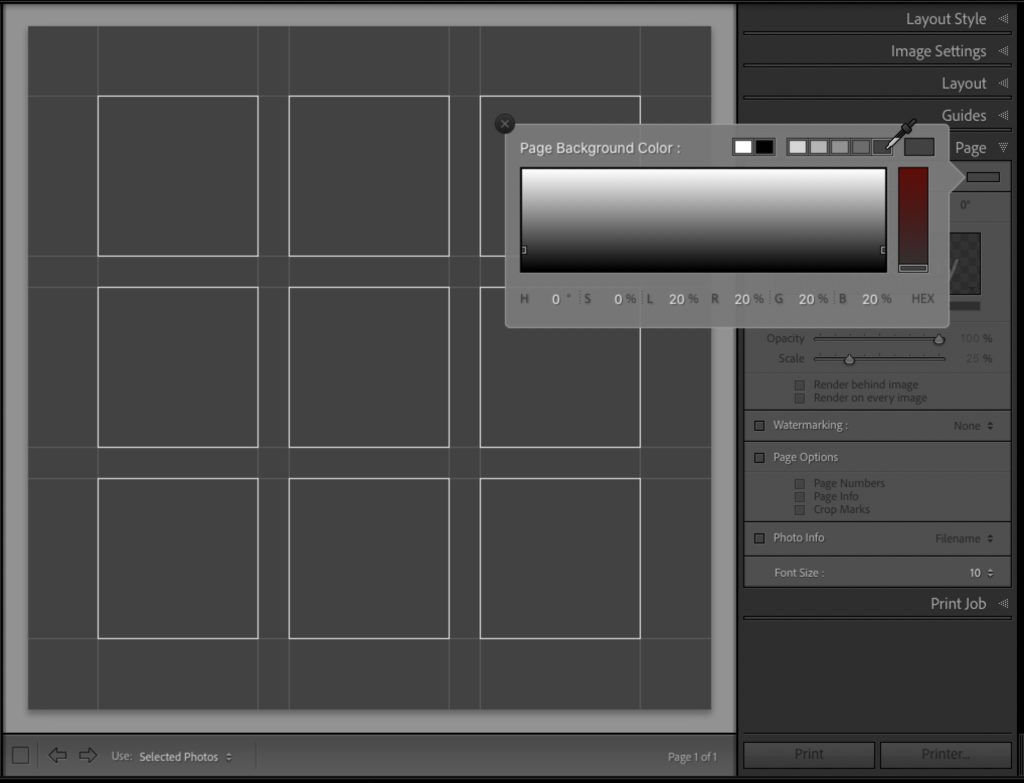
STEP FIVE: Now that our photo grid is set up, to make the page background that nice dark gray, go to the Page panel; click on the Background Color checkbox (it’s near the top of the panel), and then click on the little color white color swatch to the right of it, the Page Background Color picker you see above appears. Click on the dark gray background to make that your background color.
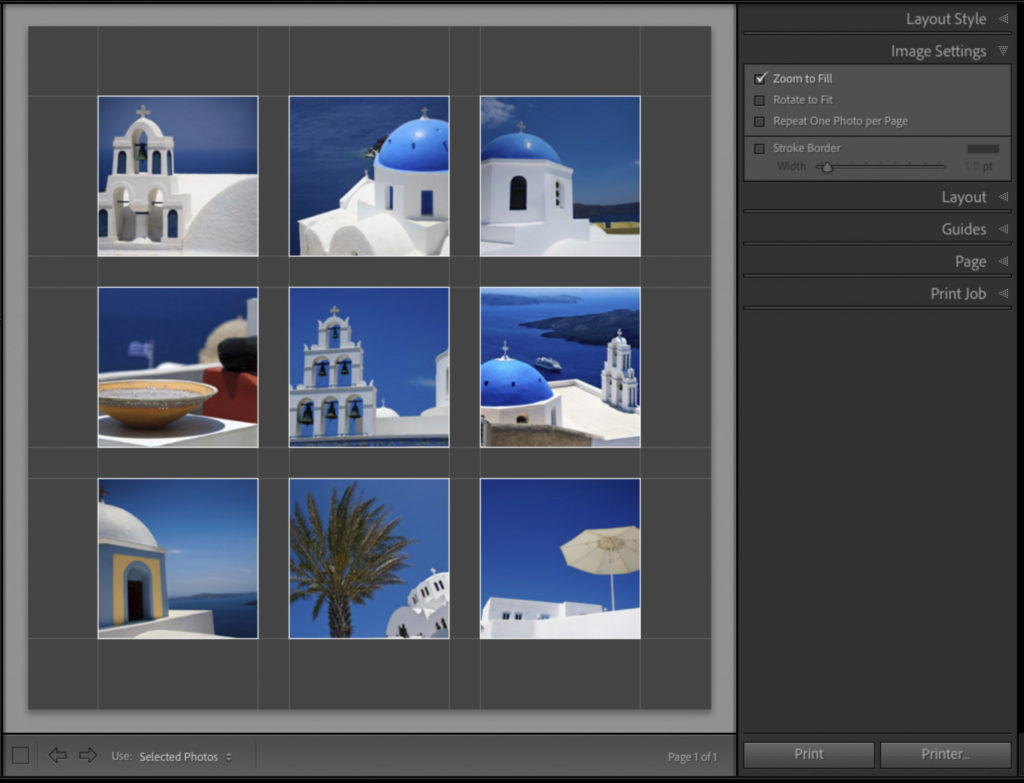
STEP SIX: Now select the images you want to appear in your cells (just select them down in the Filmstrip, or in a collection, etc.) and they populate those cells (as seen here). Make sure the Zoom to Fill checkbox is turned on (in the Image Settings panel), and make sure “Rotate to Fit” is turned OFF, and you’ll have the look you see above.
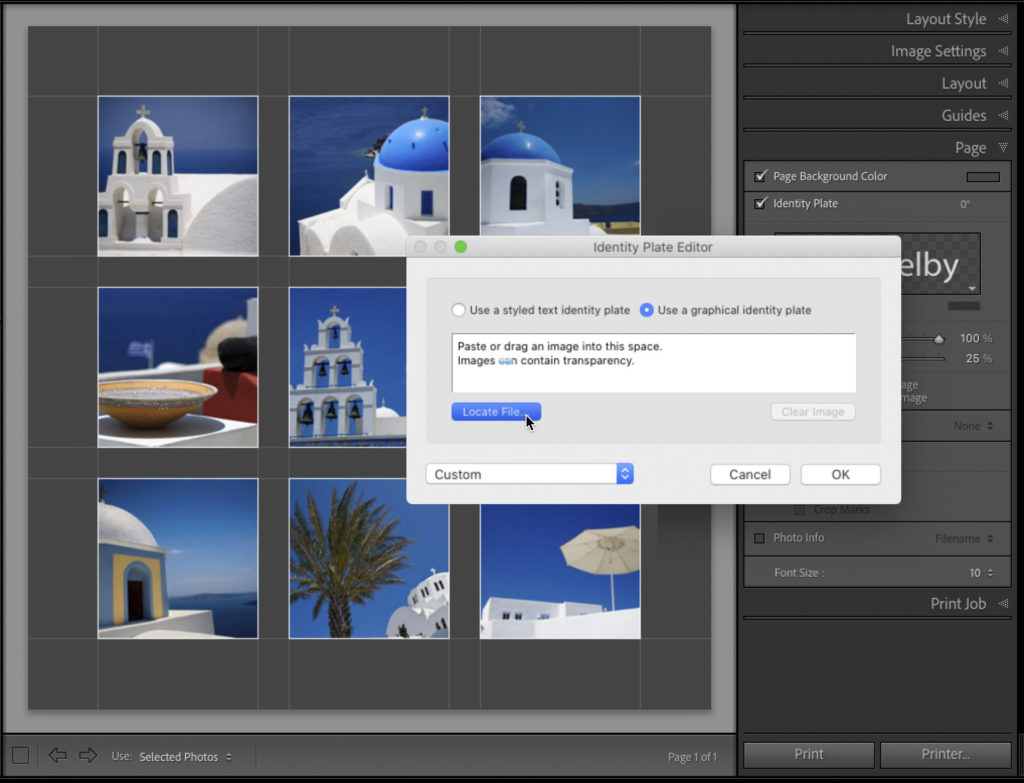
STEP SEVEN: Go to the Page panel; turn on the Identity Plate checkbox, and then in the corner of the Identity Plate preview, click the white down-facing arrow to bring up a pop-up menu; then choose ‘Edit’ from that pop-up menu to bring up the Identity Plate Editor window (seen above). Click on the “Use a graphical identity plate’ button at the top right, and then click the Locate File to choose your logo, or graphic, etc.. The background will need to be transparent behind your logo or signature (in our case), so the image you’re importing will need to be a file save in .PNG format, so it maintains that transparency when you bring it into Lightroom.
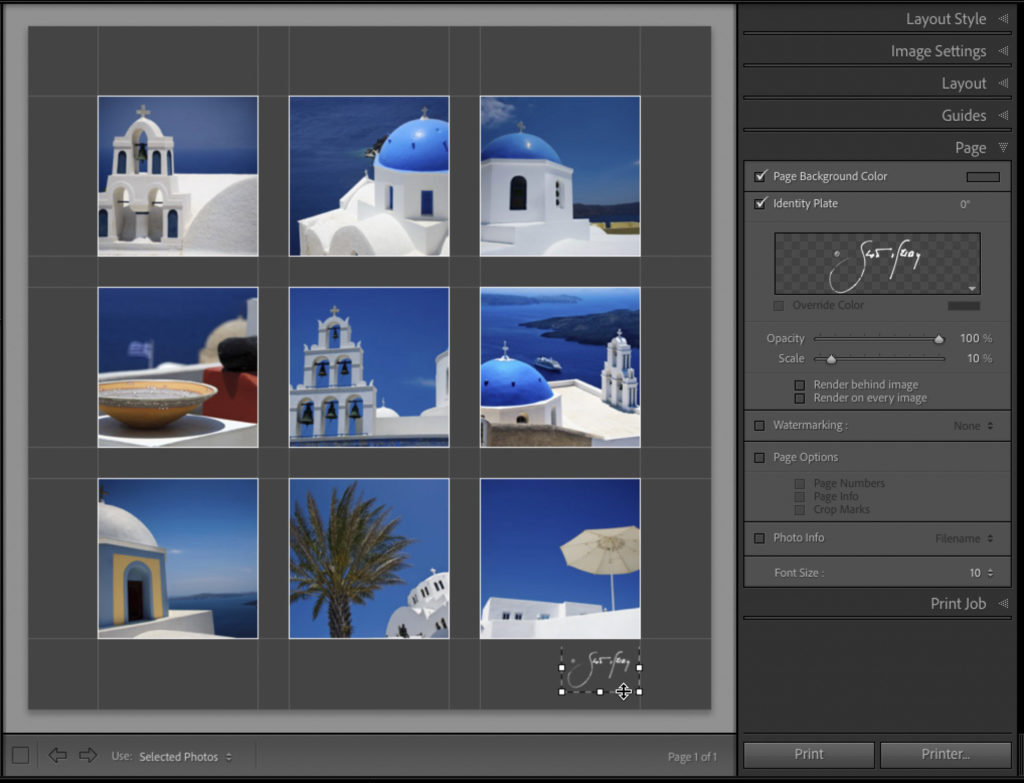
STEP EIGHT: Your image will appear in the center of your screen – click and drag it to where you want it (in this case, under the bottom right corner).
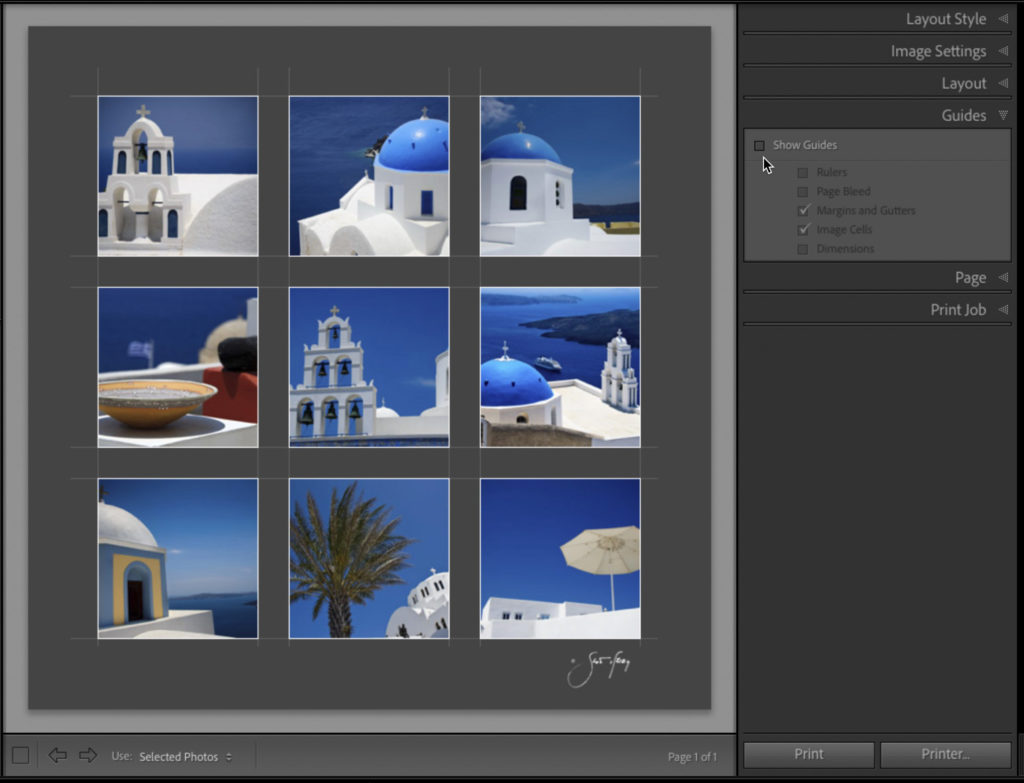
Here’s how the image will look once you turn off the “Show Guides” checkbox in the Guides panel. You can Save it this page as a JPEG so you can share it on social media. You do that at the top right corner of the Print Job panel. Where is says “Print to…” choose JPEG image. That’s all there is to it.
One last thing: So you don’t have to built this layout again, go over the Template panel and save this as a new Template (click on the + sign to name it and Save it).
Hope you found that helpful! Have a great weekend, everybody!
-Scott
P.S. I shared some “Scott Stuff” over on my other blog, including how I won a big photography contest, which totally caught me off guard. Here’s the link if you’ve got a sec.