Bringing Your Logo into Lightroom (with a transparent background behind it)
Happy Friday everybody. Here’s a tip on how to bring your logo into Lightroom (so you can use it in slideshows, or as an identity plate, or Watermark, or for the title of a slideshow, or whatever), but with a transparent background behind it (that’s the cool part). Here’s how it’s done:

STEP ONE: We have start over in Photoshop. Open a new document, and then use the Place command (under the File menu) to bring in your logo, so it appears on its own layer above the background layer (as shown here).

STEP TWO: Now, go to the Layers panel and drag the Background layer into the trash can at the bottom of the Layers panel. That leaves your logo sitting on a transparent background (as seen here).
If you do this, and you still see a white background behind your logo, that means your logo has a white background embedded into the logo image itself, and you’ll have to remove it manually. In many cases, that’s as simple as clicking the Magic Wand tool on a white area of the background to select most, if not all, of the white areas. To make sure you get them all, go under the Select Menu and choose Similar to select all the white areas in your entire layer, then hit the Delete (Windows: Backspace) key, and now, if all goes well, your logo will be on a transparent background like the one you see above.
NOTE: If you want to have your logo appear reversed in white (so you can place it over any color background), press Command-I (Windows: Ctrl-I) to invert the image. If that didn’t do the trick, try this — put a rectangular selection around your entire logo. Hold the Command-key (Windows: Ctrl-key) and hit the up-arrow key once on your keyboard, and then hit the down arrow key once. You’ll see selection perfectly snap-to your logo. Now, press the letter “d” on your keyboard to set your Foreground/Background colors to their defaults. Now press “x” to make white your foreground color. Now, while your logo is still selected, press Option-Delete (Windows: Alt-Backspace) to fill your logo with solid white. Didn’t except to be learning so much Photoshop today now, did ya? 🙂

STEP THREE: The key to keeping the transparency in your file, as it comes into Lightroom, is to save it in the right format. Go to Save As, and when the Save As window appears, down at the bottom where you choose the file format, choose PNG (as shown here), then click Save.

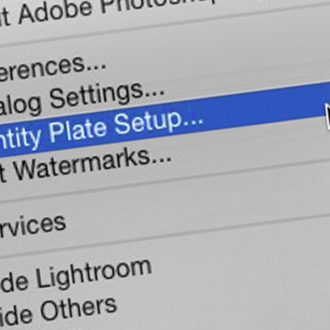
STEP FOUR: Go to any of the Identity Plate editors (in the Print Module, Slideshow, etc.) and when the Editor appears, click on “Use a graphical identity plate” (as seen above). A locate file button will appear in the lower left. Click on it and find the logo you just saved in PNG format. Then click OK.

STEP FIVE: Now when you choose that logo you imported as your Identity Plate, it appears with a transparent background behind it (as seen here, where I brought in my logo, and placed it over a black background. I did that “reverse white logo” trick so it would appear in white over any background color I chose).
Well, that’s really quite a few steps, but that’s it — a transparent logo in Lightroom. By the way, when you’re in that Identity Plate Editor window, don’t forget to click on the “Custom” pop-up menu lower left side and save your logo in Lightroom, so you don’t have to go through this process again — you can just choose it from the Identity Plate pop-up menu.
OK, that one should keep your busy for the weekend. 😉 Hope you have a good one.
-Scott