Best of Both Worlds for Masking Skies
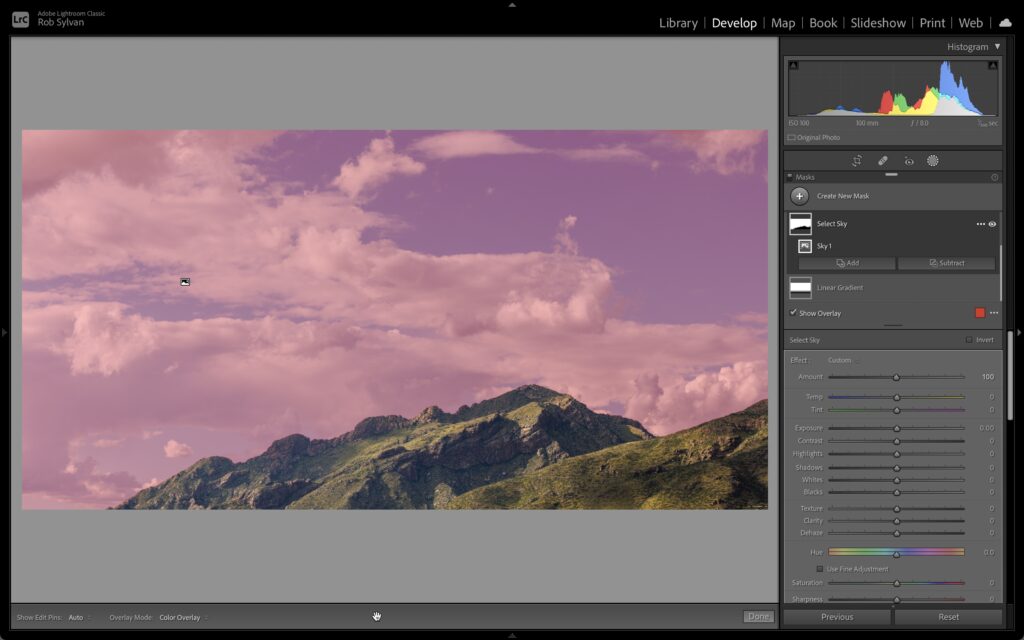
The new AI powered Select Sky function for finding and selecting all of a sky in Lightroom Classic (LrC), Lightroom, and Camera Raw (ACR) is an incredibly powerful and welcome tool. However, there are some instances where you still may want the gradual fade of the Linear Gradient tool when making the desired adjustments to a landscape photo. For example, in this photo if I use Select Sky it does a great job of selecting the sky and avoiding the foreground, but any settings I apply will be applied equally to the entire sky.
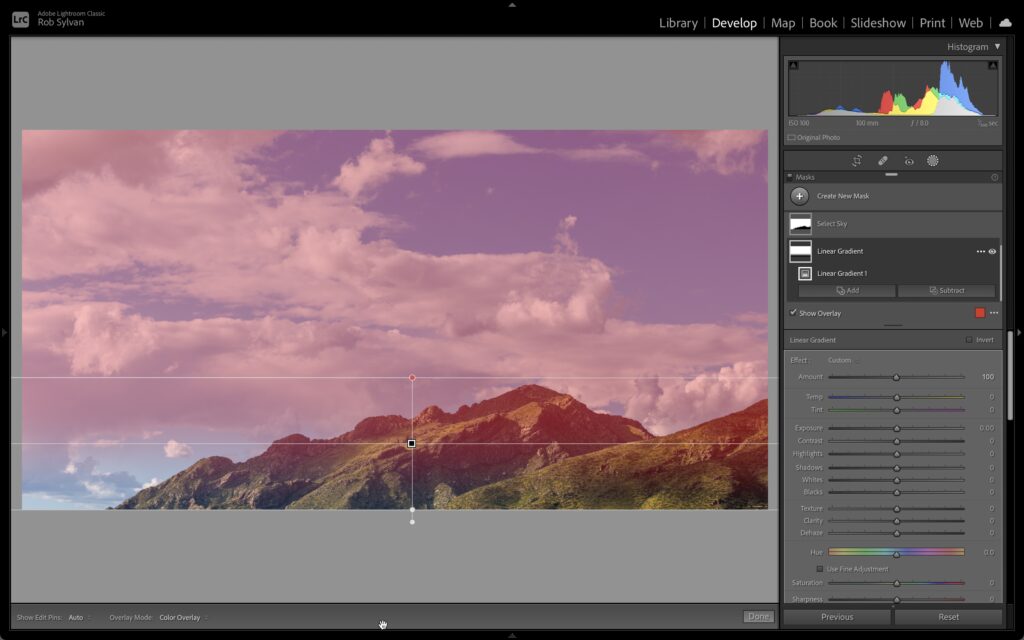
If I switch to using the Linear Gradient tool I can get the desired fade as the sky meets the horizon, but the settings will affect the foreground in undesired ways.
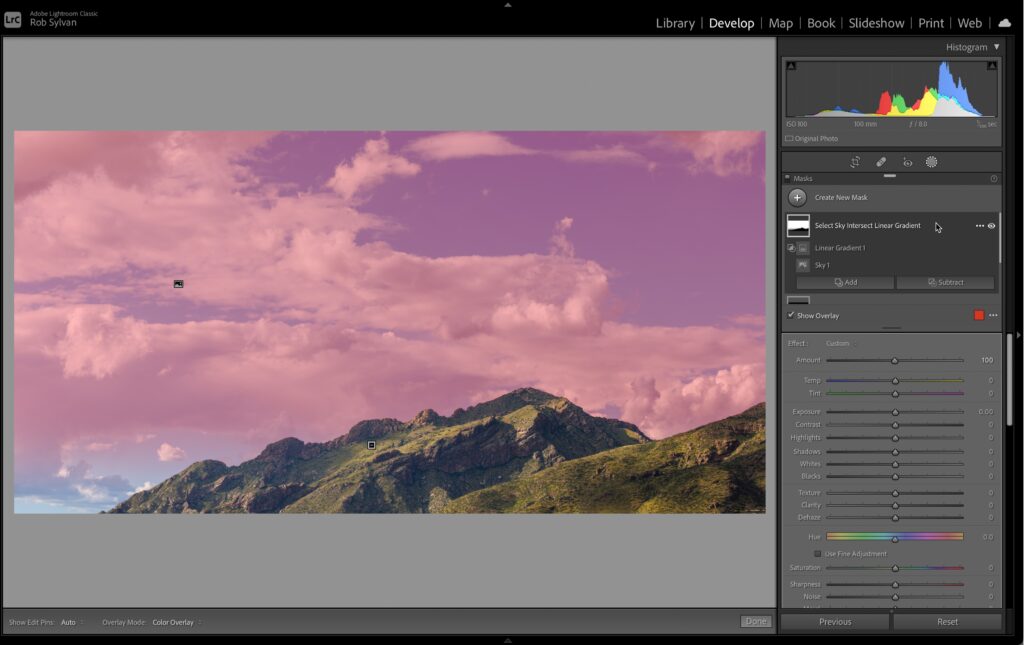
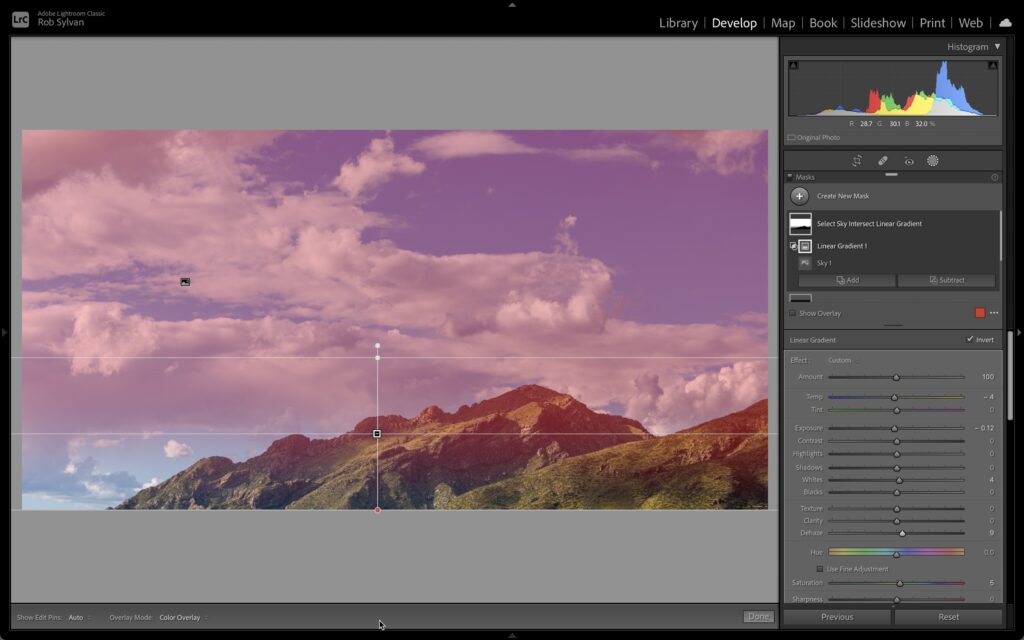
The way to get the best of both of those tools lies in the Intersect function within Masking. The more I use Masking the more I feel that Intersect is one of its most powerful (and hidden) features. Here’s the resulting mask when I intersect Select Sky with Linear Gradient (you could also intersect Linear Gradient with Select Sky).
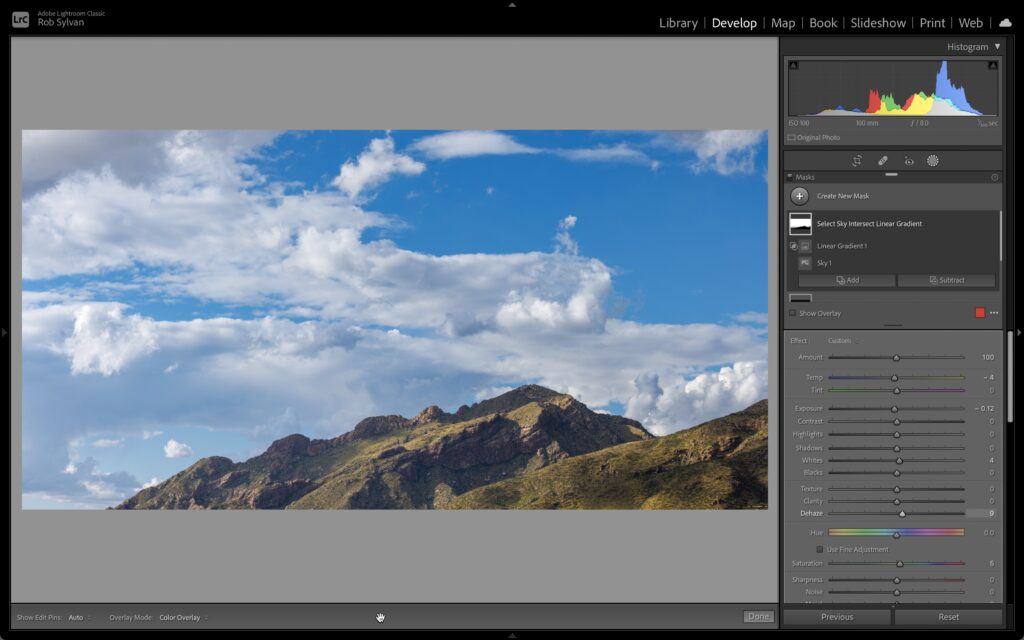
With my new intersected mask I can dial in the desired settings for the sky knowing that I will not affect the foreground and have a nice gradual fade toward the horizon.
Don’t forget that you can always go back and tweak the placement of the Linear Gradient after the fact by clicking its pin on the image to reveal the mask’s adjustment handles.
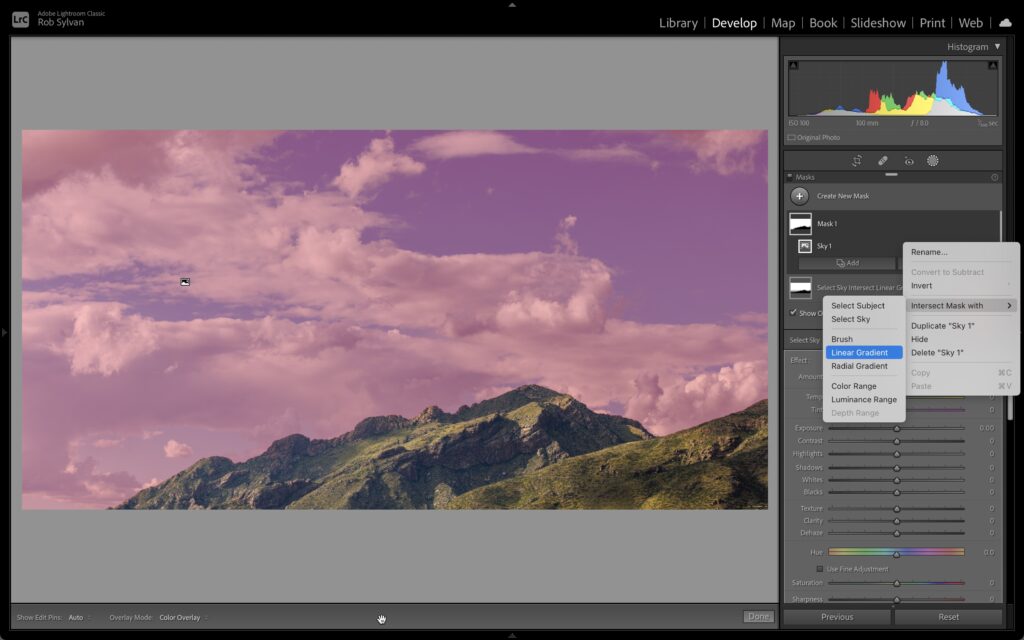
To use Intersect, apply the first mask tool, in this case I started with Select Sky, then once that mask is applied, click the three-dot menu next to that mask in the Masks panel and choose Intersect mask with Linear Gradient.
Then dial in your desired adjustments, tweak, and enjoy the best of both worlds!