
Background Spotlight Effect in Lightroom
Just a quick heads up before the tutorial:
I had a spot open up in my sold-out travel photography workshop in Rome, Italy at the end of next month. If you want to grab that spot and join me in Rome for an experience you’ll never forget, visit http://bit.ly/romewithscott – Hope I’ll be seeing you there (hey ya never know — maybe that spot opened up just so you could be there)?
Background Spotlight Effect
This is a new version of an old trick I used to do in Photoshop where you add what looks like a light on the background behind your subject (a guitar in this case, but I usually did it with portraits). But now, with Lightroom’s Radial Tool and its Color Range Mask feature, you can do the whole thing right within Lightroom. Here’s how:

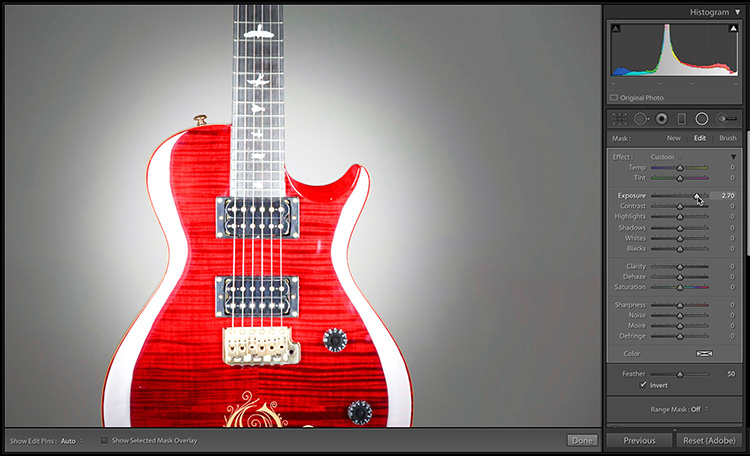
STEP ONE: Here’s the original image we want to add a background spotlight effect to. Get Lightroom’s Radial Tool in the Develop Module, from the Toolbar at the top of the Right side panels. Then, increase the Exposure Amount a couple of stops (to around +2.0), and turn on the Invert checkbox at the bottom of the panel (as shown here) so that +2 stops happens inside the circle.
STEP TWO: Click and drag out that circle over the area where you’d like to background light to appear (as shown here where I dragged it out right over the top center of the guitar
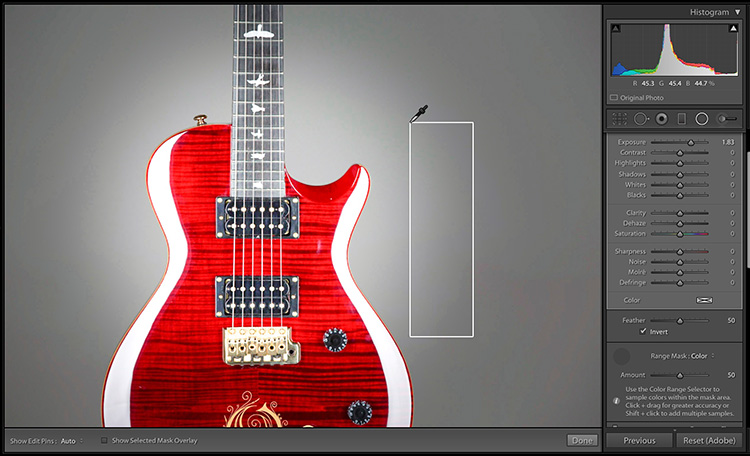
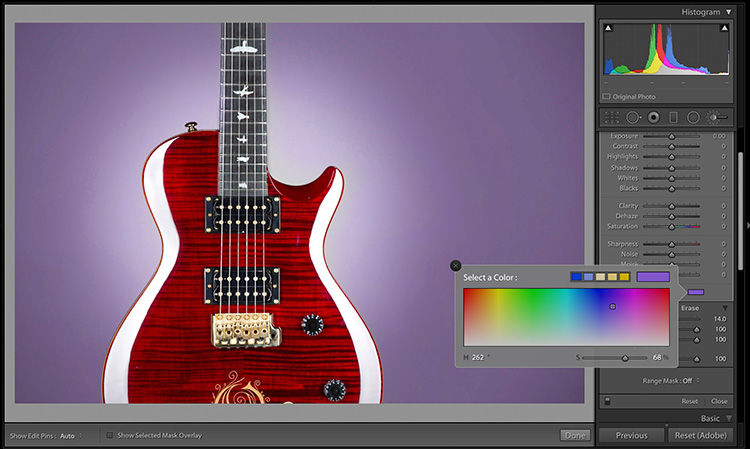
STEP THREE: To remove the brightening over the guitar (we only want the spotlight on the background — not on the guitar), I turned on the Range Mask ‘Color’ feature (found at the bottom of the Radial Tool’s options) and took the Eyedropper tool from there; click and dragged it over the range of colors I wanted to keep active (the gray background), as shown here so it would mask away the white areas I brightened over the guitar.
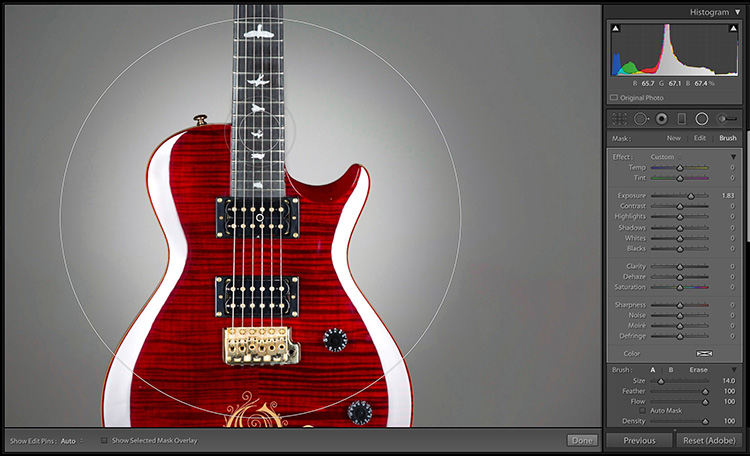
STEP FOUR: The result of dragging out that Color Range Mask eyedropper tool worked pretty well, but it didn’t get all of that brightened masked away, so at the top of the Radial Tool’s option’s panel, I clicked on Brush (shown circled in red here); held the Option key (PC: Alt-key) to put it in Erase mode, and then I painted over the neck of the guitar and over the pick-ups for any areas I have might missed.
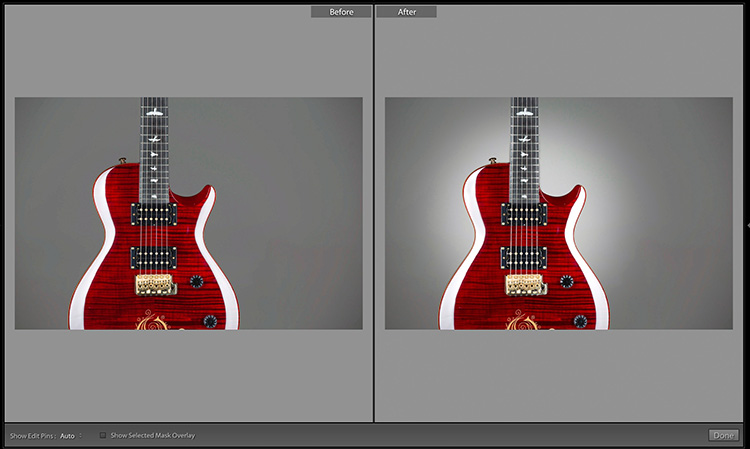
Above: Here’s a before/after with the spotlight effect added to the background.
Above: Not fer nuthin’, but if you shot your subject on a gray background (like I did this guitar), you can use the Adjustment Brush, and its Color option to pick a color (click on the Color Swatch to bring up the Color Picker you see here) and then apply a tint to the background. Don’t forget to turn on the Auto Mask checkbox so when you paint over the background, it doesn’t accidentally paint over the guitar. Just sayin’ — you could get some bonus points for that adding a color tint. 🙂
Hope you found that helpful.
Have a great weekend, everybody. I have some fun stuff planned for next week, so I hope you’ll pop back by then.
Best,
-Scott
P.S. College football is back! Whoo hoo!!!! (#rolltide!)

