Adobe Camera Raw for Lightroom Classic Users
Before there was Lightroom (Classic), we had Photoshop, Bridge, and the Adobe Camera Raw (ACR) plug-in that formed the foundation to many photographer’s digital imaging workflow. In the 10+ years since Lightroom’s debut I think it is safe to say that many of those photographers have made the migration over to Lightroom. So much so that it is far more common to see articles, videos, and tutorials about Lightroom than about ACR. That said, there are still people using ACR because that’s what fits their needs. I’m not here to convince anyone to change the software they are using, but rather to provide a look into what is the same, what is different, and how to decode whether a given Classic resource applies to ACR, and vice versa.
Origins
Lightroom was created as a way to take the powerful editing capabilities in the ACR plug-in and build a more efficient workflow around it, from capture to output, aimed specifically at digital photographers. As a result, Lightroom Classic’s Develop module shares the same editing and rendering capabilities as the ACR plug-in, but in a different wrapper that includes features and functions for importing, organizing, and output that don’t exist in Camera Raw itself. Due to this common origin, Lightroom and Camera Raw have evolved as separate products, but they continue to be developed and updated in parallel to retain that consistent editing and rendering capability.
Because of this, the conventional wisdom is that everything in Classic’s Develop module is also in ACR, and everything in ACR is also in the Develop module. But in actual use, I think the answer is a good bit more nuanced than that, and that is what I want to explore.
Differences
So much is the same between the two programs that I just want to focus on the differences to help you navigate between the two programs. Now, if you are Classic user you might be wondering why this would be helpful, but there are a few scenarios where a Classic user might encounter the ACR plug-in:
- You use the Photo > Edit in > Open as Smart Object workflow from Classic.
- You use the Filter > Camera Raw Filter menu in Photoshop.
- You have some reason to open a raw photo into ACR from Bridge or Photoshop (uncommon, but not unheard of).
We’ll look at those specific cases later on, but I think there is value in Classic users knowing their way around ACR too.
The Interface
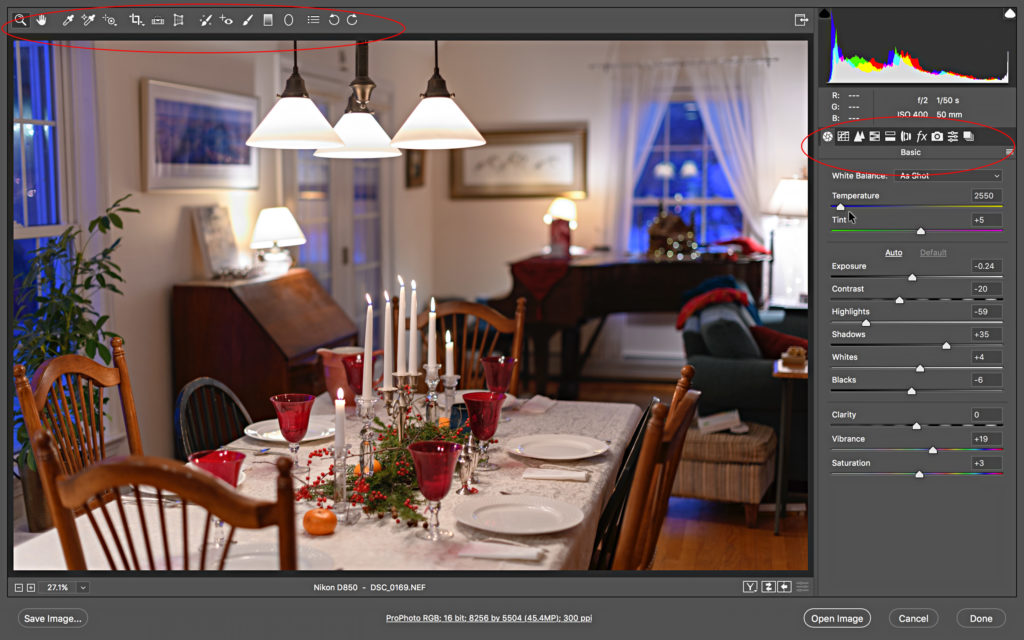
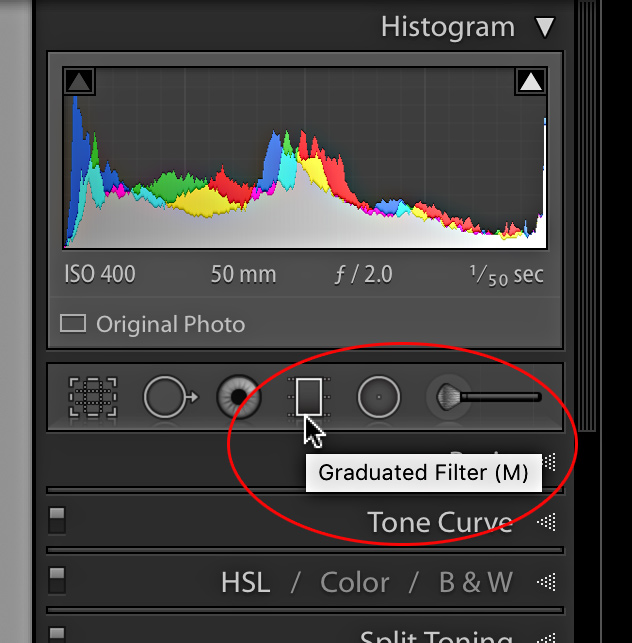
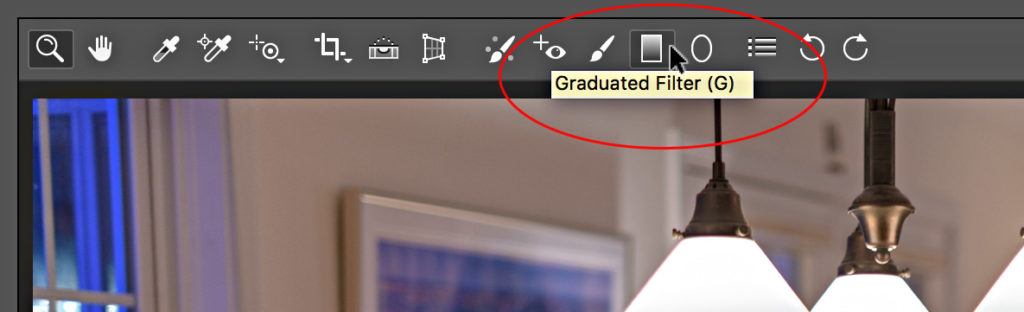
The biggest cause of disorientation for anyone opening one program or the other at first is the difference in where things are located. In Classic, all of the editing tools are located within the group of panels on the right side of the Develop module. In ACR, it does also have a group of tabbed panels on the right side of the interface, but it also provides access to a suite of tools along the top of the interface.
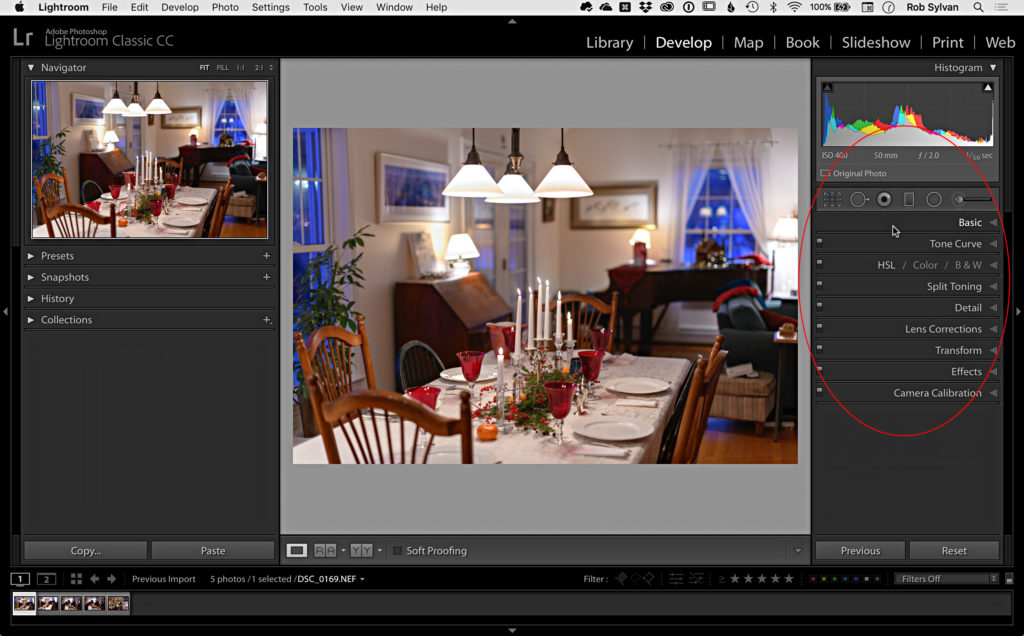
In both Classic and ACR, if you are unsure of what a given icon represents you can place your cursor over the icon to see a tooltip appear displaying the name of the tool and its keyboard shortcut. I highly recommend any new user spending the time to become familiar with the icons this way. Note, keyboard shortcuts are not consistent between the two applications, so be prepared to use your mouse a lot more in the program you are less familiar with.
A few quirky differences in the interfaces to be aware of are as follows:
- The White Balance Tool appears in the top tool strip in ACR but in the Basic panel of Classic.
- The Targeted Adjustment Tool appears in the top tool strip in ACR but in the Tone Curve, HSL, or B&W panel in Classic (depending on what you want to adjust).
- The Straighten Tool appears in the top tool strip in ACR but is included within the Crop tool in Classic.
- The Transform Tool appears in the top tool strip in ACR but is a panel of its own in Classic.
- ACR has left and right rotation buttons along the top, but the rotation options in Classic are found under the Photo menu (or on the thumbnails in Grid view of Library).
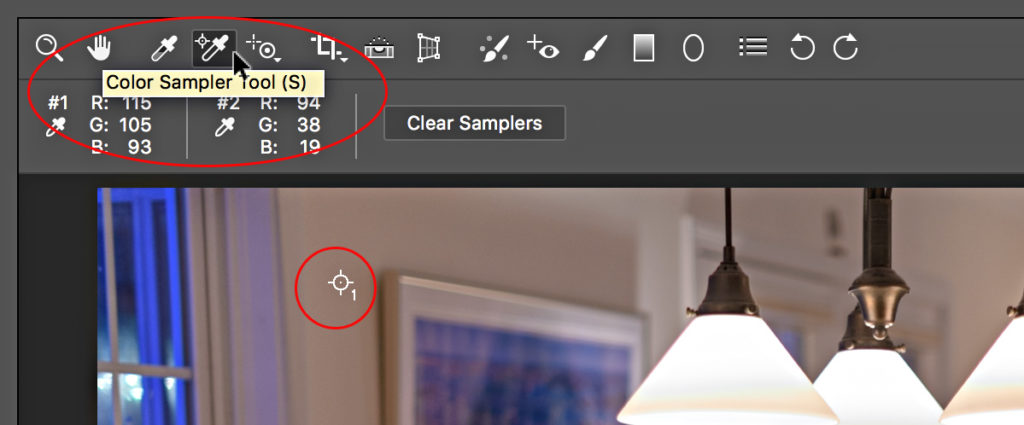
There is one tool that can be found in ACR that does not exist in Classic, and that’s the Color Sampler Tool. This tool allows you to drop up to 9 color sample points on the photo so that you can monitor the RGB values at those points while you edit. I’d love to see this added to Classic, but it has not yet come to pass.
Workflow Options in ACR
Somewhat related to the topic of color sampling is the fact that you can change the color space used by the Histogram and Color Sampler in ACR via the Workflow Options dialog (accessible by clicking the link at the bottom of the window). Classic’s color space cannot be changed in a similar way (unless you are soft proofing).
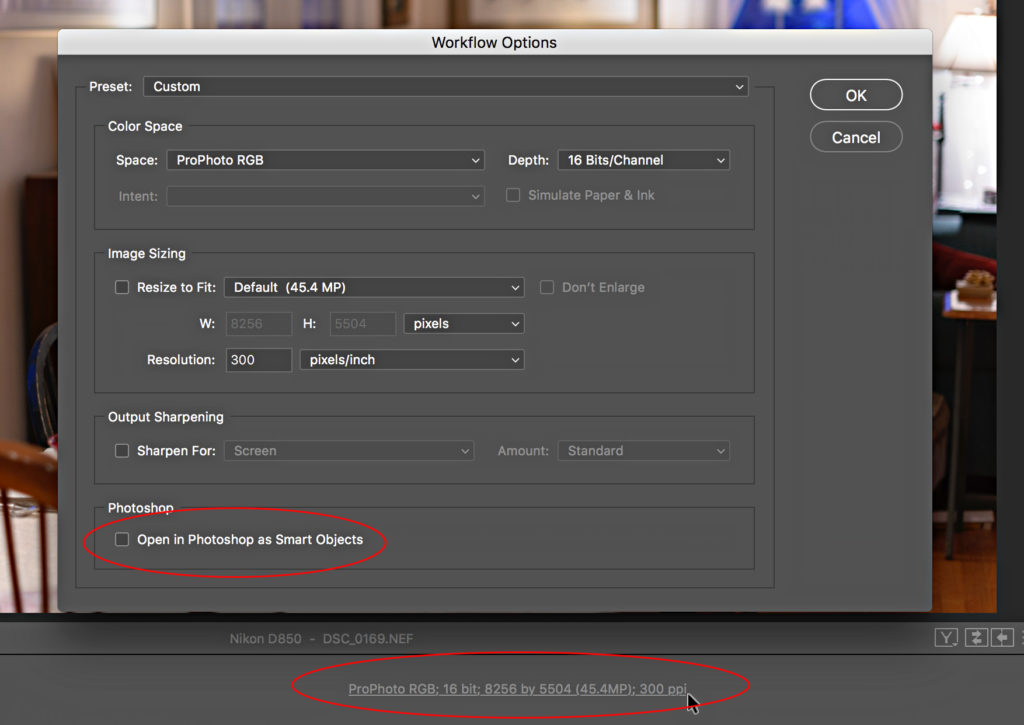
It is in this Workflow Options dialog that you can configure ACR to open a copy of the edited photo as a smart object in Photoshop if desired. In Classic you would go through the Photo > Edit in > Open as smart object menu to do the same.
You’ll also find an option to change the pixel dimensions of the photo opening in Photoshop from ACR this dialog. Most people leave this at the recommended Default setting that uses the native pixel dimensions (minus any cropping), but Lightroom doesn’t have any way to change the pixel dimensions of the copies sent to Photoshop for editing (aside from cropping). If you need to resize the photo as part of your edit in Photoshop workflow from Classic you’d have to either resize it in Photoshop after it opens or go through Classic’s Export dialog, then open the exported copy in Photoshop. In both programs the ideal is to stick to the largest color space and highest resolution (pixel dimensions) possible for editing the master version of the photo.
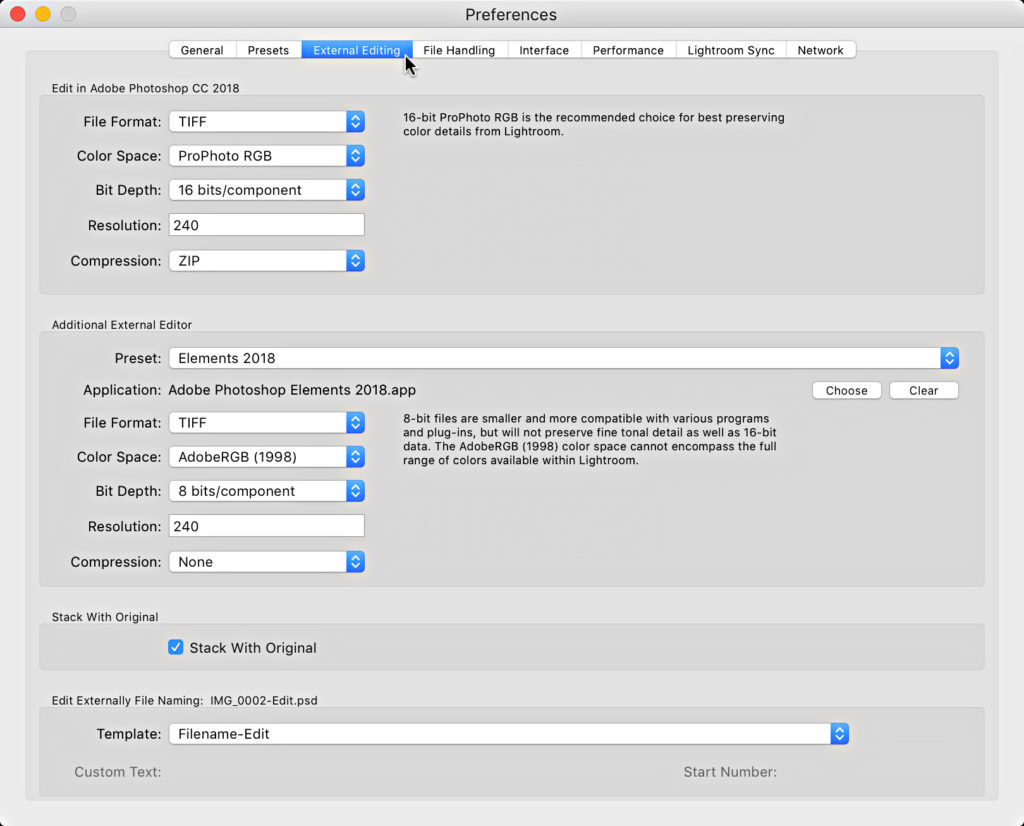
In Classic, the closest parallel to the Workflow Options dialog in ACR is found in the Lightroom > Preferences > External Editing (PC: Edit > Preferences > External Editing) panel. Here you can configure the color space, bit depth, and file type of copies sent to Photoshop with Lightroom adjustments. The default settings are recommended. Changing these settings has no effect on what you see in the Develop module.
Ok, I hope that helps getting you oriented to the differences in the interface. Next week I’ll wrap up this topic with a look at things like presets, batch editing, merging to HDR/pano, and more.