The Advantage of Using Virtual Copies in Lightroom
Although we’ve talked about Virtual Copies here on the blog from time to time, I realized that I haven’t done anything on it for people who are new to Lightroom Classic, so today that’s what we’re doing.
So, what if you wanted to see a version of a photo in black and white, and maybe another version with a color tint, and then a real contrasty version, and then maybe a version that was cropped differently? Well, what might keep you from doing that is having to duplicate that high-resolution file every time you wanted to try a different look, because it would eat up hard drive space like nobody’s business. Luckily, you can create virtual copies, which really don’t take up space (well, maybe the size of a thumbnail, so…nothing) and allow you to try out different looks and versions without the any of the file size overhead.

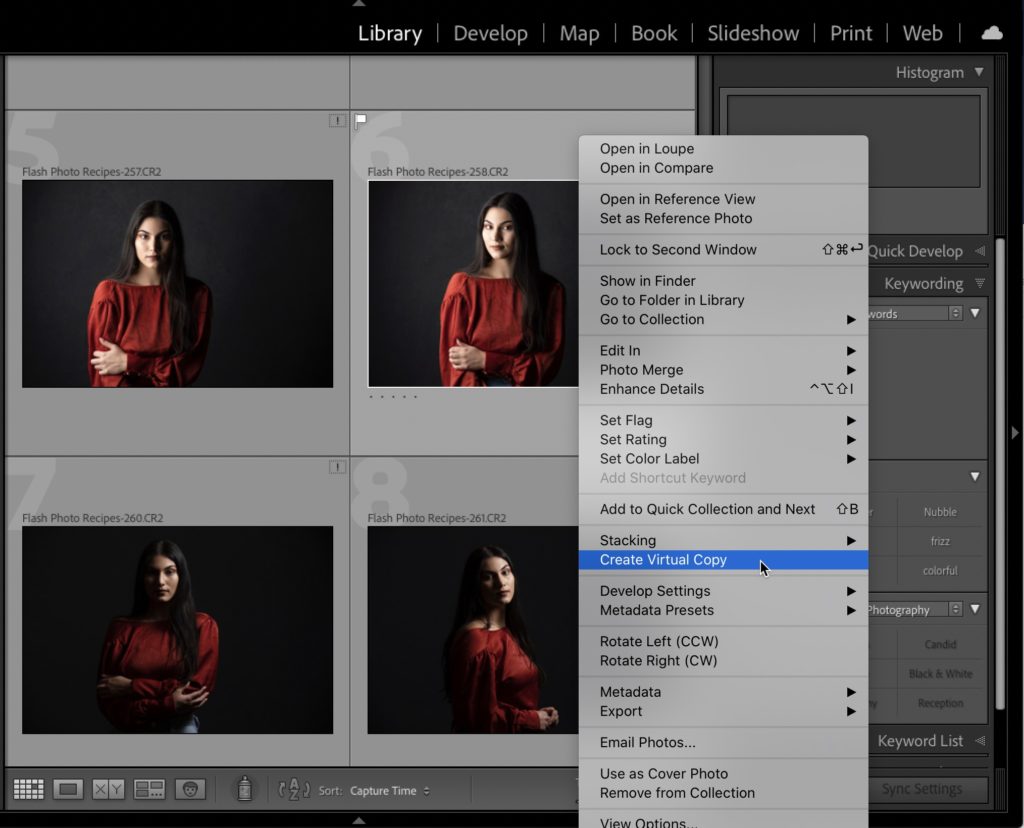
STEP ONE: You create a virtual copy by just Right-clicking on the original photo and then choosing Create Virtual Copy from the pop-up menu (as shown here), or using the keyboard shortcut Command-’ (apostrophe; PC: Ctrl-’). These virtual copies look and act the same as your original photo, and you can edit them just as you would your original, but here’s the difference: it’s not a real file, it’s just a set of instructions, so it doesn’t add any real file size. That way, you can have as many of these virtual copies as you want, and experiment to your heart’s content without filling up your hard disk.

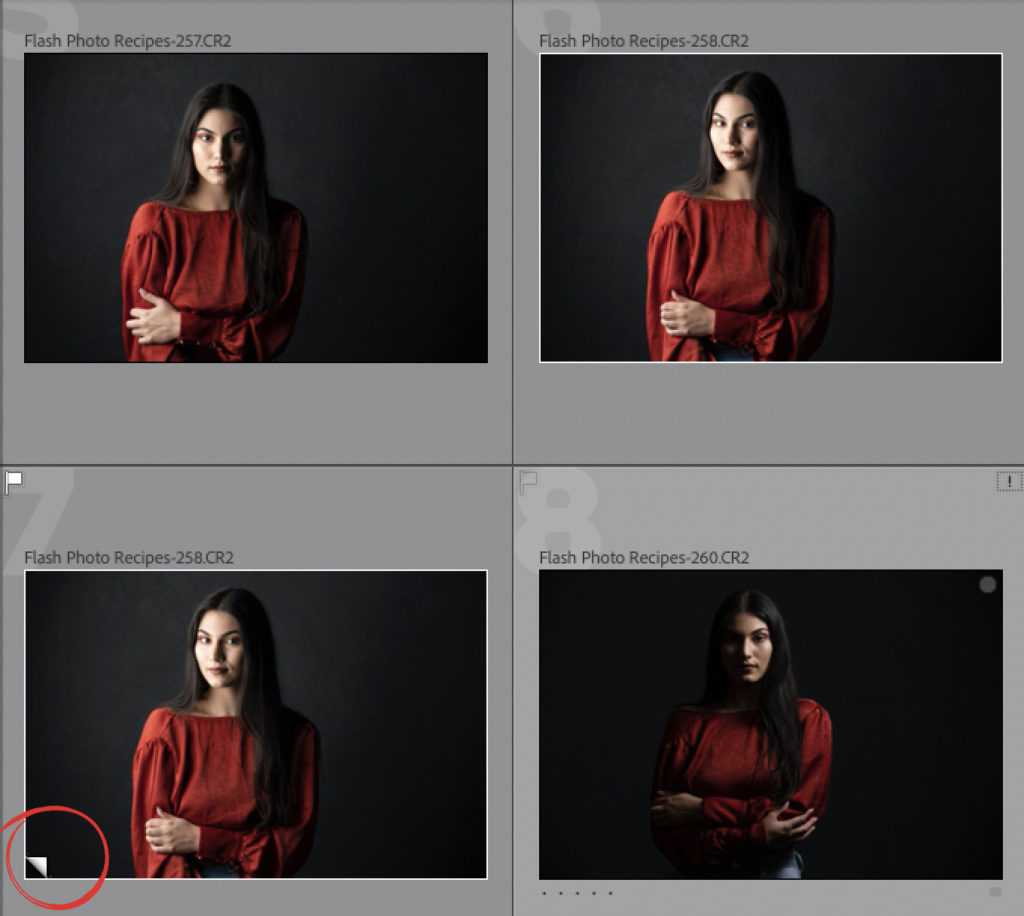
STEP TWO: When you create a virtual copy, you’ll know which version is the copy because the virtual copies have a curled page icon in the lower-left corner of the image thumbnail (circled in red here) in both the Grid view and in the Filmstrip. So now, go ahead and tweak this virtual copy in the Develop module any way you want (here, I increased the Clarity and added an edge vignette using the Effects panel), and when you return to the Grid view, you’ll see the original and the edited virtual copy (as seen here).

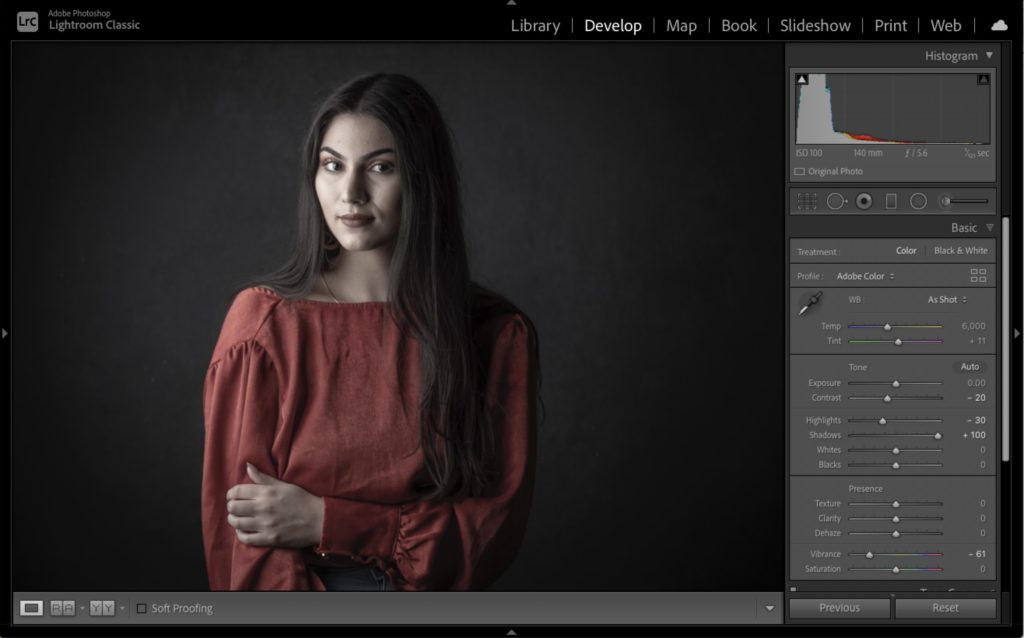
STEP THREE: Now you can experiment away with multiple virtual copies of your original photo, at no risk to your original photo or your hard drive space. So, click on your first virtual copy, then press Command-’ (PC: Ctrl-’) to make another virtual copy (that’s right—you can make virtual copies of your virtual copy), and then head over to the Develop module, and make some adjustments (here, I lowered the Vibrance a bit; lowered the Highlights and the contrast and opened up the Shadows a bit). Now, make some more copies to experiment with (I made a few more copies and changed the creative profiles for each one, making a couple black and white as well).
Note: When you make a copy, you can hit the Reset button at the bottom of the right side Panels area to return the virtual copy to its original unedited look. Also, you don’t have to jump back to the Grid view each time to make a virtual copy—that keyboard shortcut works in the Develop module, too.

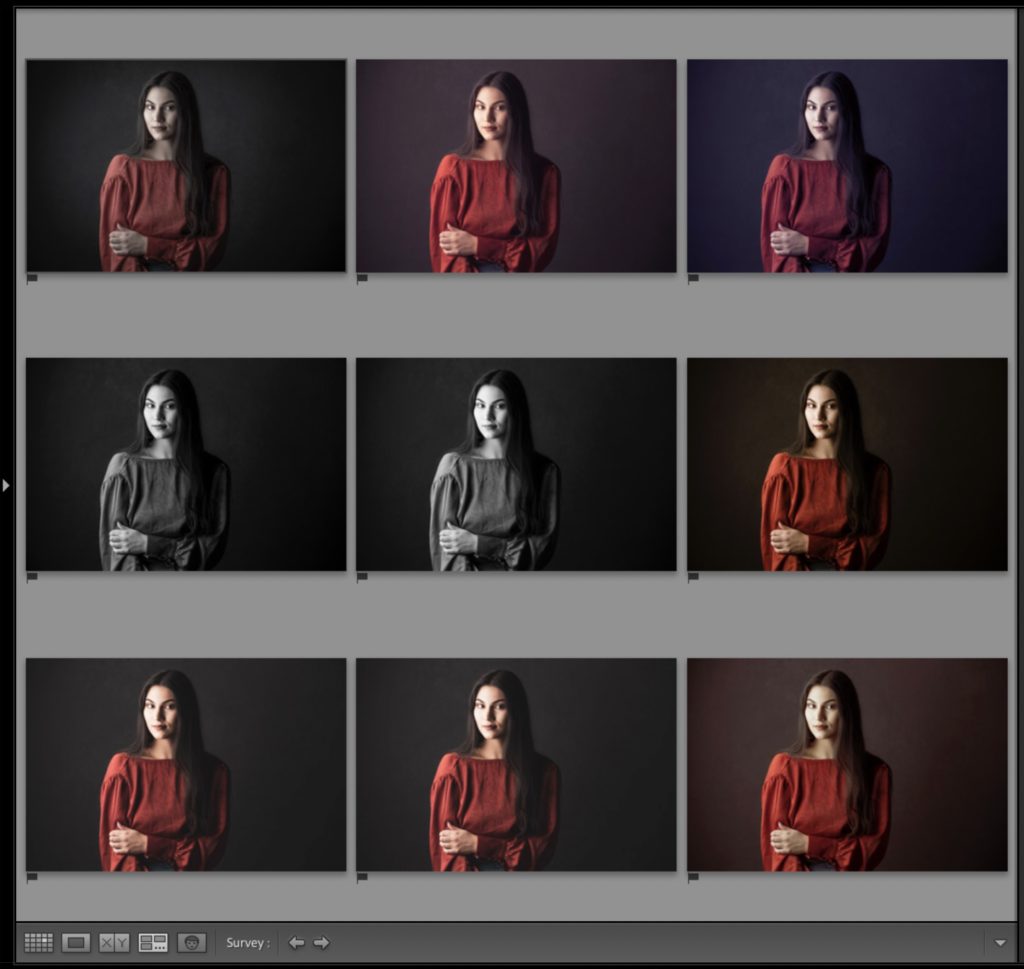
STEP FOUR: Now, if you want to compare all your experimental versions side by side, go back to the Grid view, select your original photo and all the virtual copies, then press the letter N on your keyboard to enter Survey view (as shown here). If there’s a version you really like, of course you can just leave it alone, and then delete the other virtual copies you don’t like. (Note: To delete a virtual copy, click on it and press the Delete [PC: Backspace] key, and then click Remove in the dialog that appears.) If you choose to take this virtual copy over to Photoshop or export it as a JPEG or TIFF from within Lightroom and it go to the original file to help it create a real copy of the image using the settings you applied to the virtual copy. Pretty cool, huh?
Hope you found that helpful, and I hope you give these Virtual Copies a try. 🙂
-Scott
P.S. You know what would make a freakin’ amazing Christmas gift for the photographer on your Holiday Gift List? A KelbyOne Pro Membership. They would flippin’ lose their minds! They would learn so much! Here’s the link, ya know, just in case. 🙂


However, if you’re like me and you use Photoshop to do most of your editing, I’m guessing that you’d lose the file size advantage, yes? Likewise taking a photo anywhere outside of the LR environment (I.e., into Luminar or OnOne) results in a new file along with its accompanying mega/gigabytes of info. I use virtual copies simply to retain the original regardless of what I do with the copies. And making virtual copies of copies has saved me a few times when I screw things up. But, yeah, for those who spend most of their time in LR and who need to save disk space this is a great idea.
Thanks for sharing valuable info.
Thank you, Scott! This is a solution to a question I just posted the same day to the K1 Community and opens a lot of flexibility without wasting digital bits on my hard drive. Great timing, sir, and great info as always!
I work with virtual copies a lot so I was surprised to learn that a VC is not the same file size, Can you look at the penultimate sentence here and edit it, as it is not clear to me due to typo, and it seemed to be the crux of the article. Thanks!
A virtual copy, as Scott describes, is simply an additional set of instructions that references the same original source photo. It doesn’t duplicate the source photo (hence the name virtual). As Scott also mentions, the only real file size penalty (in terms of bits on your hard drive) would be the preview created to display the virtual copy. That preview would have the same pixel dimensions as your source photo (so if you zoomed into 100%), and is stored in the cache.