
To clone or heal?
I don’t know about you, but I am the designated photographer for every event that occurs in my family. What that means is that I have way more poorly composed, badly white balanced snapshots of my family than really well executed ones. Why? Because it takes energy to think for everything and get everything just right… and if your family is like mine… you don’t have a lot of left over energy, nor does your family have left over patience for you to get it right.
But after the fact, you can do a little bit to help your cause by cleaning up the images. It will not turn every image into a work of art… and that is not your goal, but it can make you rest a little easier when you look at the images, if you can cut out some distractions.
This is where the Spot Removal tool comes into play and the question of whether to set it for Clone or Healing.
Let’s look at an example.
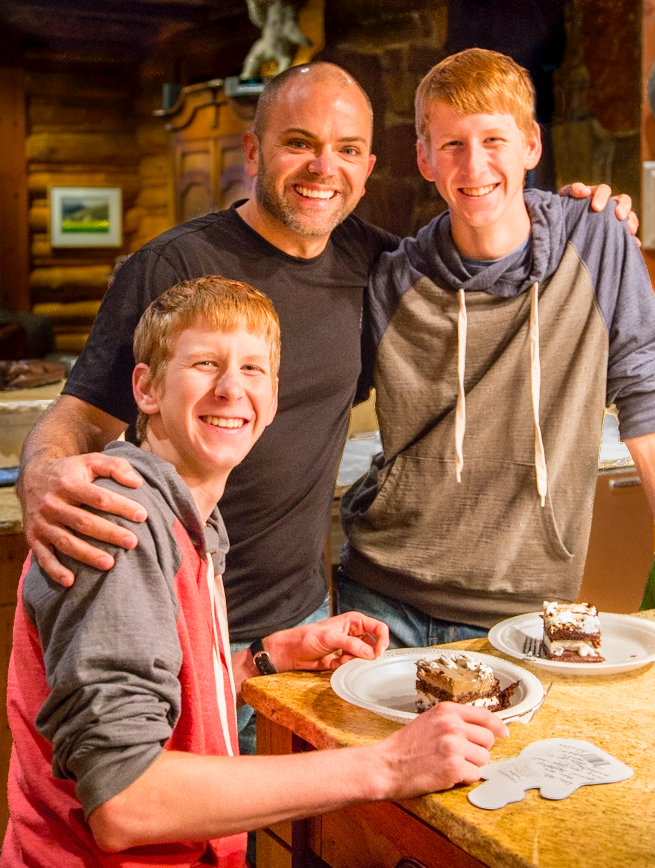
Here is a birthday party with my sons and their uncle… (if you know my brother in-law Jeff, don’t tell him that I am using this picture… since I don’t have a model release. :D)
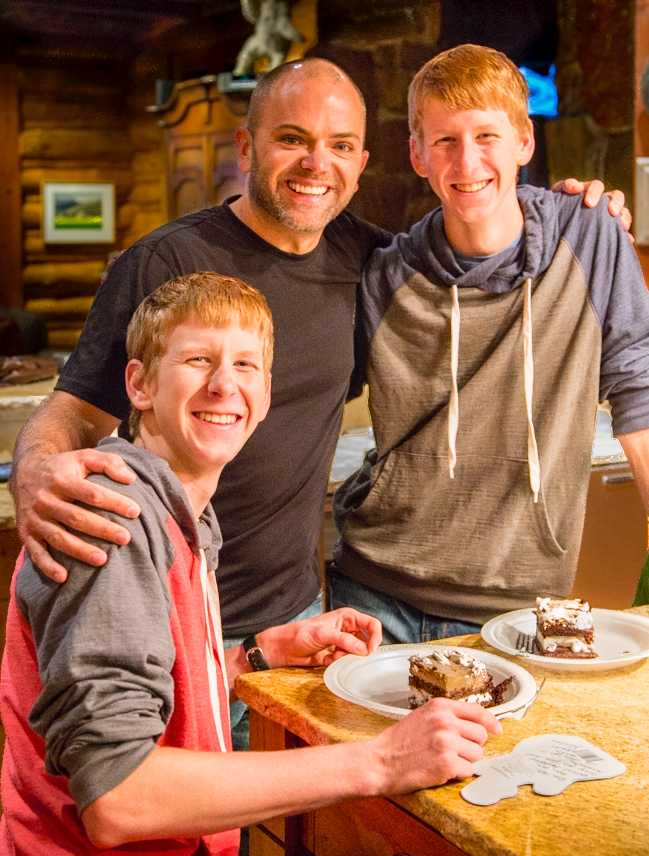
Now this photo is not going to win any awards, but since I have been talking to you guys about how the eye reacts to different distractions in the image… I dare you to not pay attention to the blue blob behind Daniels head. It hurts my soul to look at it… and even though I am not going to spend a long time editing this image… that blob has to go.
So what is my best approach?
Start with the Spot removal brush set to Clone and do the main part of the blob… going near the edge, but not hitting the hair.
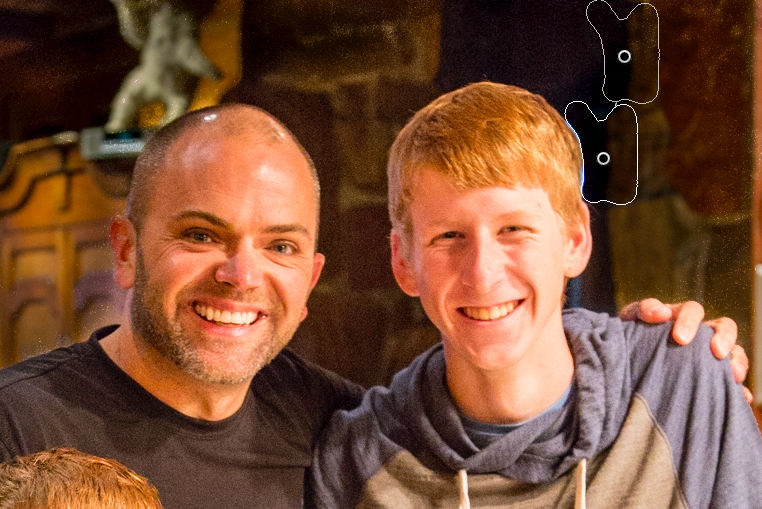
Now switch to Healing and work the edge of the hair and the remaining blue.
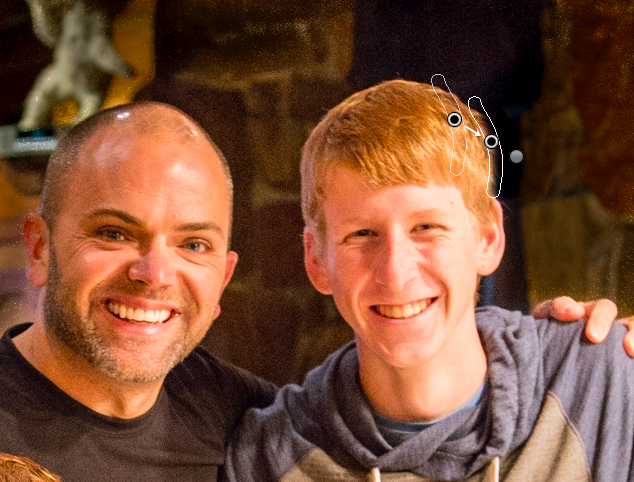
you may have to move the sample target to get the right blend
The healing brush gives just the right amount of blending so the hair doesn’t look chopped
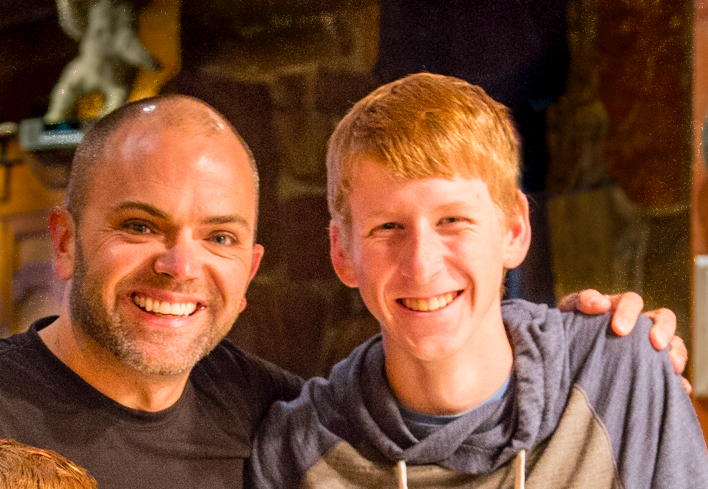
after a ten second clone and heal
Think of it this way… Cloning does a lot of the heavy lifting as far as removing large chunks, but healing is what you want to use to blend the edges. Most of us are impatient and we try to do everything in one shot… so we usually use one type of brush on that section, but if you will think like Photoshop does and do a quick two step, you may find you have better luck.
ps. who in here wants me to tackle the weird animal thingy behind Jeff’s head? Yep, that is next on the list. 😀

